UPDATE! Scroll to the bottom to see the finished jacket on it’s owner!
This jacket, besides being awesome, is very special to me. I was commissioned for this jacket earlier this year to be worn as SDCC. And, of course, was commissioned before Civil War had come out, so there was a lot of research to do be done on my end with some very fuzzy photographs.
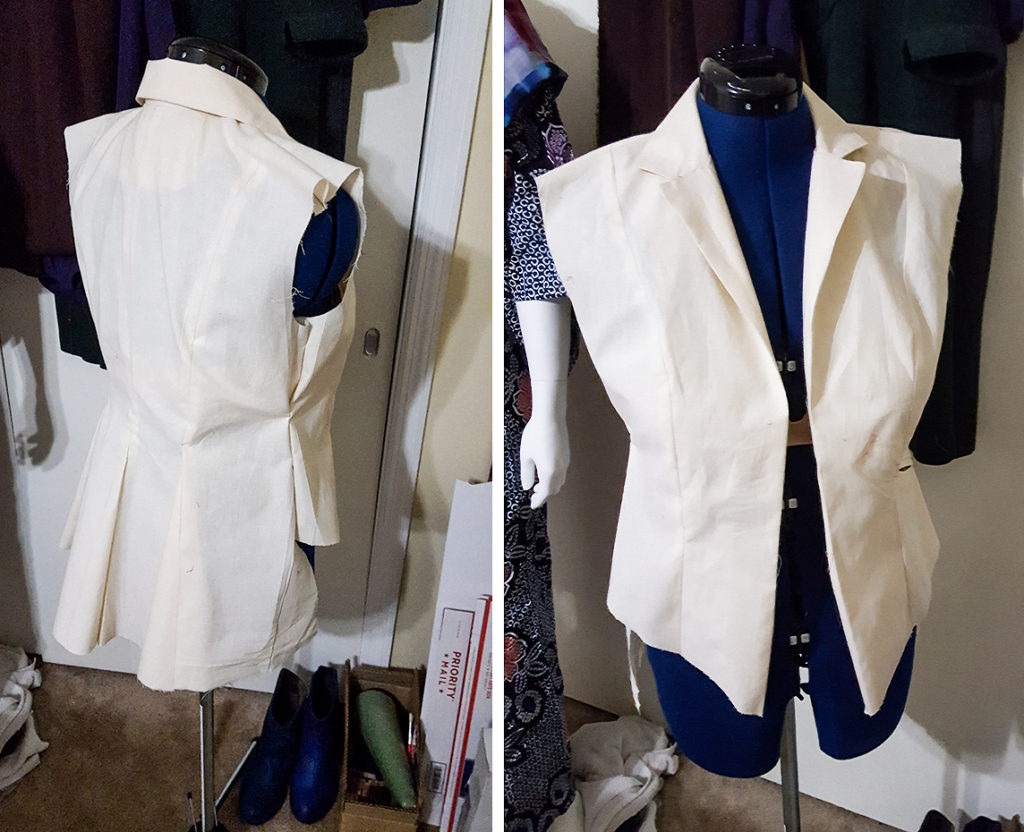
But what makes this jacket so special is that this was the first pattern I drafted digitally using Adobe Illustrator. I managed to spend a good amount of time earlier this year teaching myself the fundamentals of flat-patterning, vs my usual “winging it,” and it was really nice to be able to put that knowledge into action. I’m sure at one point I’ll go into my adventures of flat patterning. Also, I was amazed how much easier this garment went together. I think it’s because I spent a lot more thinking about it’s construction as I was designing it and concentrating on the details.
Of course I mocked up a quick muslin just to make sure it fit like I wanted.
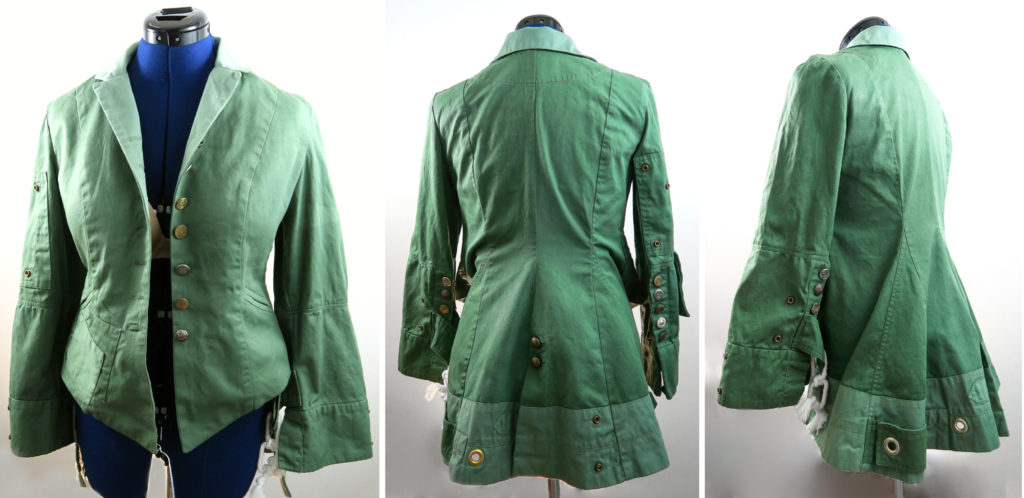
Alright, the important deets (and some larger jacket images):
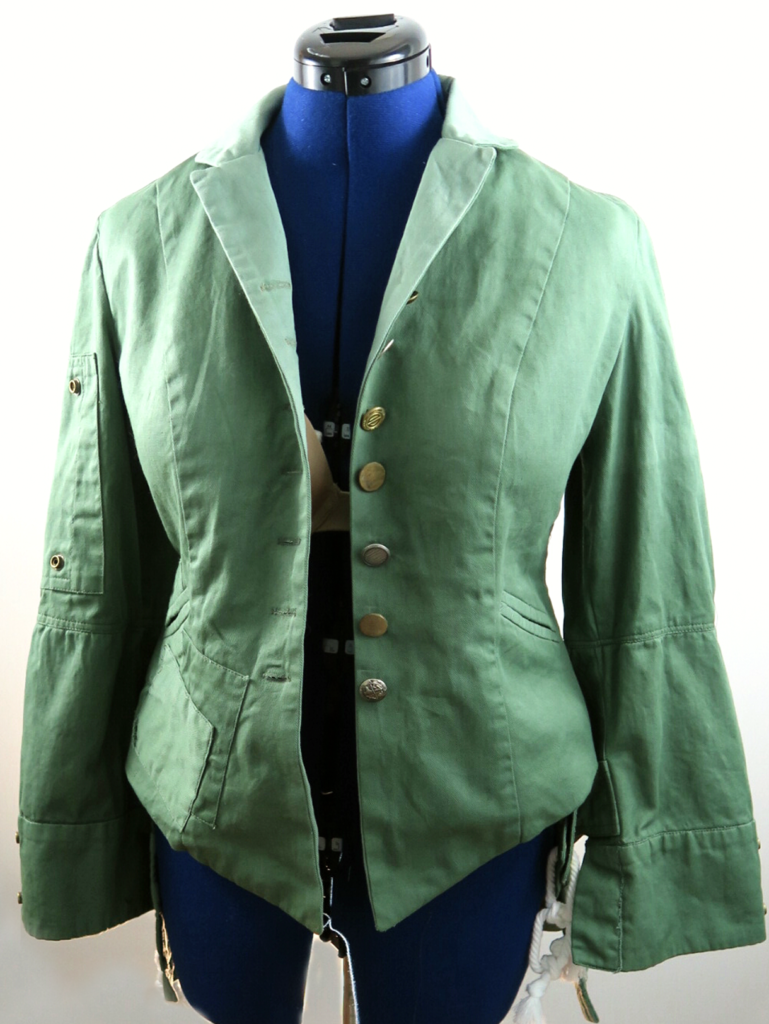
For some reason those pictures turned out way green. The colors below are way more accurate. C’est la Vie.
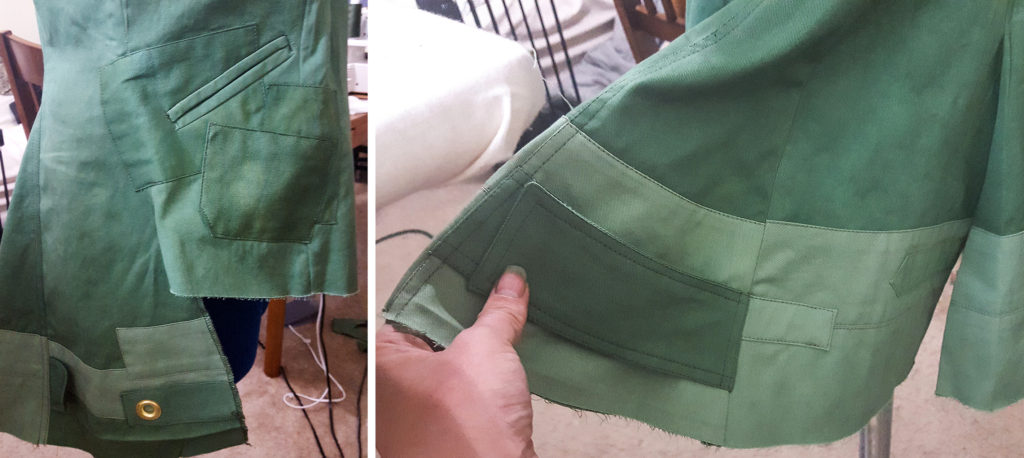
Jacket is unlined and made with cotton twill which was custom dyed with Procion dyes from Dharma Trading Co. I hemmed it with a blind hem stitch and dyed rayon hem binding (aka, the SHIZZ! This is my favorite way to hem).
I used a mix of Muir Green, Sage, Wasabi, and Olive. I love the way the different toned fabrics work together. I’d give a specific mixture I used for the different colors, but there was a lot of mixing and layering of colors until I was happy with it. And then when it was done, I gave it a quick all over dye bath with a very watered down olive to unify the colors a bit. This also helped bring out some the areas that I distressed.
I cut out and dyed all the pieces specifically for their color which also did a great job of making the jacket look a bit weathered, plus I did a bit of distressing at the end.
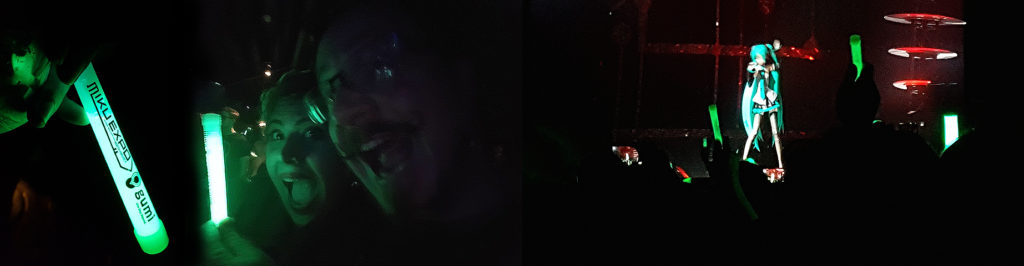
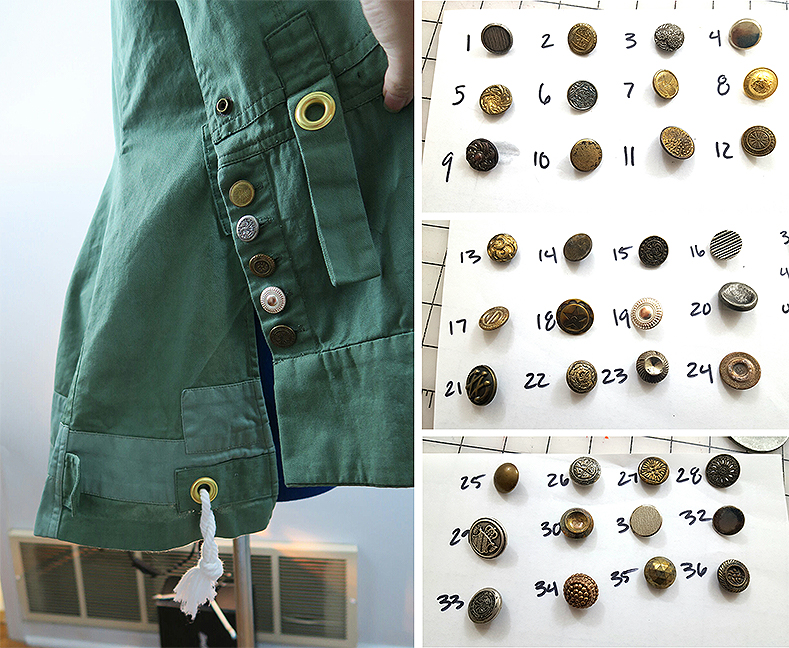
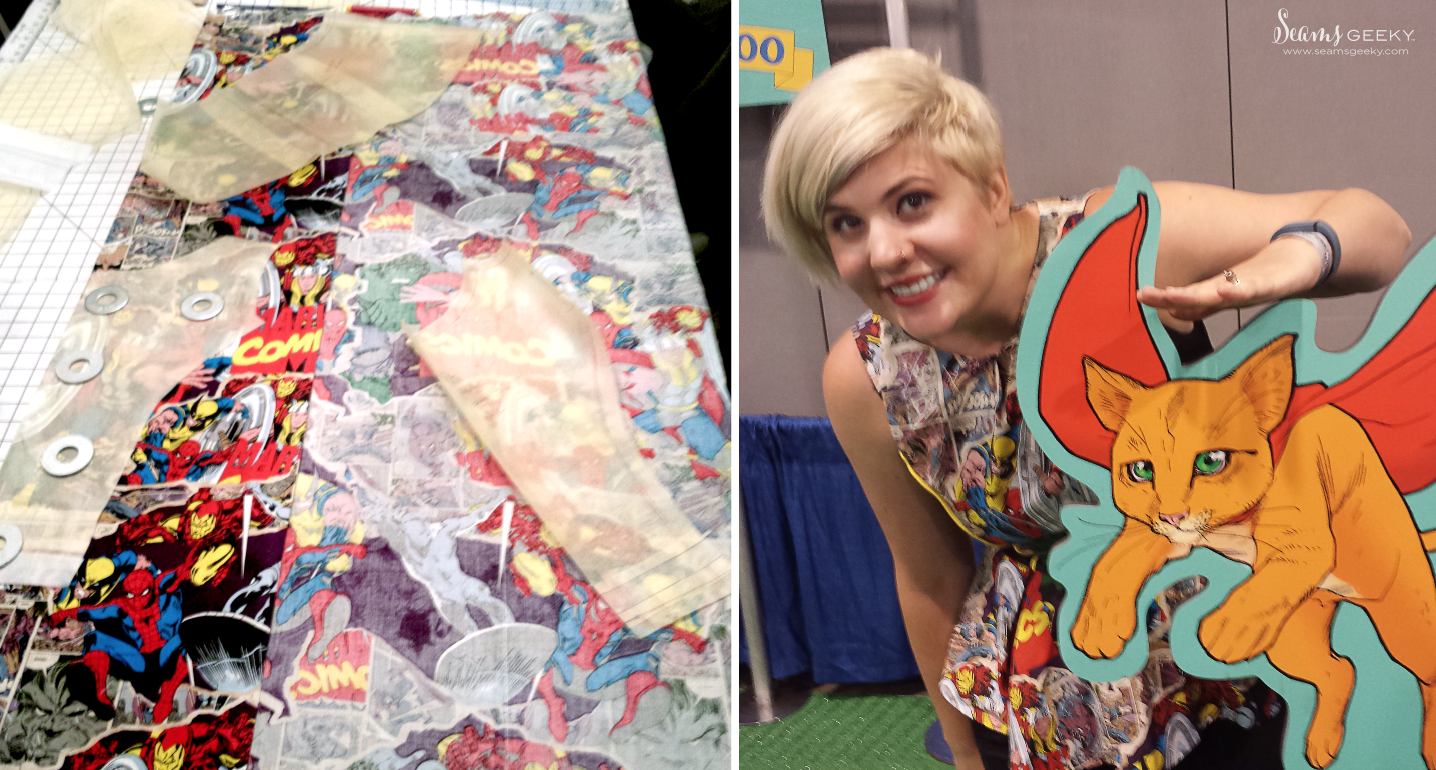
The jacket has a bunch of mismatched buttons like the one in the movie, and I did my best to try and match the patterns and tones. Most of the buttons are vintage metal buttons (I bought a 1 lb bag on etsy) with the exception of a few I picked up while in Dallas When we went to see Hatsune Miku! Squee!
When I got the lot in, I dug through all of them looking for buttons I liked, then refined for the same size, then cleaned those, then organized them so my client could pick the ones she wanted if she liked. She opted for me to pick out which ones to use.
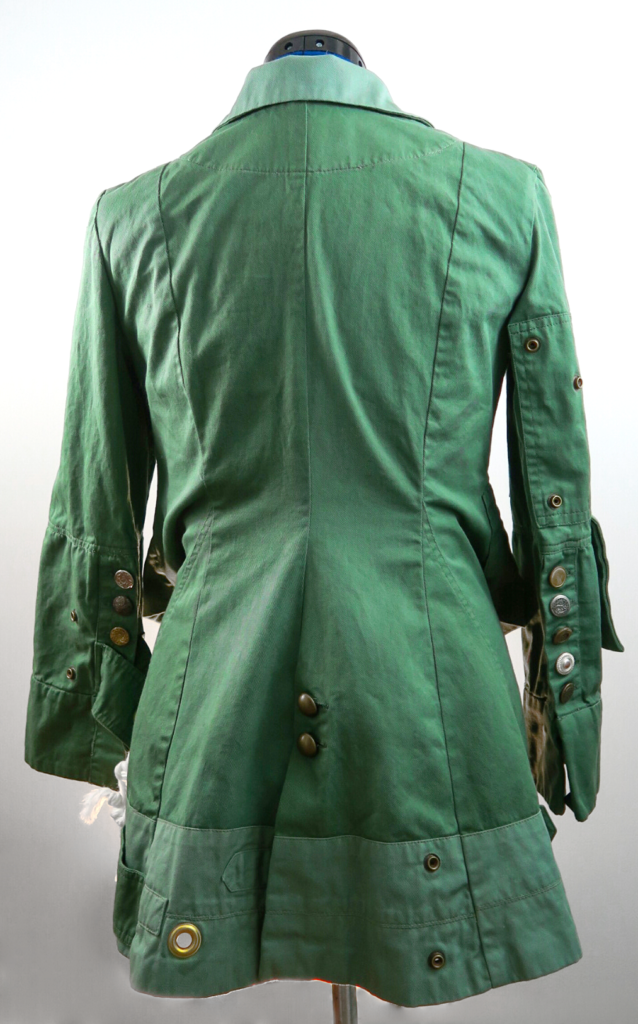
I used 1/2 in brass grommets on the back of the jacket. Originally I purchased some 1 inch antique copper grommets from china, but as I studied the photos more, I realized these were actually brass, and the 1 inch seemed too large in the end.
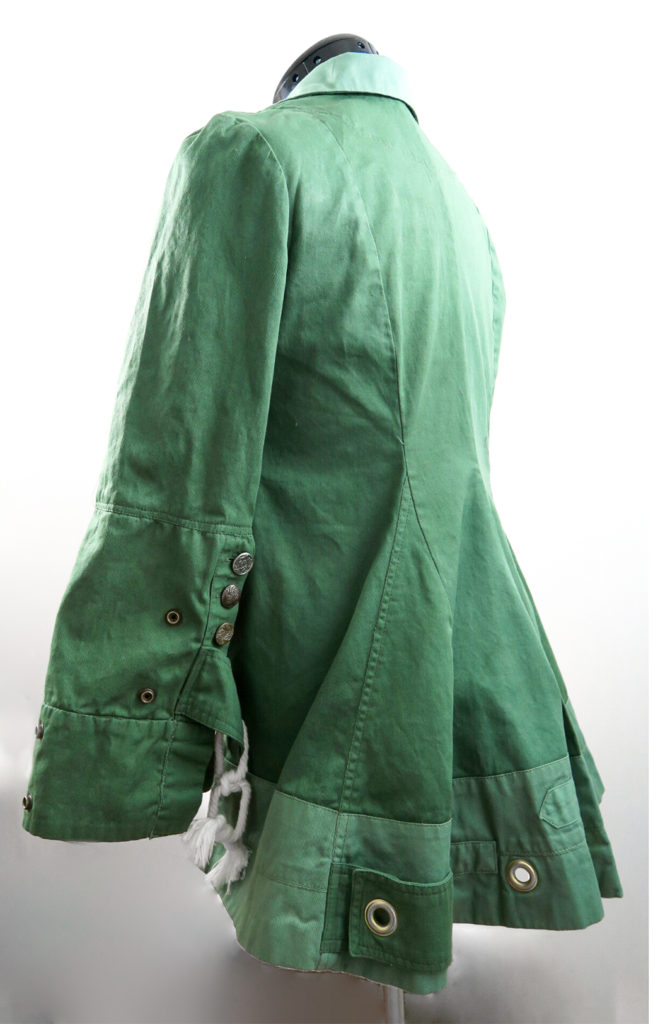
The sleeves have these metal rivet looking pieces. I ended up using one half of a heavy duty snap. Let me tell you, a heavy duty antique copper snap with just the right looking “male part” was ridiculously hard. I ended up finding some on eBay. Bless eBay.
• Lots and LOTS of topstitching.
• This jacket is deceptively asymmetrical. Both sleeves are similar but assembled differently with different detailing. The same went for the back And the front areas by the pockets.
I really think it turned out beautifully, and kind of wish it was my size so I could have kept it.
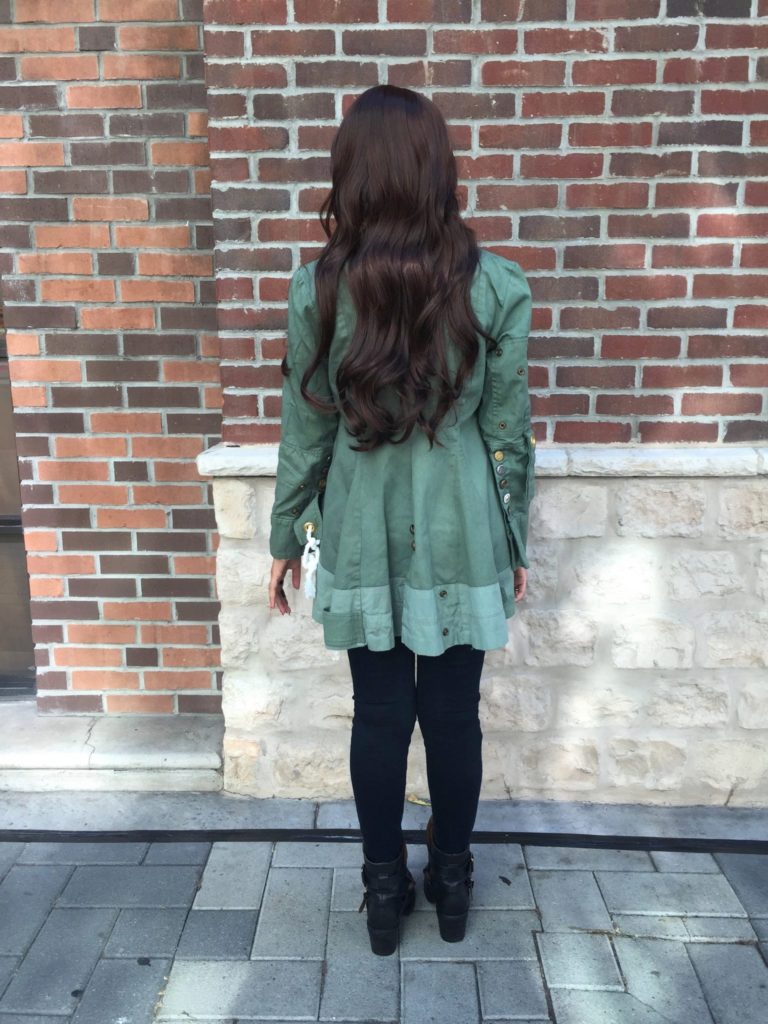
UPDATE!
Here’s some pictures of the jacket in it’s natural habitat! I always love when I get photos of commissions in action!
I know I am dreadfully behind on updating everyone on projects. What can I say, it’s been one heck of a summer with a bunch of back-to-back projects. I am only now, nearly a month later, recovered from Dragon Con and I’m working on some posts outlining the costumes I made. Plus, I know you’ve been waiting on the edge of your seats for 3 months for shots of that wedding dress I made.
But for more exciting news! I’m going to try and get into this crazy world of streaming (most likely for a few hours every week), and to jumpstart the crazy streaming train I’ll be streaming my “sewathalon” which basically means I’m going to try and cram in as many of the projects I planned to make over the summer into one day (some are geeky, some are not). It’ll be a trial by fire, and I’m sure the cats will entertain you while they demand attention while I’m trying to iron.
So tune in tomorrow on twitch! I’m planning on starting around 7 am (CST) and going until I drop (which is usually around 2 am.) And I have few patterns to give away as well!
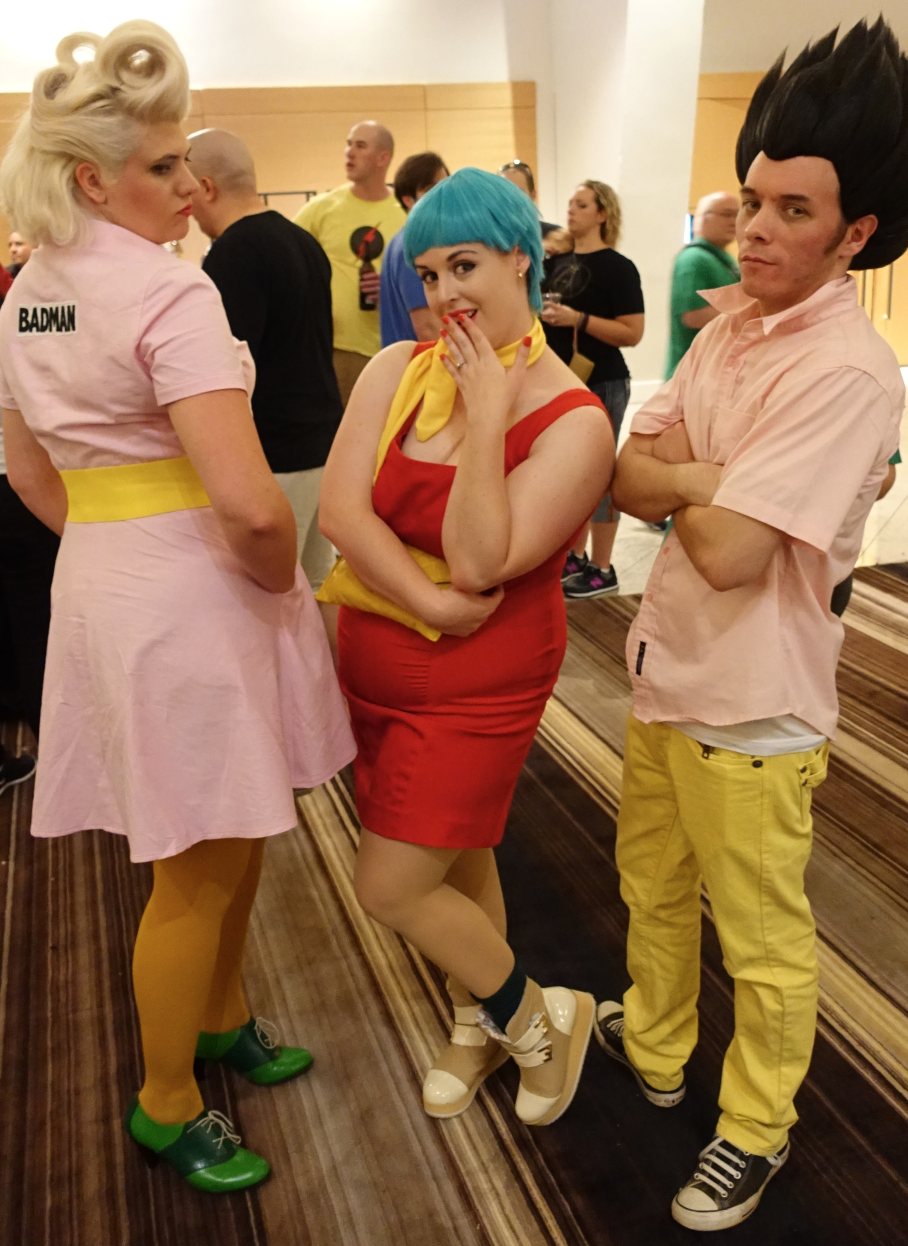
I’ll leave you with a little peak of my Badman dress.
By the way, isn’t that Bulma adorable?
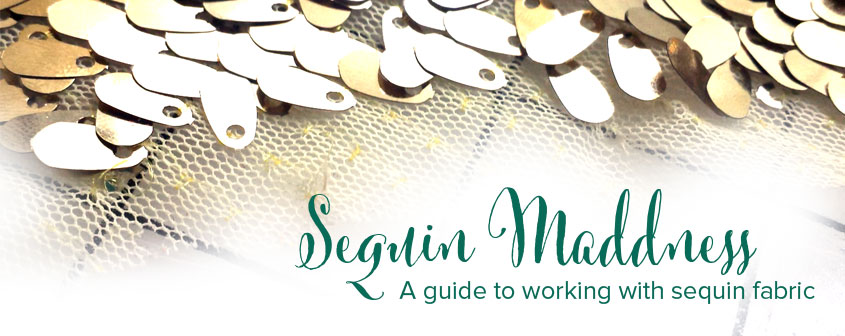
Straight up, everyone: Sequin dresses are a bitch to make. My biggest piece of advice: Don’t do it! Oh, you’re going to do it anyway? Basically this is going to be like a sex talk: If you’re going to do it, at least have the knowledge to do it safely and so you know what to expect.
Working with sequins in general are a total pain, but GLAMOUR!! Now, I knew it wouldn’t be easy. I can be blindly confident about taking on projects, it happens all the time. I tend to over-research to the point of WebMD psychosis levels.
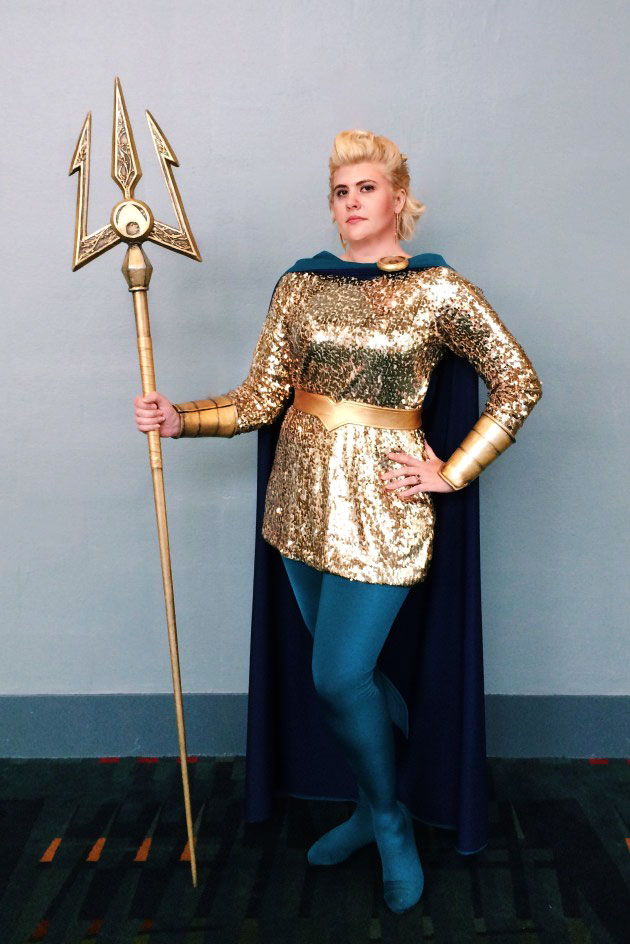
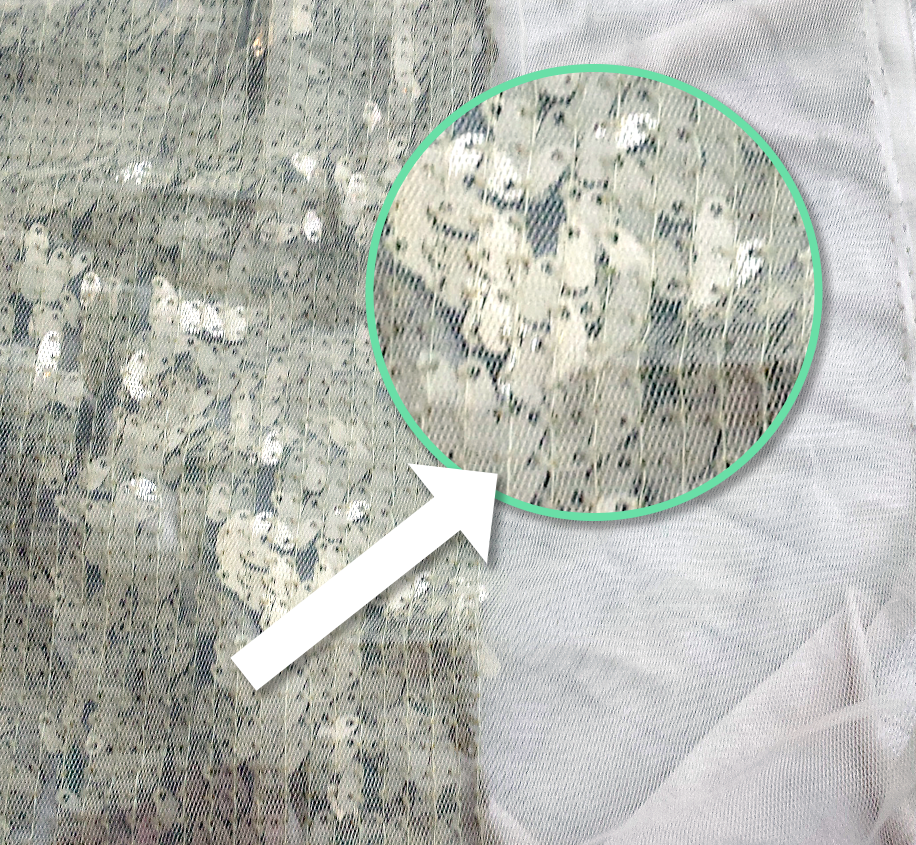
^ That’s the dress, you guys!! *Photo courtesy of Comic Alliance
The costume was full of unknowns to me, so it’s my own fear that’s kept me from starting the focal piece of the whole costume: the gold sequin dress. But I was also excited, because I never made a sequin dress before. I was smart and took pictures along the way, so you lovely readers can benefit from my pain and suffering.
Without further ado: Working with sequins.
At the end of the article, I’ll post some of the pages I looked at when researching that are much more positive about working with sequins, with headlines along the lines of Add a little sparkle to your wardrobe.
1- Sequin fabric is EXPENSIVE
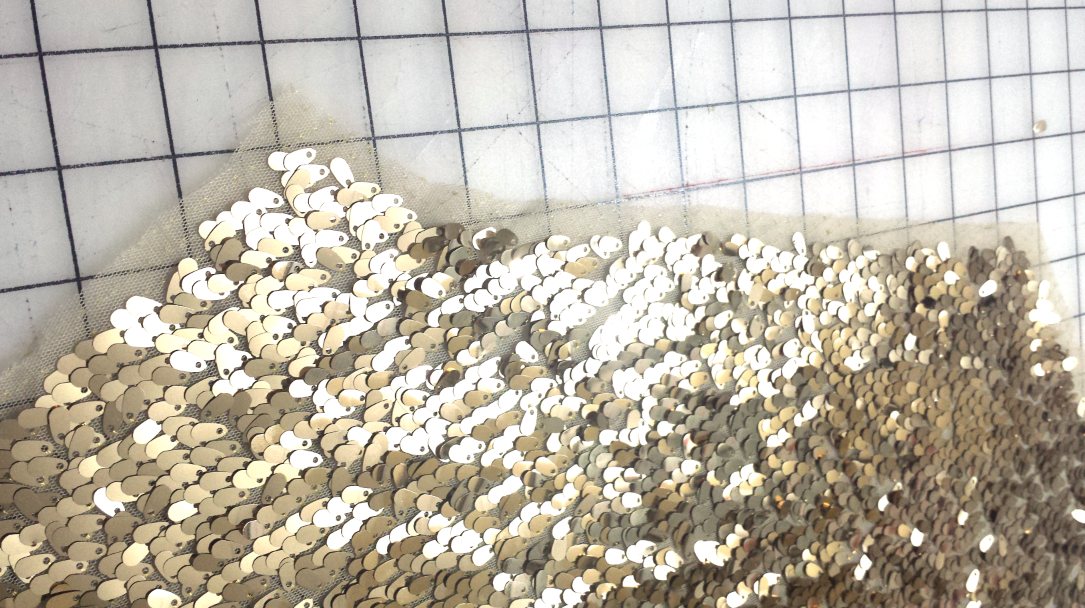
So make you have enough in the event of mistakes, but not so much you break the bank. It also makes it daunting to cut into. Not to mention the added fear of sequins falling off. That’s right, you are paying big money for the most fickle fabric known to man (might be an exaggeration). The way sequins are attached to fabric is they are stitched to the background in rows.
That one thread holds a whole mess of sequins!
Makes sense, right? Except a loose thread can make you lose a whole line of sequins. WHAT? This will come into play later.
2- Make sure your pattern is simple
Check and check! I mentioned in a previous post I’m using McCalls 7122. It’s really a simple dress, 4 seams total. No zipper.
Why does a simple pattern matter? Because you have to do a lot of prep of the fabric before you sew, so adding in darts or zippers or fancy collars, or even princess seams is a lot of work! I think the nice way the articles put it is “Let the fabric be the focal point.” Most sequin fabric is on a mesh or stretch backing anyway, so you can get away with less shaping.
3- Prepping Sequin fabric takes FOREVER!
I read an article that said, “A sequin dress will take 3 times longer to make than normal, so plan accordingly.” I went “Ok, this dress would normally take me about an hour. 1 x 3 = 3 hours, but I’ll add in a few more hours to be safe, I should be able to get it done in an evening.”
WRONG! So wrong. So very wrong. Just to prep the fabric took me about a week of evenings. If I judge by the anime I was watching when I removed the sequins, it took me close to 13 hours to prep the fabric. 13 HOURS. And that was just to get the fabric ready to sew, then once the dress is assembled, you have to hand sew sequins back on. From here on out I will be keeping track of approximate time spent on this dress so you can estimate your own.
Side note: I watched Red Garden. That anime is beautiful, and I might have to re-watch it because it’s so pretty and I hardly saw any of it because I was staring at sequins the whole time. It’s like Pretty Little Liars (well, the only episodes of seen of it, which is like 2) but with monsters.
4a- Make a mock up
I used stretch mesh for my mock-up since it matched the fabric the sequins were sewn on, and there’s no pictures because that thing was almost fetish worthy in its sheerness. But I learned a lot about my pattern, and took it in a lot. Time spent: 45 Minutes
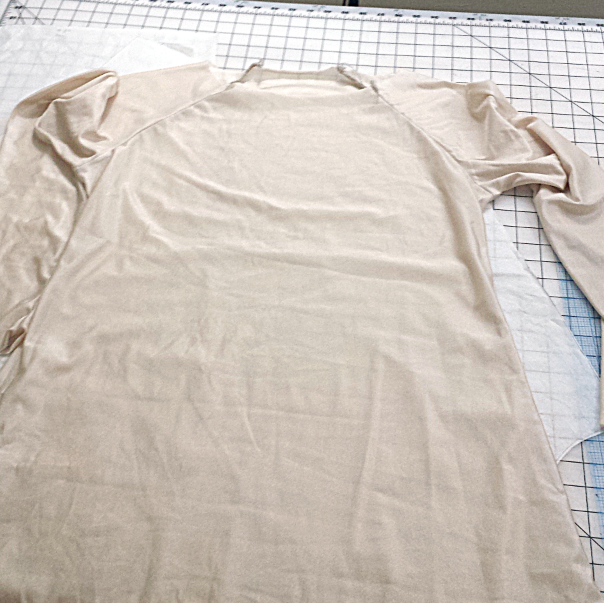
4b – Treat your lining like a second mock-up and sew it first.
Oh, and ALWAYS PUT IN A LINING. I called my lining my old lady night-gown because it was made of nude tricot. I used tricot because it has a similar stretch profile as the sequin fabric, and it was silky so it would feel nice against my skin but also not snag on the sequins. I made even more alterations to this lining for fit because I wasn’t getting distracted by my bellybutton like with the mesh one. Time spent: 45 Minutes
Old lady nightgown FOR THE WIN
But why is the mock-up important? I realized after all my fittings that the weight of the sequins, and the fabric being a little stretchy made everything hang longer than anticipated, plus I forgot to transfer some of my pattern changes (whoops!). So, I had to go back and remove more sequins everywhere I needed to take it in or shorten it. Just add more time to the sequin clock Time spent: 2 hours
5- Sequins have a Nap
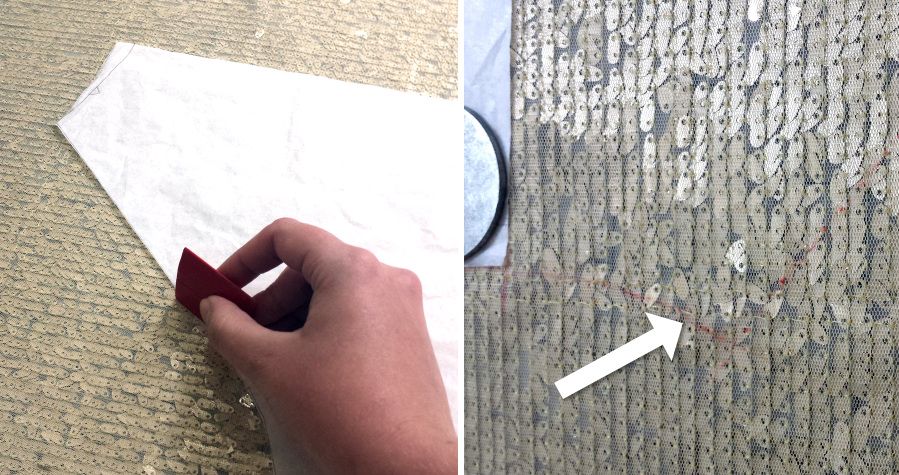
That means, sequins hang a specific way and shine a specific way. Find out which direction your sequins hang and lay everything out going one direction. I know it can feel like you’re wasting fabric, but you know what really wastes fabric? Having to re-cut a piece because the sequins are “hanging” vertically. Also, some sequins are one color on one side, and a different color on the other, so a piece cut in an opposite direction will really stand out.
Things to know when cutting out the fabric: Pinning is definitely not something you want to mess with, and cutting on a fold is not recommended. Layout and trace your pattern pieces onto the fabric from the back. I used red tailor’s chalk, then remove the pattern piece and cut along the line.
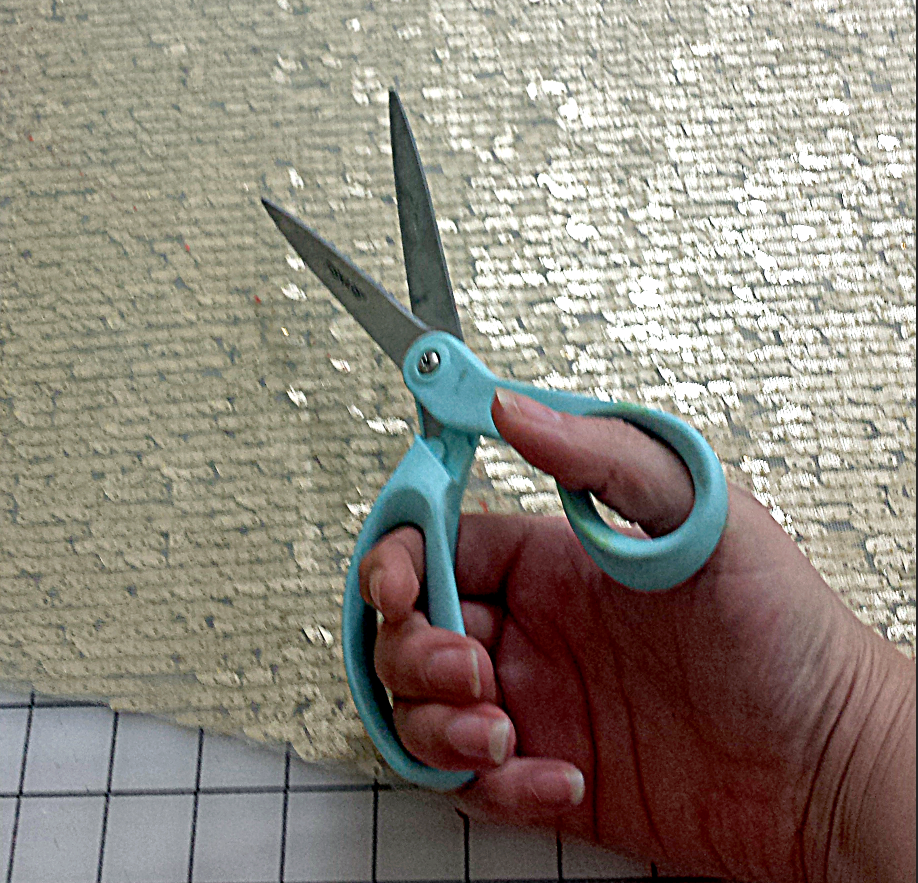
Also, don’t use your good scissors. I used my gift wrap scissors because those sequins will knick and dull your good scissors so fast! Time Spent: 1 hr
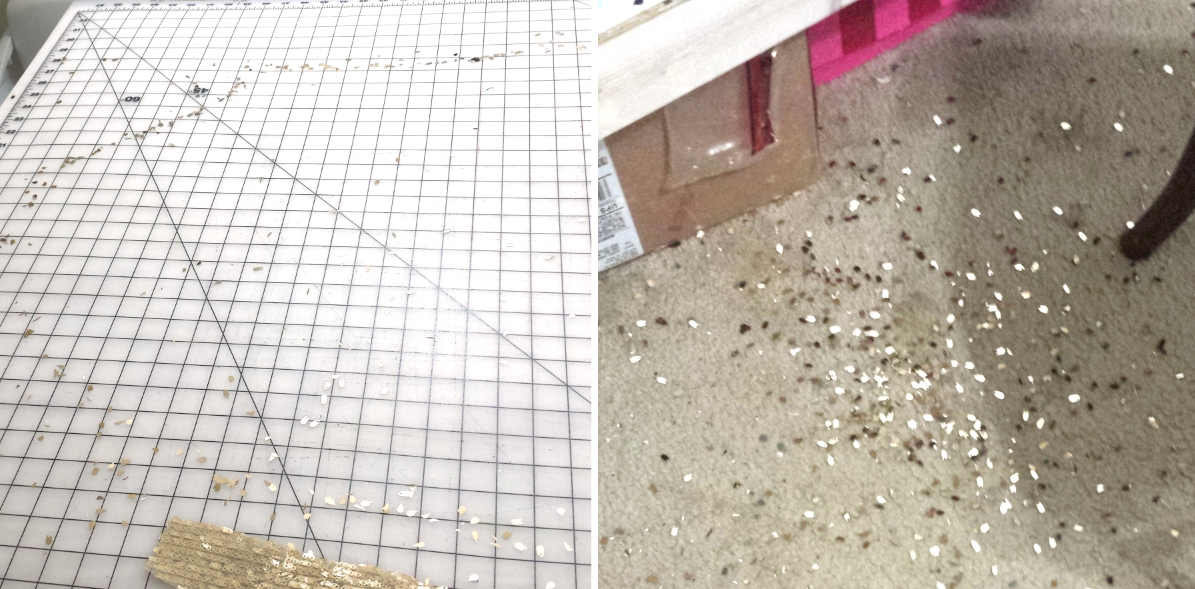
6 – Get ready to live in a disco ball
Left: Table after cutting out a piece Right: sequins from trimming one seam allowance
You may see the storm of sequins rolling in just from cutting your fabric, but you are not ready for the tidal wave of sparkles that are about to drown you. I joked with my husband I was like a sparkly Family Circus cartoon, trailing sequins in a path around the house. I also littered the city of Memphis with them, the work conference room, my car, etc. It’s basically giant glitter.
Before you sew, you need to take all the sequins out of the seam allowances. This allows for several things:
• Reduce the risk of sewing machine needle breakage
• Reduces seam bulk
• Not having sequins sticking straight out and jabbing everything if you sew through them.
If you have, like me, kept your sequin fabric folded in the box it shipped in, the sequins will most likely not lay flat at all. I suggest letting gravity help you and hang the fabric vertically for a few hours (I left mine overnight) before trimming the sequins off.
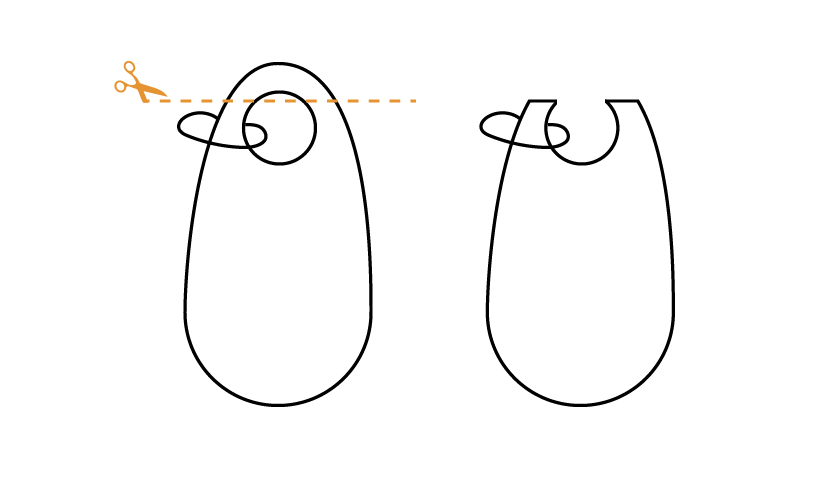
And you’ll want to trim off the sequins. If you use your seam ripper to take them off, most likely you will weaken the already crazy fragile stitching that holds the whole line of sequins together, so grab some small hand scissors that you don’t care about, and start clipping off the sequins.
I found clipping here gave the best and quickest results:
I would also err on the side of removing too many sequins than not enough because sequins move around while you sew and have a life of their own, and a broken needle is how we loose an eye.
Did I mentioned this took forever? This is going to take forever. And I asked around for tips on making it go faster, and found out there isn’t any. Your hands will hurt. Mine were swollen and I broke a blood vessel near my knuckle where the scissors rested.
Also, if I were to do it again, I would only clean up the seams and neck hole, and not the hem. Due to sequin fabric weight, the hem is going to hang much lower than you anticipate, so sew it together first, then remove the sequins at the hem and bottom of sleeves if applicable once you know the proper length. Time Spent: 13 hours
7- Sewing up the dress is going to seem like a reward from the heavens! But it’s not!
However, the dress should go together quickly, because it’s a simple sewing pattern. I stitched it together and lined it in less than an hour. Also, wear your trusty safety glasses. The chances of you breaking a needle or sequin pieces fling through the air is high. I used a zipper foot so I could get as close as possible to the sequins without having a full foot trying to feed through over the bulk.
I used a stretch stitch on my old battle horse of a Janome because a straight stitch kept puckering and I wanted to maintain as much stretch as possible. The downside? There is no unpicking at that point. The thread is hard to see and the stitches are really small.
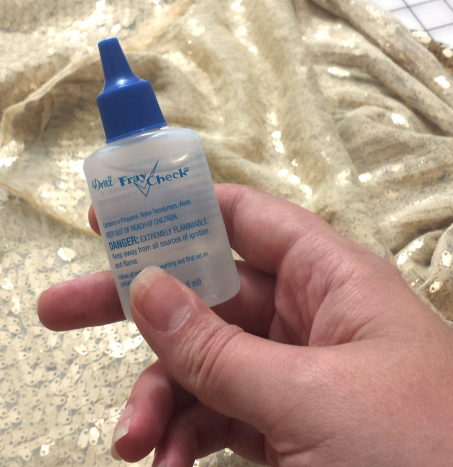
I also fray checked each seam, because I’ll be damned if even 1 row of sequins comes loose! I also installed the lining kind of like a bagged jacket. I attached it at the neck and the ends of the sleeves, but hanging free at the bottom.
DO NOT IRON. It can melt the sequins, degrade their color, or melt your backing fabric. I found the seams didn’t really need it, and you can hand tack them later. If you feel it needs to lie flatter, steam and use a clapper.
Because of stretch in the dress and lining, and because the sequins are so heavy, I stay-stitched my trusty friend; clear elastic, around the neck (no stretching!). This gives it the stability to not get all wonky with weight and stretch. Instead, it will give it the stability to hold up that dress you’ve been working on for a week.
If you’re like me, now you’ll try it on and go “I feel like Zsa Zsa! I’m so glamorous! Maybe those past 13 hours have been worth it!” And for a few moments it does feel like it’s all worth it.
Time Spent sewing: 1 hour Time spent gawking at sparkles: at least 1/2 hour.
8- Hemming
Just when you thought you were done with sequin removal, it begins again. Once you get everything the length you want it and pinned (if you haven’t already), trim off all the hem sequins and hand hem the bottom. Because it’s all mesh, it’ll look flawless from the outside! Time Spent: 4 hours
9- Hand sewing sequins: the project that never ends
I hope you saved leftover fabric, because you’ll need it. Now is when you can take advantage of the sequins being attached by one thread and remove a bunch of whole sequins. You may have noticed when you tried your dress on that you can see all the backing fabric at your seams. Now you are going to painstakingly attach sequins over all the bare spots. I also used this opportunity to tack my seams the direction I wanted them, which keeps the seams as flat as possible. Time Spent: 8 hours (damn those long sleeves)
But guess what, now you’re done! Only about 30 1/2 hours and 3 sewing needles later.
And that is how you make a sequin dress. I suggest buying one from some sweat shop where 5 year olds are clipping sequins off instead of making one. Just kidding! (mostly)
Oh, but you do feel so glam in it. I probably would not make a sequin dress like this again, but I do feel more prepared to take on sequin projects in the very, very, very distant future.
If you have any sequin questions or tips, you know what to do: leave a comment!
Oh man, just the idea of practicing things gives me cold sweats. I remember as a kid taking piano lessons and procrastinating on practicing and then I’d go into my next lesson embarrassed because I still sucked at playing Frère Jacques. I think there’s two parts to that equation: 1) I had no desire to play Frère Jacques (rock and roll, please) and 2) practicing is scary because you screw up. A lot. And that can take a toll on your self esteem.
I mean, this is true of everything we have to practice. It’s not like I understood the quadratic equation the first time I tried it, but because my homework sheet had 20 problems I had to answer using it, I
eventually figured it out. But when it comes to hobbies or extracurriculars, it’s up to us to tell ourselves its something we want to learn. And that’s hard. For one thing, it’s really sucks not understanding it the first time. I think we all have grand dreams of being perfect the first time around. We are just SO awesome, and that can’t be THAT hard. We’re bound to be prodigies. And for some people, they are. And for the rest of us, well we have to work for it. Which means you have to motivate yourself to get there. And we can all get there with one simple attribute:
Blind stubbornness.
Seriously.
You have to pump yourself up, play “Eye of the Tiger” or “Don’t Stop Believing,” or “I Believe I Can Fly.” Whatever your poison (Hey, if “Talk Dirty to Me” is your thing, go for it!). If you need to pin up a piece of paper entering your crafting space and jump through it, do it! I do this:
And then you tackle your project. And screw up, rip it out, re-cut it, re-glue it, and probably cry a few time along the way. But you can’t give up, because you are gonna own it (literally and figuratively) when you’re done!
You all know I’m a huge fan of sewing. It’s my favorite. I’m comfortable with it, I’ve been doing it for years, and I’m always trying to get better by trying new things. Once you learn the basics, you have to try new things. It gets really boring if you don’t.
My one word of advice here, take baby steps. Don’t try and make a ball gown your first time out if you haven’t sewn before.
That nonsense is tricky. There’s usually a lot of technique that goes into a fancy gown. I mean you can do it, but it’s real easy to get frustrated and drop everything. Lots of tears, anger, “I sucks” and a crushed crafting self esteem. And that’s no fun. This stuff should be fun!
Now in respect to cosplay, man, we are swimming in some uncharted waters (unless you went to school for it). So I’m gonna drop some SeamsGeeky™ Wisdom on you: practice on something smaller first.
Shocking, I know. But that’s a hard pill to swallow sometimes. I mean, we want that sweet, sweet movie accurate Black Widow catsuit NOW! But from experience, cosplay isn’t cheap and the last thing you want to mess something up half way with your $25 (or more!) a yard fabric because you jumped into the deep end before you knew how to kick.
Sewing breaks down into levels of techniques and skills which add up to the knowledge of making something. You kinda have to build up your own mental toolbox before taking on something crazy.
• Sewing a straight seam
• Knowing what are the best tools for the job
• Understanding how patterns look and how they go together
• Pattern alterations
• Understanding textiles and textile best practices
• Fabric grain
• When to machine stitch, when to hand stitch
• The right interfacing for the job
• Fit (this is the hardest, I think)
• Tailoring
• Draping
…
I could go on for days. And there is, like, a billion variations on themes. It seems overwhelming, I know.
So when I want to learn something, I break down what exactly I want to learn. I HATE learning with “samples.” I don’t want to insert a zipper into a square of fabric, I want something usable at the end, not just a zipper randomly floating around my sewing room. I don’t have the time or space for that. So I figure out a project where I can use a new skill and try it hands-on then complete that project. And I try not to make it too hard on myself.
Need to learn how to put in a zipper? Sew up a simple, unlined skirt (from a sewing pattern. Online sewing tutorials when your learning can suck, and having an instruction sheet really helps) out of a basic cotton. Seriously. You get something usable you can be proud of (Self Esteem Booster!) And you’ll have learned how to put in a zipper, and gotten better at cutting out patterns, understanding pattern shapes, sewing a straight seam, seam finishing, probably interfacing, hemming, and most importantly, putting in that zipper. (the cotton helps you hide those holes if you have to rip it out and redo it).
Rinse. Repeat. You’re going to get better and better every time. I had an art teacher who told me, “Draw it 3 times, and you’ll be amazed how much better the last one looks. Then do it 3 more.” But drawing an apple 6 times is boring. 3 skirts and 3 dresses to add to my closet? Plus with all the amazing licensed fabric there is now, you can fill out your geek wardrobe and have much more fun.
Anytime I try something new, I try to do it in a small scale on a wearable project first. And I’m probably going to repeat this over and over. In every post. From here to eternity. The main reason I like doing things this way is because it boosts your self esteem, which is hard to keep up sometimes. That way when you’re ready tackle that costume, you feel armed with the skills to figure it out! Scared to work with spandex? Make some leggings or a swimsuit. Unsure of leather? Make a bag, or add some leather accents to a jacket. When you spend 3 months on a costume, you want to be proud of it, so you need that firm foundation. I mean, every costume is it’s own adventure, and it can feel like you are running full steam in one direction, and hoping that it’s the right way.
We are all students in the classroom of life (<——cheesy, but I don’t care). And new things always seem scary, but you have to face it sometimes. You might need to amp yourself to start, but you don’t have to run if you just learned to crawl.
You totally have this under control. You got this! You can do anything!
When you first start sewing, the whole world of clothing… changes.
Shopping for clothes isn’t as fun anymore. Because you look at
something and go “Pshhh! I could make that.” And you could! It might
take some research and skill, but you could make that, and it would
fit better, you’d love it more, and it won’t cost as much!
(Side note: Most of those are lies. Sewing for yourself can get<
expensive quickly. Yes, you can save money, but only if you compare
yourself to designer or high end clothes. I stopped thinking about
sewing as saving money a long time ago, instead I think about it as
“I’d rather pay more for something that fits.” And sometimes I
don’t love it more. Sometimes I wear it once then donate it.)
Thoughts of a wardrobe or cute clothes in cat prints and chevrons
float across your mind’s eye. “YES! THIS IS EVERYTHING!” So you go to
the fabric store, and browse for the perfect fabric (which I guarantee
isn’t there). You might not find the perfect fabric for what you
wanted, but Novelty prints are 30% off, and that X-Wing print is
calling your name! You HAVE to buy it! You NEEEEEED IT! More than you
needed anything in the entire world (please picture 23 year old Laurel
at the fabric store stopping herself from a toddler size meltdown over
Star Wars fabric before realizing “I’m an adult, I can buy whatever I
want.”) Oh, and this star fabric will make a perfect skirt, and I
think I need dress pants for work…. and Simplicity patters are 5 for $10.
Before you know it, you’ve spent $250 on a bunch of fabric, notions, thread, and patterns. You get home, and are SUPER excited about everything you’re going to make RIGHT NOW! You’ve seen Project Runway, you know that a ballgown can be made in 8 hours,
and you’re just making a few dresses and skirts, you’ll get all this
done tonight if you don’t sleep!
Then your best friend calls and asks if you want to go out to
dinner, so you leave the bag untouched on your floor for another day.
You forget about it. Maybe you even add a few more.
Yeah, pretty much something like this.
Then one day while playing video games you go, “Huh. Didn’t I buy some
Star Wars fabric?” You realize you’ve accumulated this huge
backlog of projects, some of which you don’t even want to make
anymore. Did you really buy “Peace and Love” flannel? *face palm*
Stashes are the most wonderful thing in the world to accumulate, then the worst thing to have.
Well not the worst, but it can get a bit daunting, and most of it
isn’t needed. (Well, that’s not true either… I’m a bit of a stash
addict, still in denial) there are certain things you want to have on
hand at all times. If I had a Sewing and Crafting fairy when I first
started, the first thing she’d say is “Don’t buy something unless you
have a project for it.” But that’s no fun.
When I go to fabric shopping now, I bring a list of what I’m looking for, the
yardage I need, notions, what to get if on sale, etc. I also find I am
more likely to plan projects now because space is limited, and I’m
more focused on what I make and do.
Cosplay tip: If you have several projects planned out for sometime in the future, keep a list of fabrics and notions you need on hand at all times because when you want blue pleather Murphy’s Law says you won’t be able just the right one. You never know when you might find just what you need.
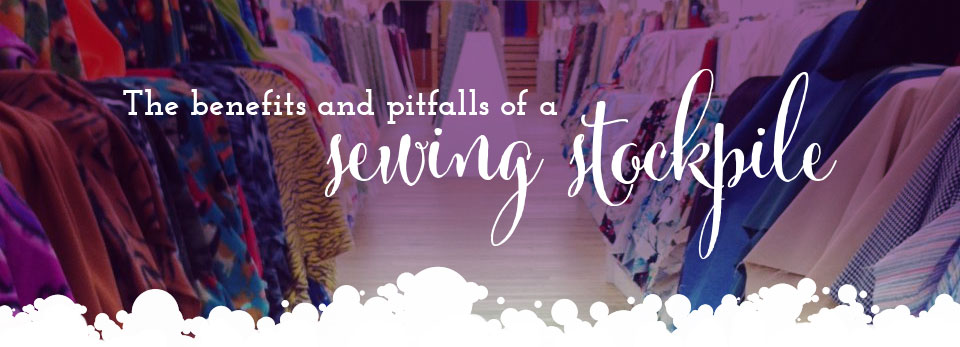
So without any more rambling on and on…here is what I stash away for a rainy day:
Basically try to keep on hand any notion you will completely forget to buy
Elastics
varying sizes and colors and types
Buttons A lot of time I buy buttons specifically for projects but I also capitalize of good deals, like those bags of assorted shirt buttons and throw them all in my button bucket.
Various other closures
sew on, snaps, hook and eyes, grommets
Velcro
I usually but 1 inch wide in white and black. You can dye
white velcro really easily to match projects. See more about dying
here. You can cut it thinner if you want. I personally like this snag
free the best.
Zippers
I like to have a variety of zippers in various colors, lengths, and types. Invisible being my favorite, but both kinds are handy, and I always opt for longer vs shorter because shortening zippers is easy
Interfacing
Various kinds, fusible, sew-in, black, white, woven, non-woven) and recently I’ve started using fusible interfacing on a roll for small area like neck bands, button plackets, or inserting zippers. You can get bias cut (sometimes called wigan) or on-grain straight cut
Muslin
I buy this by the bolt, but just having a few yards on hand can be a life saver
Sewing machine needles
In various sizes and for various tasks (stretch, microtex heavyweight, twin, topstitching, etc.)
Thread
I always keep white, black, and light grey. I like to buy these in big spools so I have lots on hand)
Fabric basics in basic colors
White cotton jersey, spandex, lining fabric, broadcloth and voile or batiste, a few satins, denim and twills to name a few. Whatever you sew with the most, have some basic colors on hand
Fun miscellaneous trims
Stretch lace, normal lace, bias binding, piping, rick rack, ribbon, etc for when your project just needs a little something special
Dye (optional)
You may have figured by now I do I decent amount of dying, so I have a large tupperware stored away with different dyes in a variety of colors
Any materials needed for niche items (optional)
For example, I love sewing corsets so I like to keep steel boning, grommet, coutil, and laces on hand so I don’t have to wait for an order to come in. Some items are hard to get, or you get a better price for buying in a larger quantity so it’s nice to have a little stockpile for last minute projects.
I never feel guilty about having a bunch of this stuff stocked away. The fun prints and stuff? Those are things I try to buy on an “as-need” (and as I mentioned above, sometimes you NEEEEED things for no rational reason) basis.
How big is your stash? Do you find it valuable? What kind of things do
you stash away?
Just a quick post to show off Mine and Zach’s costumes from my work’s 1920s themed holiday party.
I realized I ended up making both our costumes because Zach had ended up wearing pirate pants from his Science Pirate costume from a few Halloweens back. I worked really hard on this dress, and am so sad we didn’t take a full length picture! Luckily we have these because of the photobooth they set up at the party. I’ll be sure to showcase the outfit in it’s full glory (and color) soon. Along with my griping about how awful 1920s fashion is. I’ll admit it now, it’s mostly because I can’t wear it.


 For some reason those pictures turned out way green. The colors below are way more accurate. C’est la Vie.