Posted on Categories Commissions, Cosplay, project spotlightTags , , , , , , , , , , , , 5 Comments

Project Spotlight: Wanda Maximoff Civil War Green Coat

UPDATE! Scroll to the bottom to see the finished jacket on it’s owner!

Project Spotlight

Seamsgeeky_scarletwitchJacket

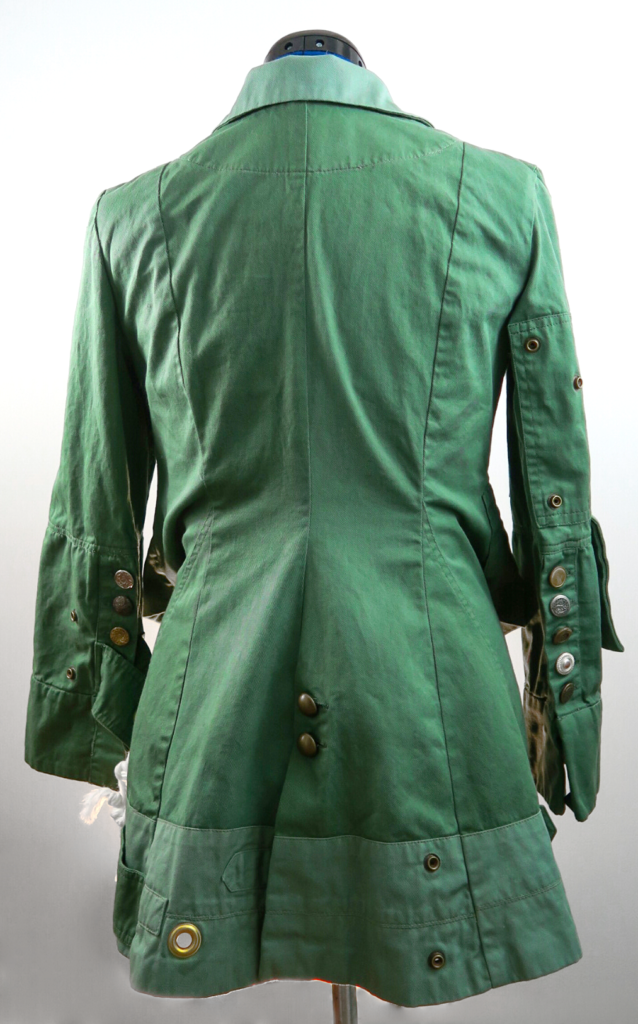
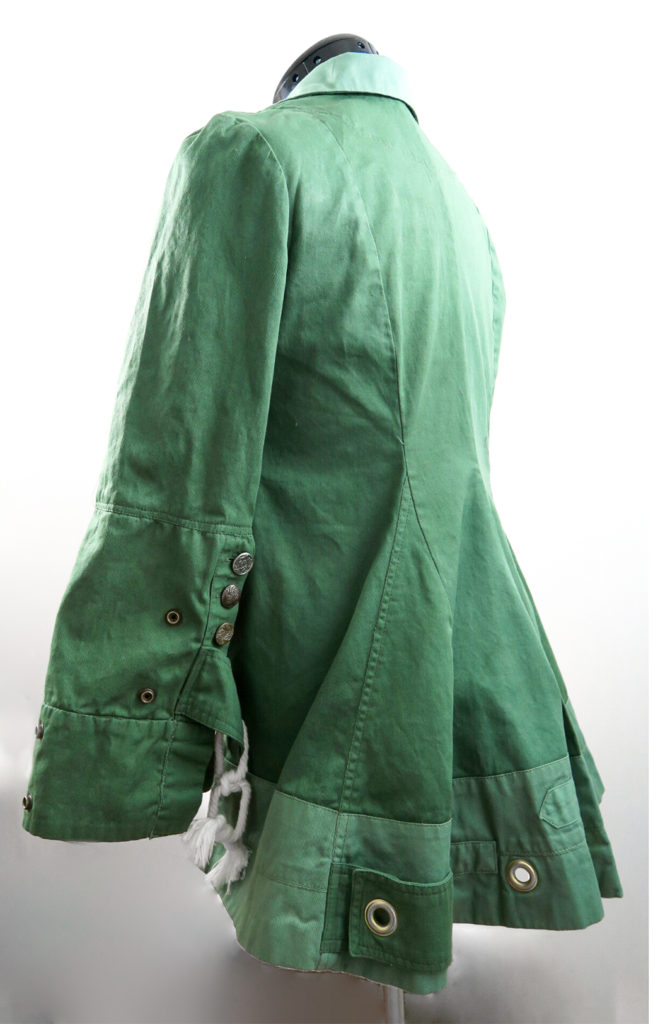
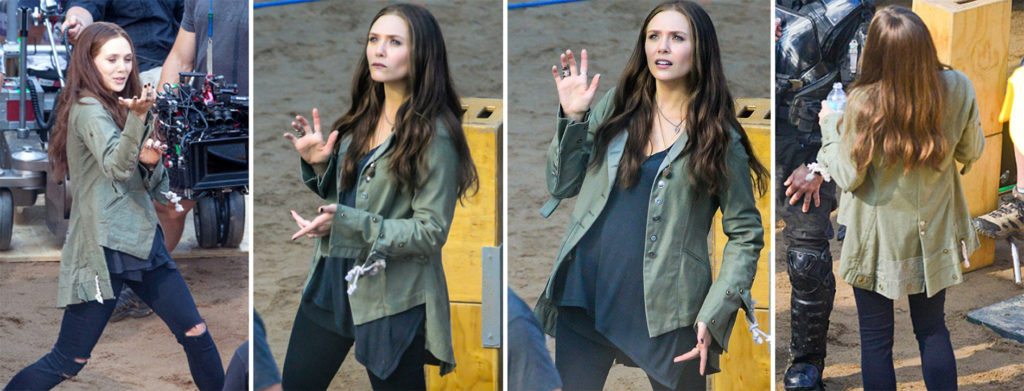
This jacket, besides being awesome, is very special to me. I was commissioned for this jacket earlier this year to be worn as SDCC. And, of course, was commissioned before Civil War had come out, so there was a lot of research to do be done on my end with some very fuzzy photographs.
movie stills
But what makes this jacket so special is that this was the first pattern I drafted digitally using Adobe Illustrator. I managed to spend a good amount of time earlier this year teaching myself the fundamentals of flat-patterning, vs my usual “winging it,” and it was really nice to be able to put that knowledge into action. I’m sure at one point I’ll go into my adventures of flat patterning. Also, I was amazed how much easier this garment went together. I think it’s because I spent a lot more thinking about it’s construction as I was designing it and concentrating on the details.

Of course I mocked up a quick muslin just to make sure it fit like I wanted.
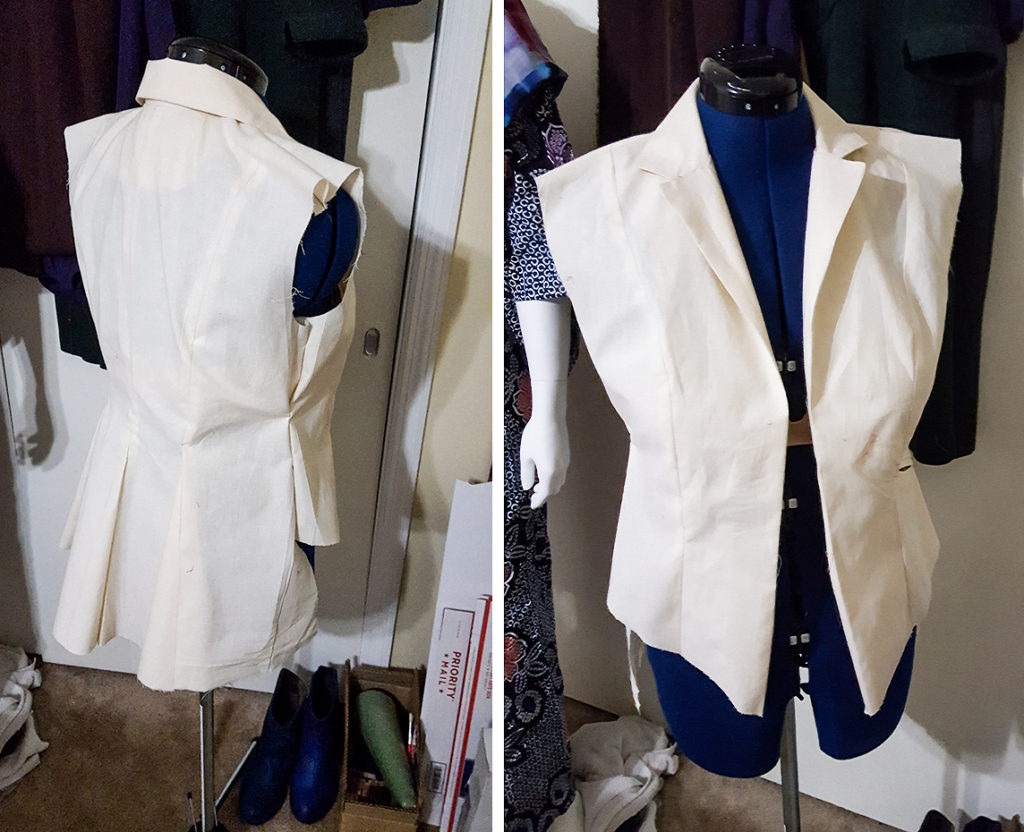
SW_muslin

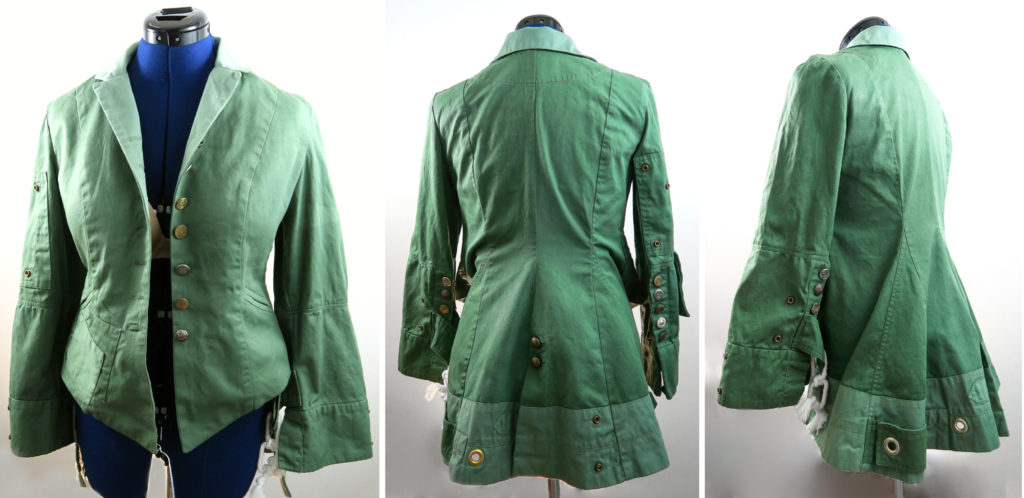
Alright, the important deets (and some larger jacket images):
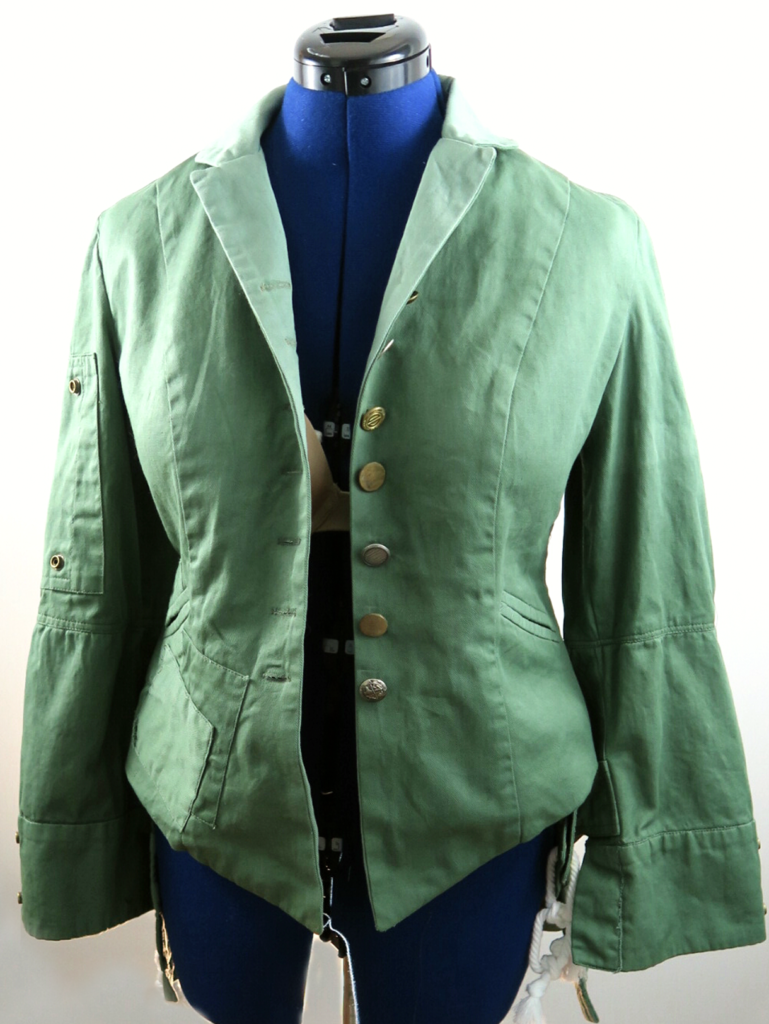
seamsGeeky-Scarlet-Witch-green_01 seamsGeeky-Scarlet-Witch-green_03 seamsGeeky-Scarlet-Witch-green_05For some reason those pictures turned out way green. The colors below are way more accurate. C’est la Vie.

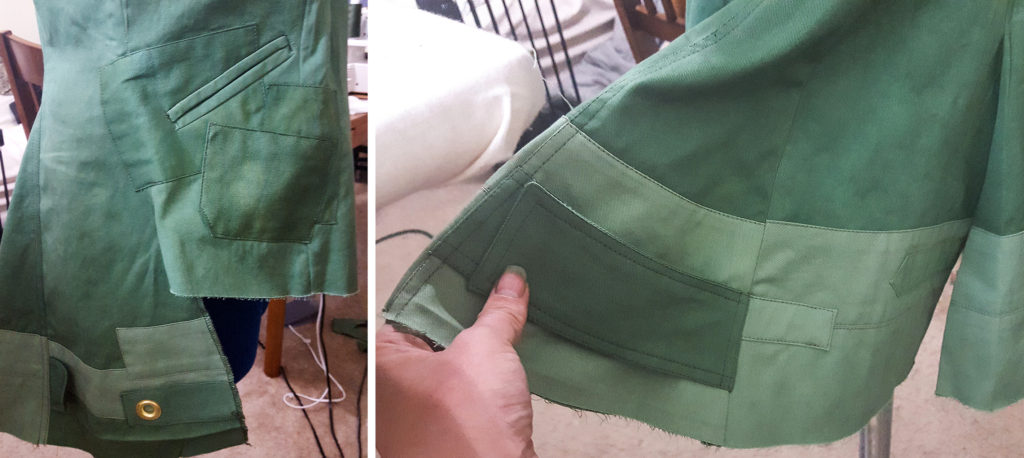
  • Jacket is unlined and made with cotton twill which was custom dyed with Procion dyes from Dharma Trading Co. I hemmed it with a blind hem stitch and dyed rayon hem binding (aka, the SHIZZ! This is my favorite way to hem).
Seam Geeky Scarlet witch color
I used a mix of Muir Green, Sage, Wasabi, and Olive. I love the way the different toned fabrics work together. I’d give a specific mixture I used for the different colors, but there was a lot of mixing and layering of colors until I was happy with it. And then when it was done, I gave it a quick all over dye bath with a very watered down olive to unify the colors a bit. This also helped bring out some the areas that I distressed.

I cut out and dyed all the pieces specifically for their color which also did a great job of making the jacket look a bit weathered, plus I did a bit of distressing at the end.

  • The jacket has a bunch of mismatched buttons like the one in the movie, and I did my best to try and match the patterns and tones. Most of the buttons are vintage metal buttons (I bought a 1 lb bag on etsy) with the exception of a few I picked up while in Dallas When we went to see Hatsune Miku! Squee!seams_geeky hatsune_miku

When I got the lot in, I dug through all of them looking for buttons I liked, then refined for the same size, then cleaned those, then organized them so my client could pick the ones she wanted if she liked. She opted for me to pick out which ones to use.
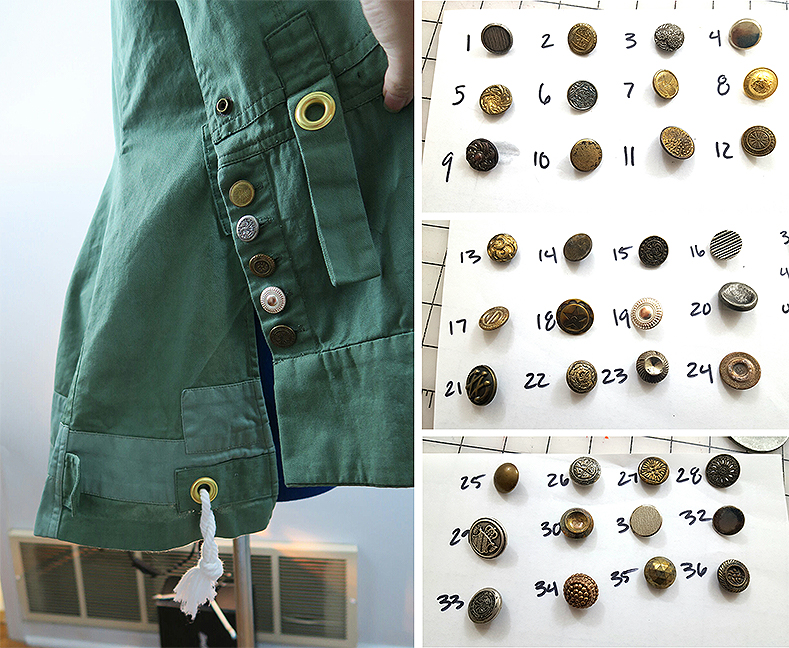
seamsgeeky_scarletwitch_buttons

  • I used 1/2 in brass grommets on the back of the jacket. Originally I purchased some 1 inch antique copper grommets from china, but as I studied the photos more, I realized these were actually brass, and the 1 inch seemed too large in the end.
    seams Geeky scarlet witch sleeve

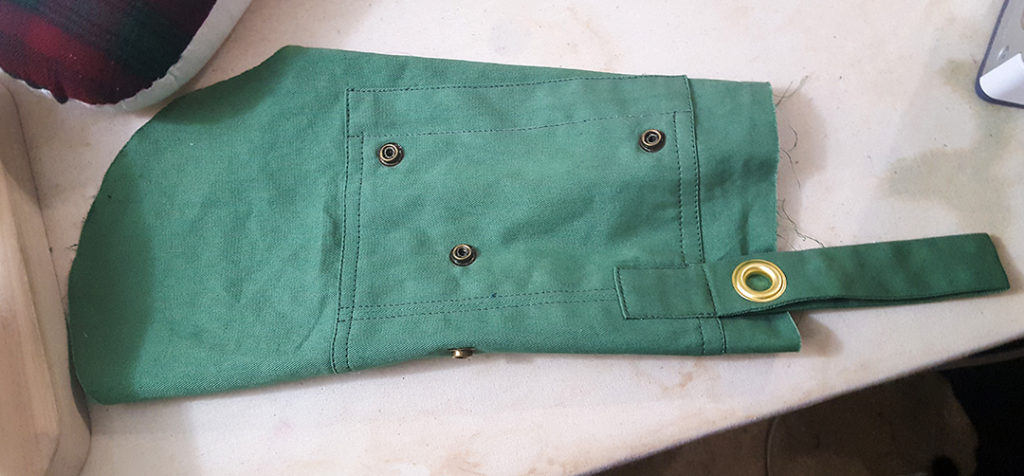
The sleeves have these metal rivet looking pieces. I ended up using one half of a heavy duty snap. Let me tell you, a heavy duty antique copper snap with just the right looking “male part” was ridiculously hard. I ended up finding some on eBay. Bless eBay.

• Lots and LOTS of topstitching.

• This jacket is deceptively asymmetrical. Both sleeves are similar but assembled differently with different detailing. The same went for the back And the front areas by the pockets.
I really think it turned out beautifully, and kind of wish it was my size so I could have kept it.

UPDATE!
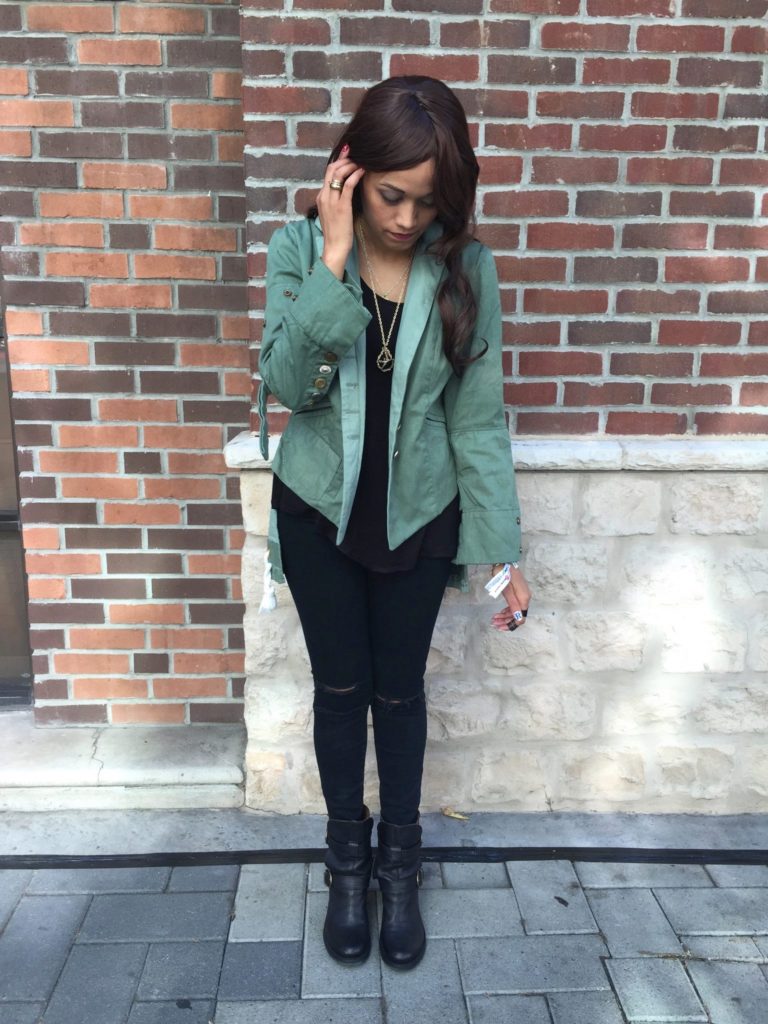
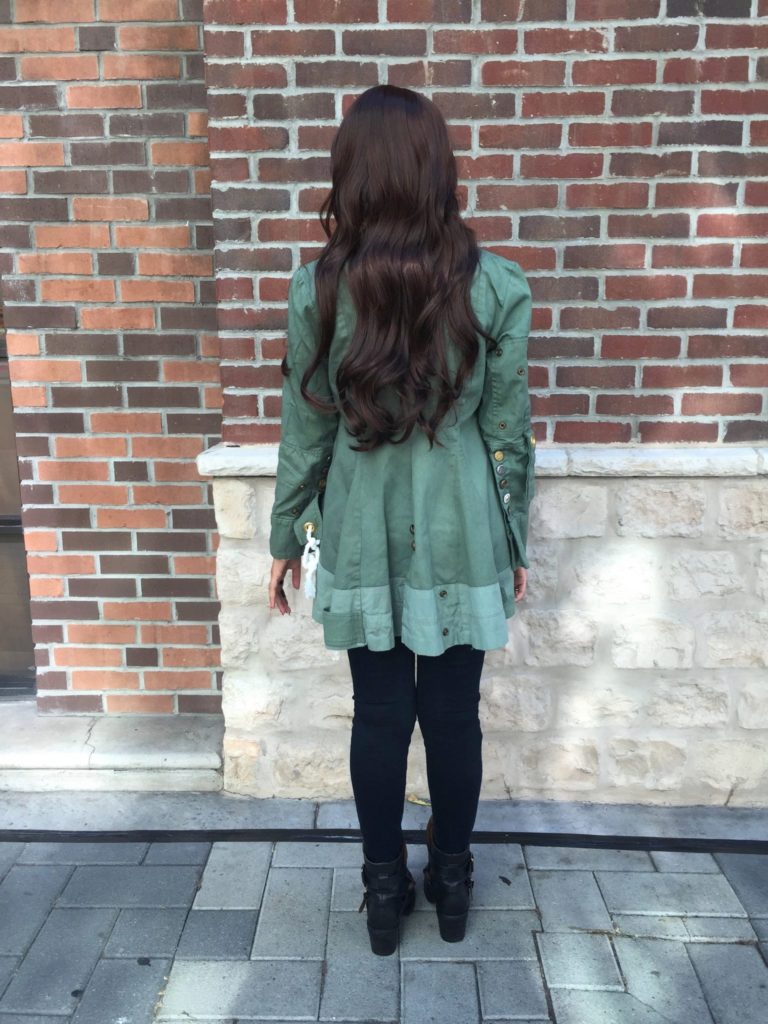
Here’s some pictures of the jacket in it’s natural habitat! I always love when I get photos of commissions in action!
SG_maximoff Jacket SG_maximoff jacket 2

Posted on Categories Commissions, project spotlightTags , , , , , , , 1 Comment

Belated Projects and Commissions #1 Spidey-Coat

I’ve decided to start a new category of posts basically featuring things I made in the past that I meant to blog about but didn’t because I thought I needed better photos or was lazy. Basically, I’m trying to work through the backlog of projects.

Project Spotlight

So Entry #1 – Spidey-Coat Commission

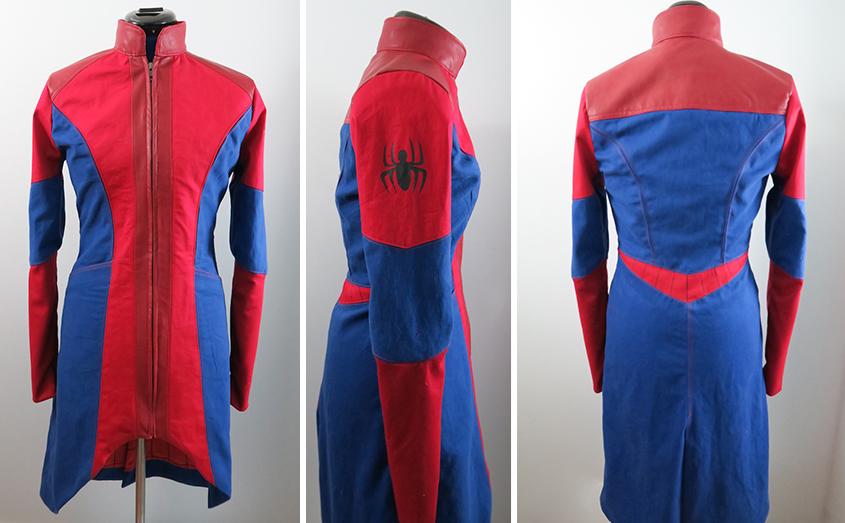
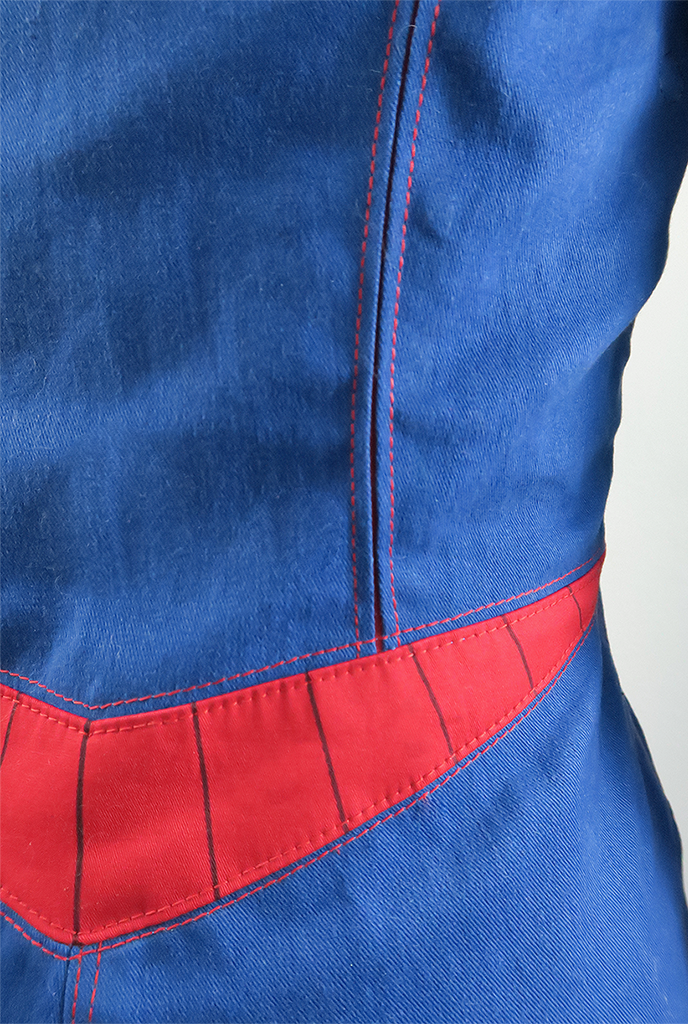
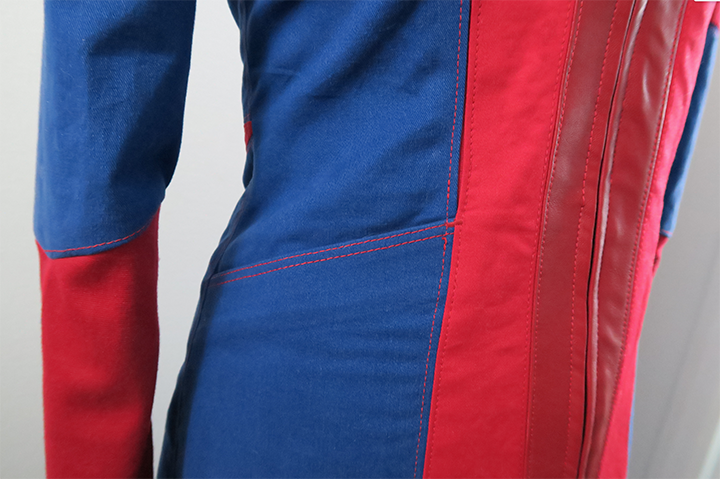
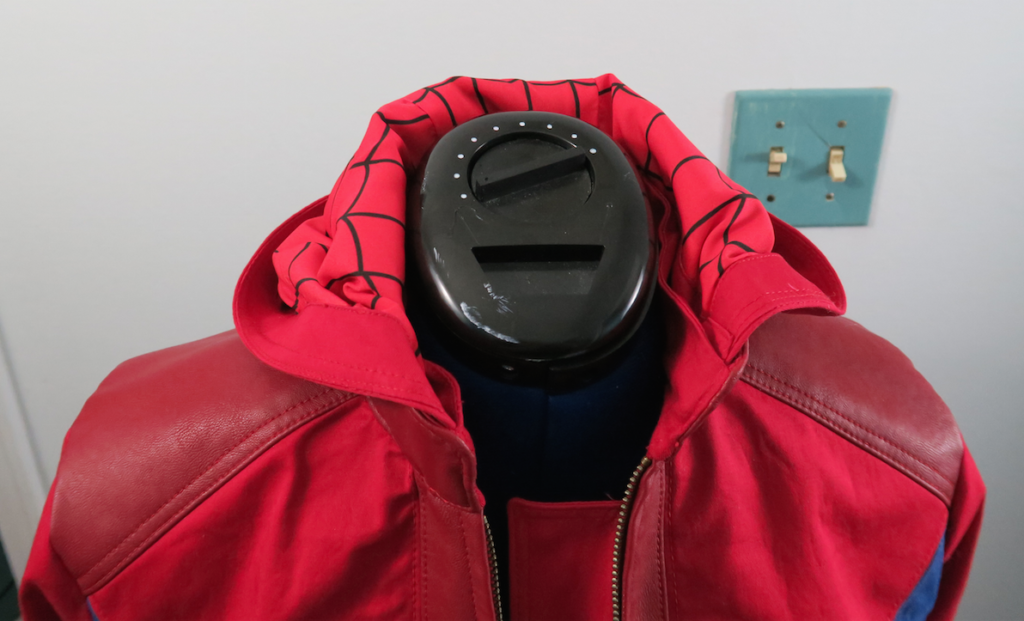
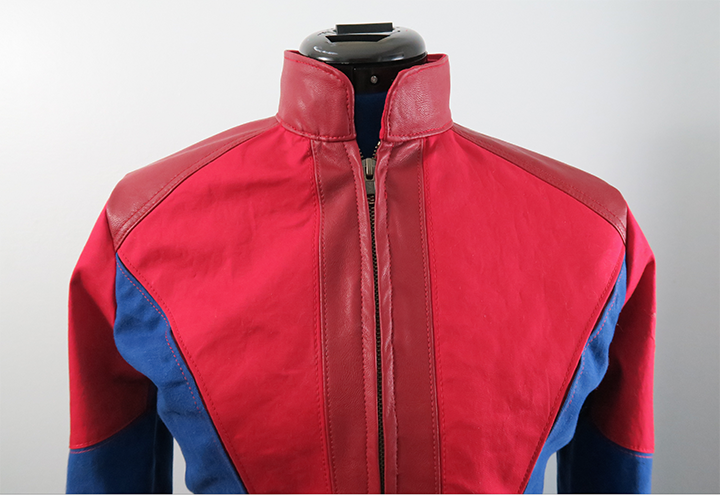
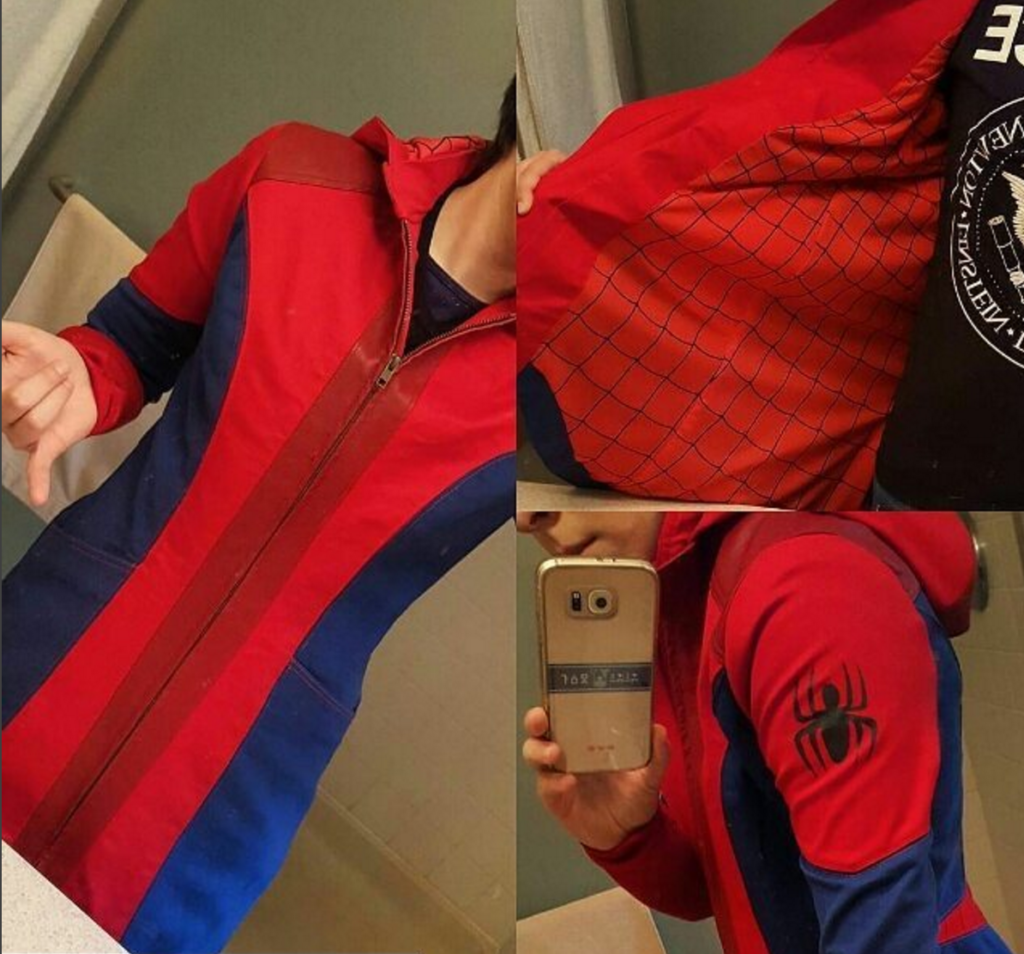
So this coat is the bees knees (or the spiders eggs?). I was contacted at the end of last year but the most amazing person who had a design in mind for a Spider-Man inspired coat. She sent me some drawings, I sent her back some more with some fabric options. I LOVE combining different types of textures in garments, and I loved that she was into it. Once we agreed on the design, I got working, and here’s some of the end results in picture form.

spideycoat image stripe

Some garment deets:

Fabrics used:

  • Red and Blue cotton twill fabric for the main body
  • Ponte knit for the sleeve bottoms
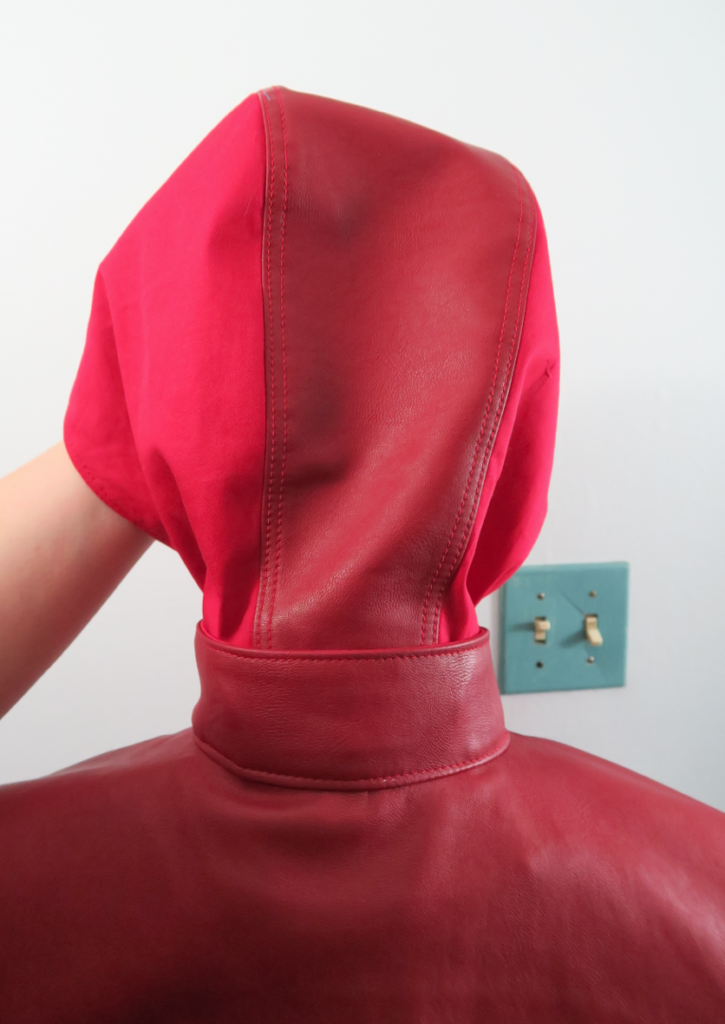
  • Perfecto faux leather (this stuff is amazing)
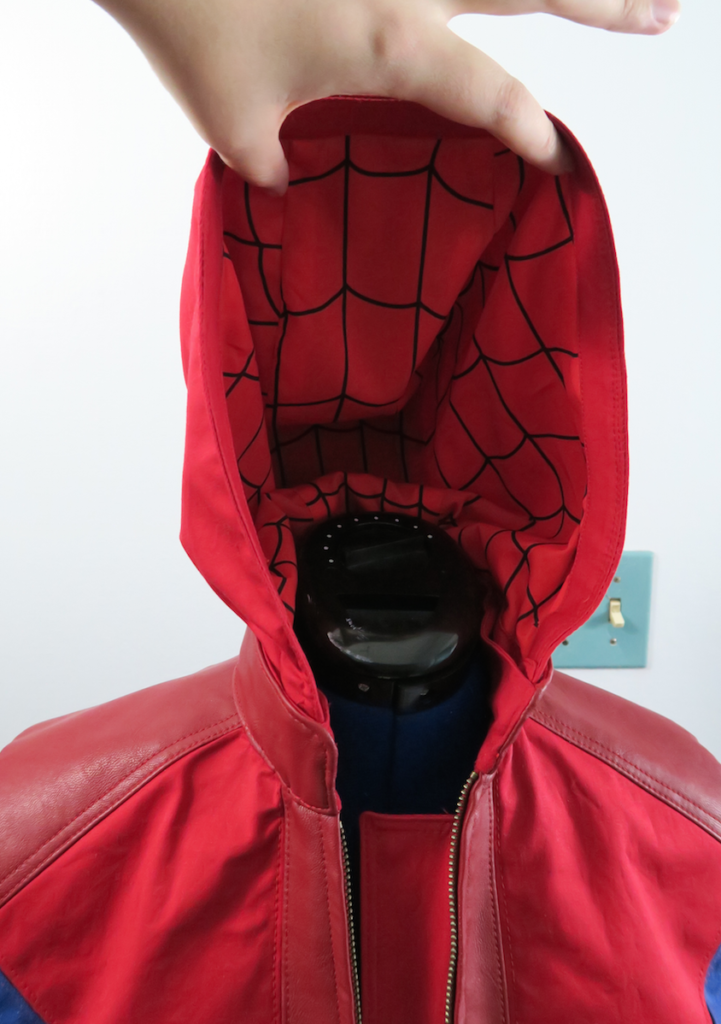
  • Crepe de Chine custom printed at Spoonflower for the lining

Cool jacket details:

  • For comfort and mobility, which seems like a given for any Spider-Man ANYTHING, I made slotted seams on the pertinent seams with some of the red ponte. I love the look, and how functional it can be.

Seams Geeky Cosplay Spider-Man coat

  • Oh! And red topstitching!
  • Thumbholes on the sleeves!
  • The hood is removable! It’s secured with hidden snaps in the collar so it can be taken off.

 Seams Geeky Cosplay Spider-Man coat


Seams Geeky Cosplay Spider-Man coat  Seams Geeky Cosplay Spider-Man coat

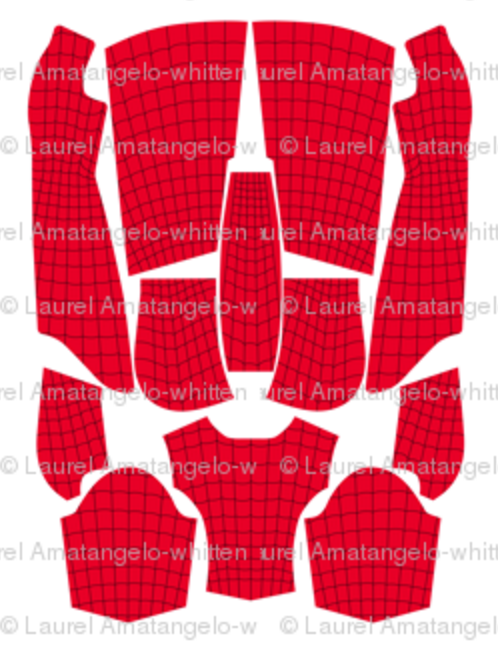
  • When I custom printed the lining, I actually scanned in the pattern pieces and designed every spiderweb pattern specifically for that piece. Lots of work, but worth it.


I mean, look at that?

And look how great it looks on her! Commissions are some of my most favorite things 😀
Seams Geeky Cosplay Spider-Man coat

Posted on Categories articles, Cosplay, Series, TutorialsTags , , , , , , , , 1 Comment

Cosplay Starter Kit: Planning your costume (Part 1 )

starterkit_1It’s love at first sight. You see it, you need it, you want to make and be inside that wonderful outfit. You love the character, you love everything about their costume and you’re ready to to get elbow deep in fabric, silicone, latex, Worbla whatever to make sure this beautiful vision you see becomes a reality. You stare at photos online, dreaming of what it would be like to put on those wings and show your love to the world.

It’s so easy to get excited and get lost in the process that things don’t turn out quite as you planned. Maybe the fabric isn’t right or it doesn’t fit how you wanted. You are convinced evenly distributed spray paint is a thing of myth. You’ve cried more times over something going wrong, and you have 2 days before you leave for the con, and you just cut two left sleeves out of your last bit of fabric. Or your clear coat won’t dry, or accidentally bleach half of your perfectly dyed fabric cleaning the washing machine…

I get it. I mean, I reeeallllyyy get it! Through trial and error, and working in a deadline focused industry, I’ve learned over the years how to properly plan a large project, and no project is larger than a cosplay (not true, but it feels that way).

Planning a costume is the most fun! I plan more costumes than I could manage to possibly make. It’s a process full of possibilities and excitement! And if you’re anything like me, you love finding out everything you can about the character, costumes, materials needed and reverse engineering how something might go together. But I’m no fool, It can also be really daunting if you’ve never done it before. Here at Seams Geeky we try to take as much confusion out of the process as possible. That means lots and lots of research and planning, including calendars and budget sheets.

Ok, first things first. You bought your con tickets and hotel a year in advance, and now you just need to figure out what to wear!

Figuring out what costume(s) you want to make 
Dig through your files (or pinterest boards), meditate, search your soul and determine what costume or costumes you want to make. Gather them all! Then start sorting through all of them and narrow it down.

First: Evaluate skill level.
This isn’t the end-all-be-all but you need to start with what you are comfortable with. Making a costume is great because you learn SO much each time you make something. What skills do you already posses? What skills are you confident in? What fabrics are you comfortable using?

Next: What skills do you want to learn?
Want to work with Worbla but never had before? Great! Never made a petticoat and want to learn? Fantastic! The best part of running into battle (and I consider every costume a battle) is it’s a trial by fire.

But you have to have time to learn. You’re probably not going to get it right the first time, so onto part 3:

What is your time line?
Do you have a whole year to make one costume? Do you have 2 months? Do you feel confident that you can learn what you need to in time, or will you be slapping it together at the end?

Now this one is optional: Think about your body image.
It’s a tough subject to talk about, especially with cosplay, so I want to be clear that I’m not saying throw out costumes because you’re worried you don’t have the same proportions. Screw that nonsense, wear what you want! What I’m saying is: If you think you need to lose 20 pounds before you can wear the cosplay, you should lose the 20 pounds (or be well on the way to losing it) before starting construction.

Tip sparkle rightI try to emphasize this with any custom garment I make:
A body can change a lot, by building muscle, by losing fat, so once you start making your costume, try to stay the same weight. The last thing you want is to have to take in 2 inches because now it doesn’t fit right. That’s a lot of last minute stress you don’t need.

I was talking to a client the other night about a costume, and she mentioned she wanted to lose some weight and I had to let her know that her costume would take about 2 months to make, so come July, she has to stop losing weight and stay the same size, otherwise she’ll risk the costume not fitting.

And finally, what is your most favorite that you HAVE to make right now? Because it’d be nice if the world was all puppies and rainbows and we did everything by the books, but sometimes passion completely wins out!

*Drum roll please*
My 2015 Cosplay list I put together the end of last year with a focus of getting several complete for DragonCon. Here’s why I chose each one per my narrowing parameters:

I’ve done a decent amount of comic cosplays in the past, and I was trying to diversify a bit this year. I originally wanted to do 1 Comic Character, 1 anime character, and 1 Video Game character. Cover my trifecta of geekiness. Somehow, though It ended up being very anime heavy. I don’t mind this, because anime is my FAVORITE, and it’s how the cards of fate fell.

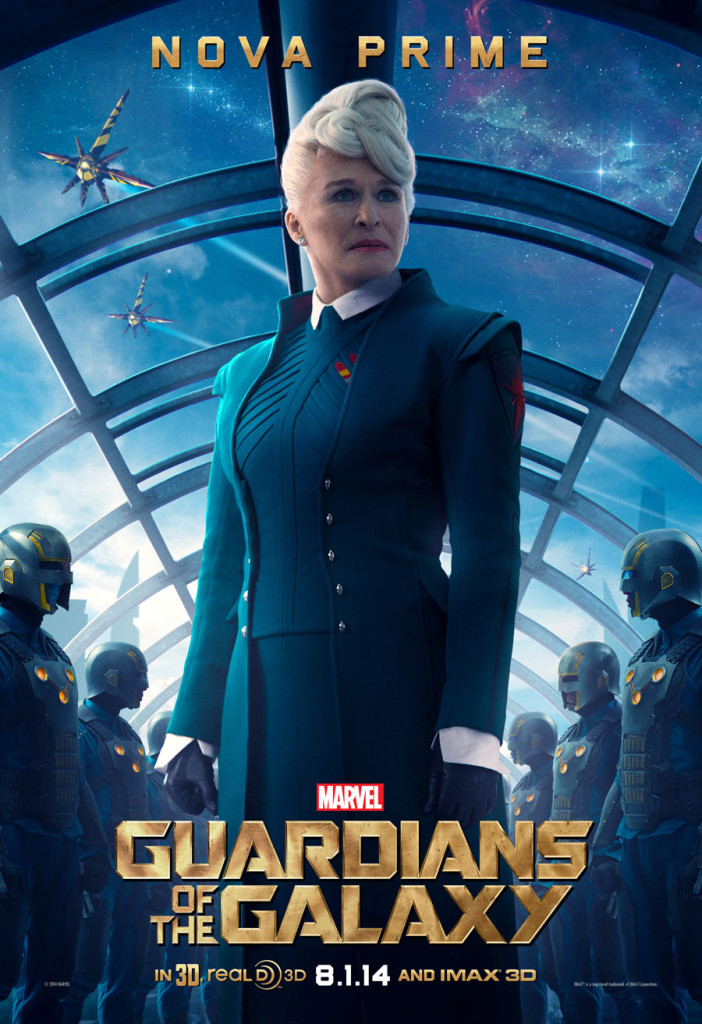
Nova Prime

gotg-bus-shelter-nova-prime-v1-lg-3c7d7

Why is that? I NEED TO MAKE IT. The second I saw Glenn Close walk on screen in the uniform, I knew it was destiny. That’s a #5. But I also know I can accomplish it. There’s going to be some pattern drafting, a little bit of molding and casting (enough to learn from, but not too much to feel overwhelmed. And if need be, I can do some last minute foam pieces), and I have a friend who’s going to style the wig. DONE!

Meryl and Milly:
trigun_mm0013

I’m REALLY excited about this because I get to cosplay with my bestie! The outfits are mostly sewn, so that’s in my wheelhouse. Plus, we are totally Meryl and Milly. It’s going to be great. I do have some apprehensions with the guns, but if the big stun gun doesn’t get made, it won’t kill the costume and there’s some derringer Air Softs out there in a crunch.

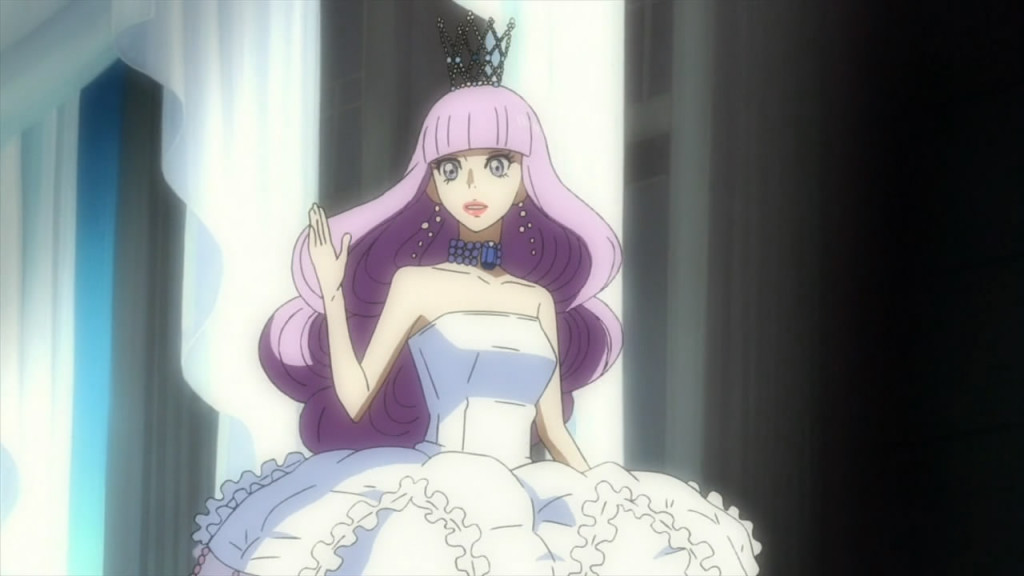
Kuranosuke from Princess Jellyfish:
Kuragehime - 11 - Large 23

If you haven’t caught on by now: Princess Jellyfish Forever (PJF). Also, I want that dress, and it’ll be fun to make without being too stressful. And I love Kuranosuke. I also think it’s funny to be  girl dressing as a boy dressing like a girl…

I had two optionals, but they needed to get set aside for another day. But then this came along:

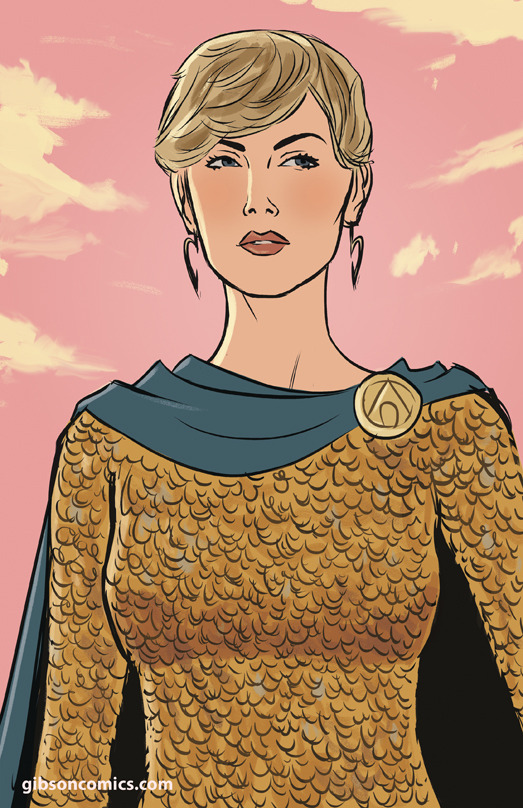
http://gibsoncomics.com/

That’s a combination of all things I love, genderbend, Aquaman, and a dream casting of Charlize Theron AS Aquaman. Plus, Jordan Gibson dress me the full body costume for costume reference because he’s awesome. I’ll also get to play with Worbla, which has been on my list a long time.

So I had to say goddbye to Kuranosuke. For now.

tumblr_static_cybj3308j1w8ocw4k08o0wcwc

Coming up in part 2: getting into the nitty gritty of costume specifics, plus a freebie for everyone!

What are your cosplay plans for the year? Do you have any apprenstions? I’d love to see what you plan on working on!


Posted on Categories UncategorizedTags , , , , , , , , , , , Leave a comment

Weekly round-up

Binding header

Guys, I’m not gonna lie: I’m really obsessed with Kimonos right now, so I’ll try to keep this roundup as Kimono-light as possible. Luckily, the husband and I saw the new Avengers: Age of Ultron last night, so it won’t be all Kimono all the time.

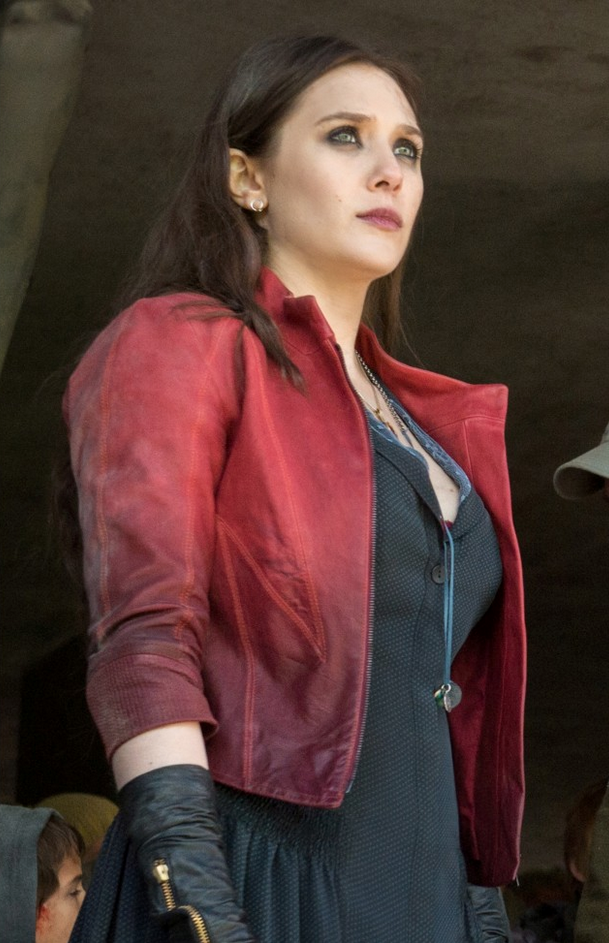
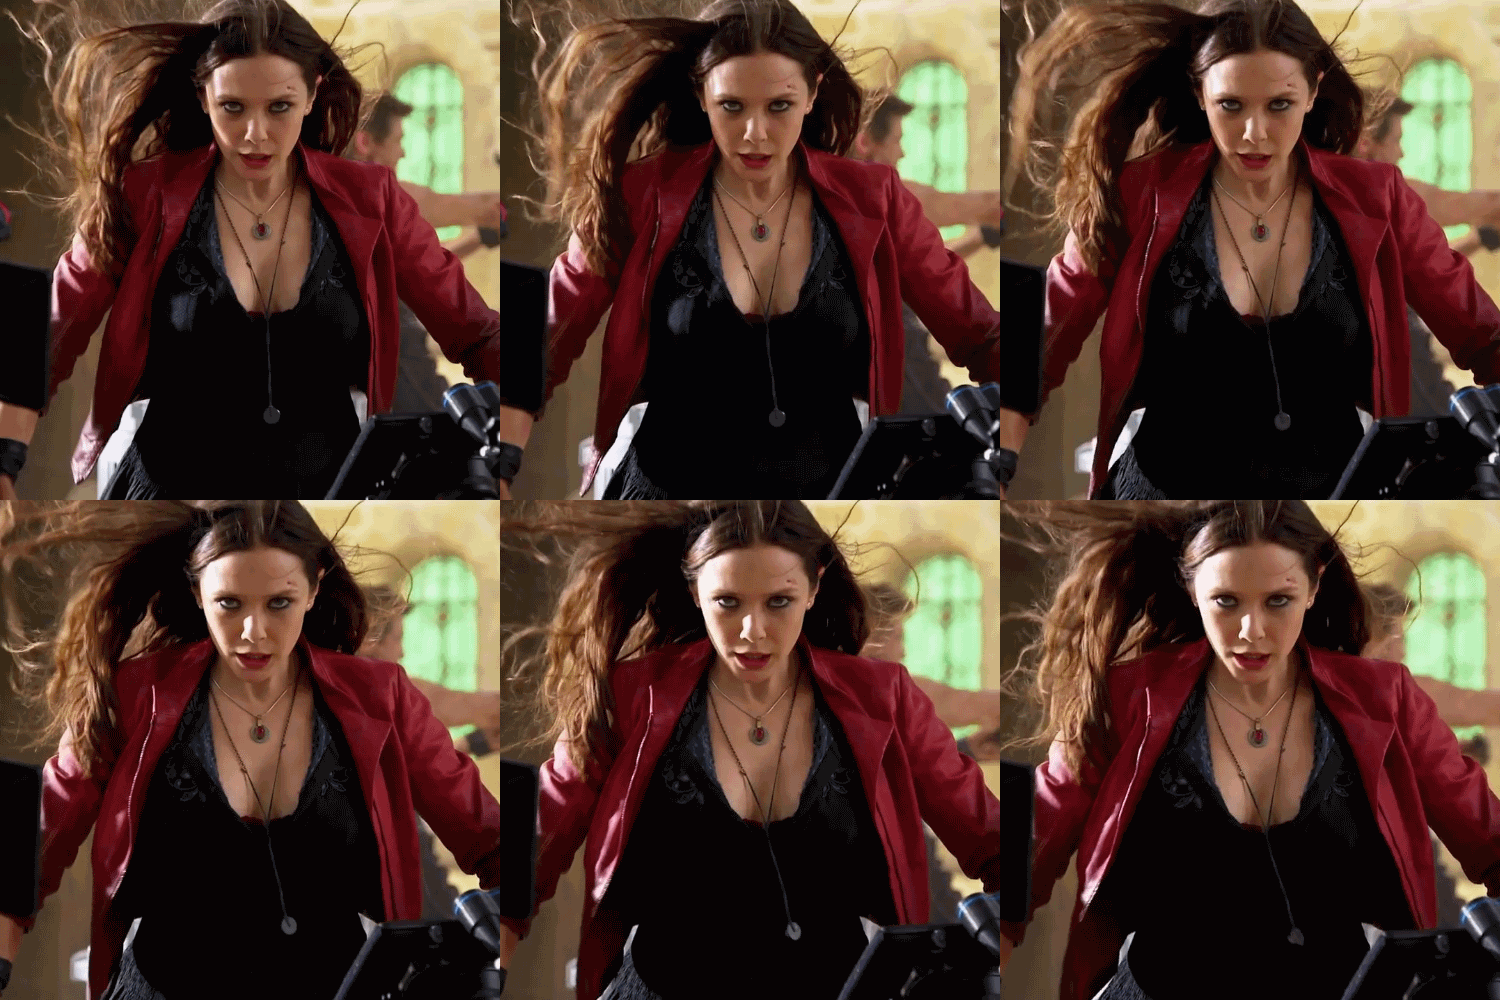
I know the pictures have been out awhile, but seriously, how great is that Ombré jacket Wanda wears?

Screen Shot 2015-05-01 at 10.10.07 AM

I’ve been spending a decent amount time trying to find Ombré leather dying tutorials online, and coming up with nada, but here’s a basic leather dying tutorial to get you started on experimenting. Thanks e-how! I’m pretty sure the rusty nail or the tea option is the best way to get an even ombré.

tumblr_nf2gn95F2y1qklq7jo1_500

Just love the Ombré look but not comfortable working with leather? Why not ombré a cotton twill then wax it? Costume designer Alexandra Byrne (my personal costuming hero and costume designer for a good share of the Marvel movies including Age of Ultron) has used a variety ways giving wovens unique finishes to emulate and pair with leather.

How to Ombré dip dye

Otter Wax tutorial video

I’ve done a lot (and I mean A LOT) of research concerning kimonos in a very short period of time. Did you know most Kimono silk is still hand painted? And you have to apprentice for a minimum of 7 years! It’s a process called Yuzen, and it’s really impressive to watch.

I’ve been watching Death Parade (stupid name, really interesting anime). The opening song is so much fun and is done by a band named Bradio. Here’s it is to jump start your weekend! Have a great one!