UPDATE! Scroll to the bottom to see the finished jacket on it’s owner!

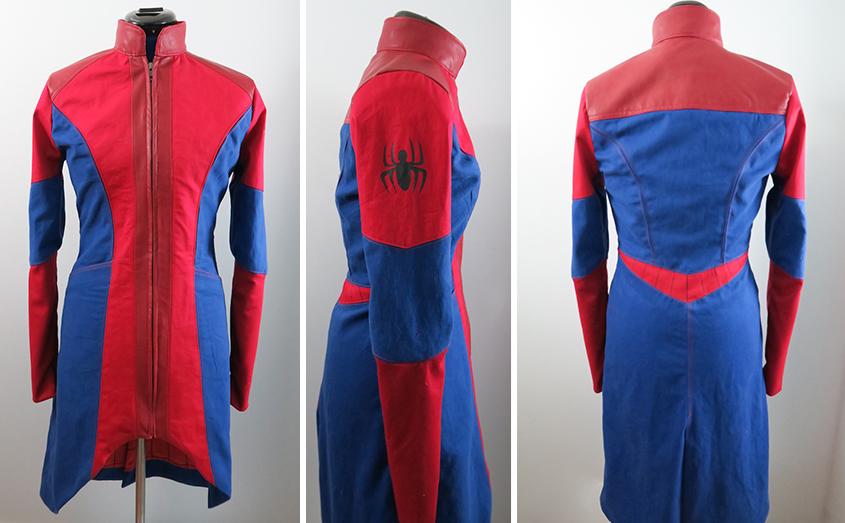
This jacket, besides being awesome, is very special to me. I was commissioned for this jacket earlier this year to be worn as SDCC. And, of course, was commissioned before Civil War had come out, so there was a lot of research to do be done on my end with some very fuzzy photographs.

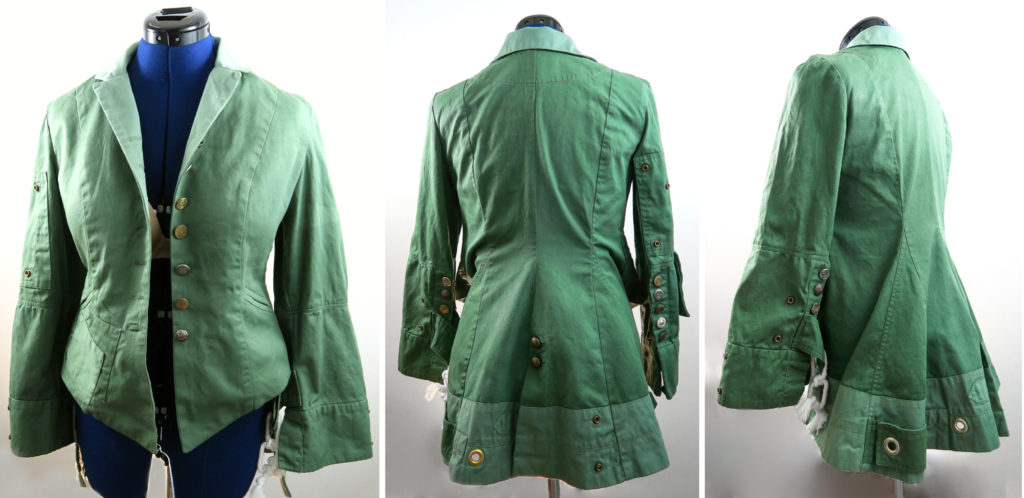
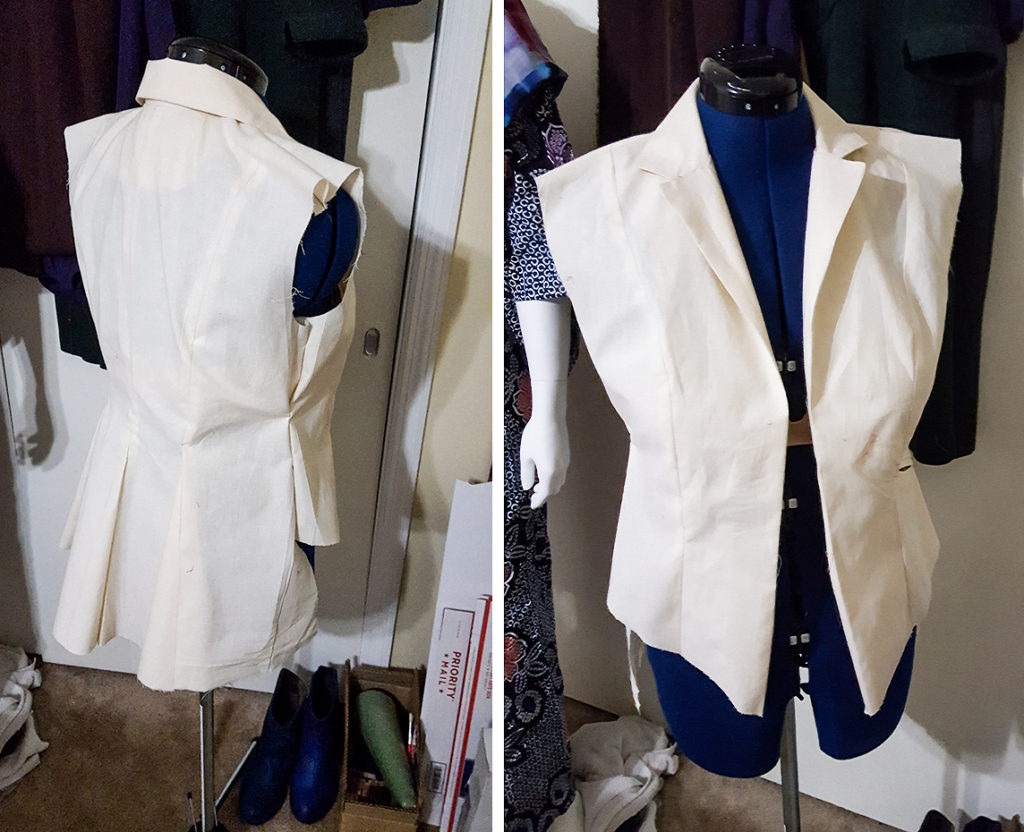
But what makes this jacket so special is that this was the first pattern I drafted digitally using Adobe Illustrator. I managed to spend a good amount of time earlier this year teaching myself the fundamentals of flat-patterning, vs my usual “winging it,” and it was really nice to be able to put that knowledge into action. I’m sure at one point I’ll go into my adventures of flat patterning. Also, I was amazed how much easier this garment went together. I think it’s because I spent a lot more thinking about it’s construction as I was designing it and concentrating on the details.
Of course I mocked up a quick muslin just to make sure it fit like I wanted.
Alright, the important deets (and some larger jacket images):
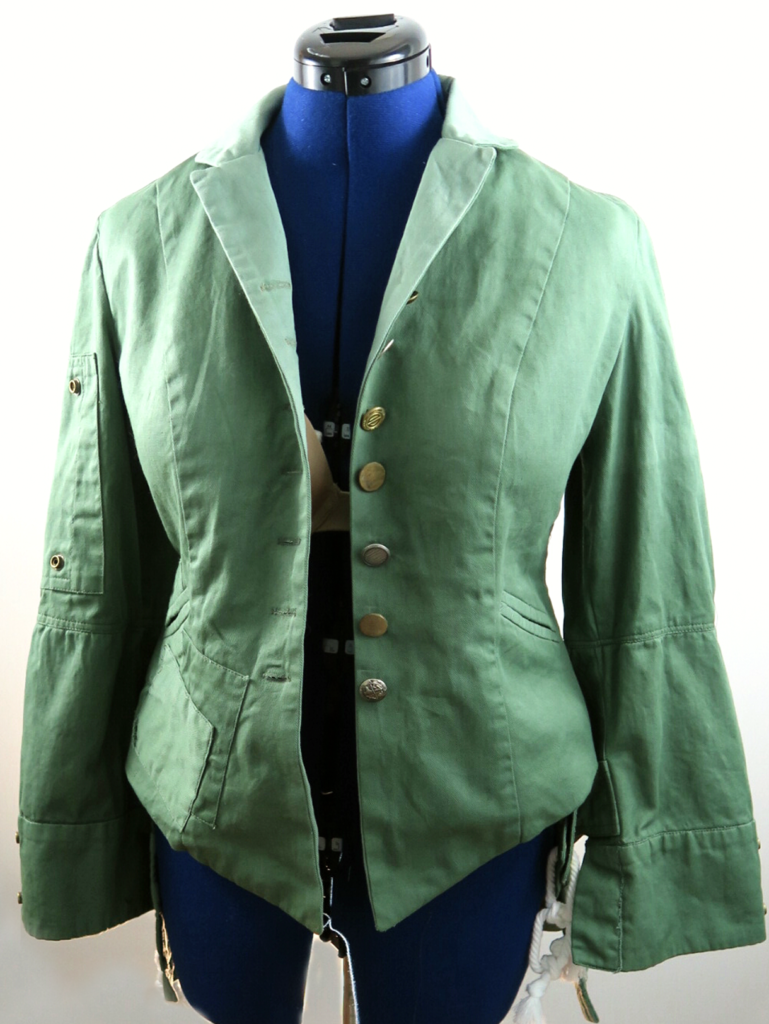
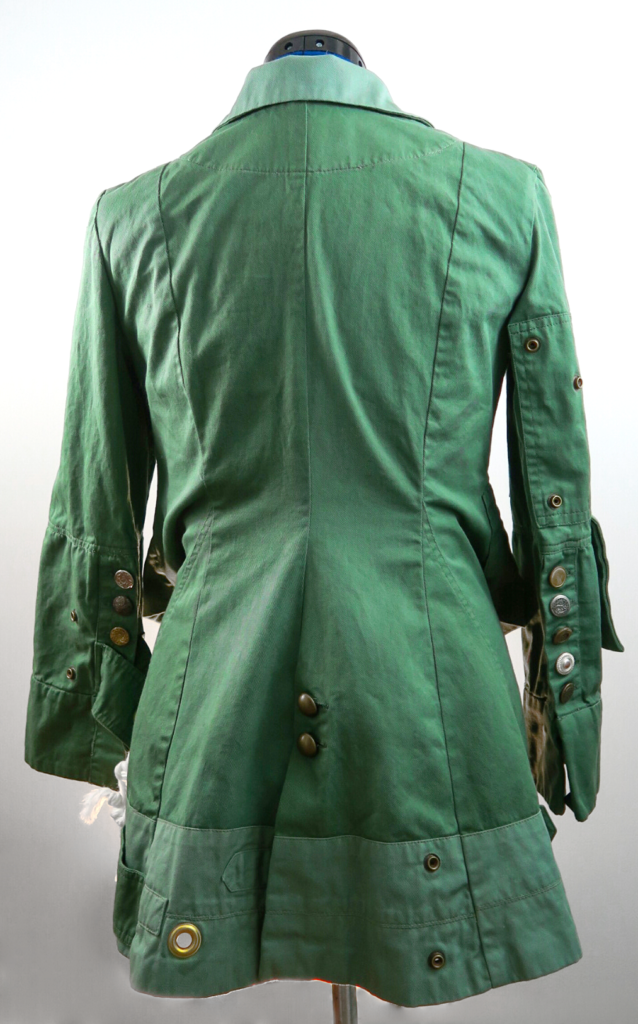
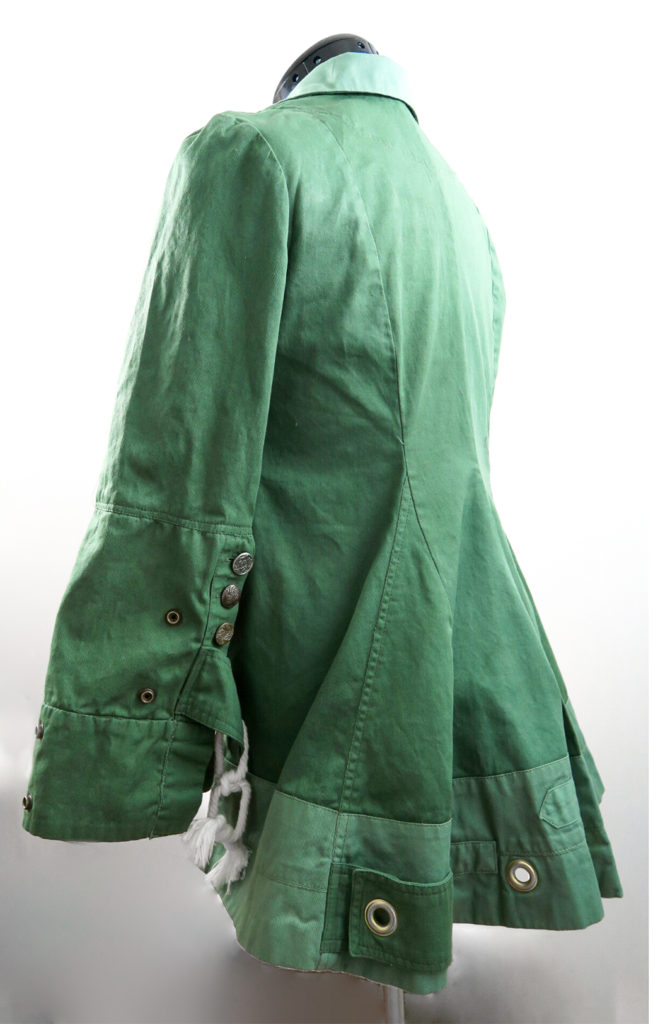 For some reason those pictures turned out way green. The colors below are way more accurate. C’est la Vie.
- Jacket is unlined and made with cotton twill which was custom dyed with Procion dyes from Dharma Trading Co. I hemmed it with a blind hem stitch and dyed rayon hem binding (aka, the SHIZZ! This is my favorite way to hem).
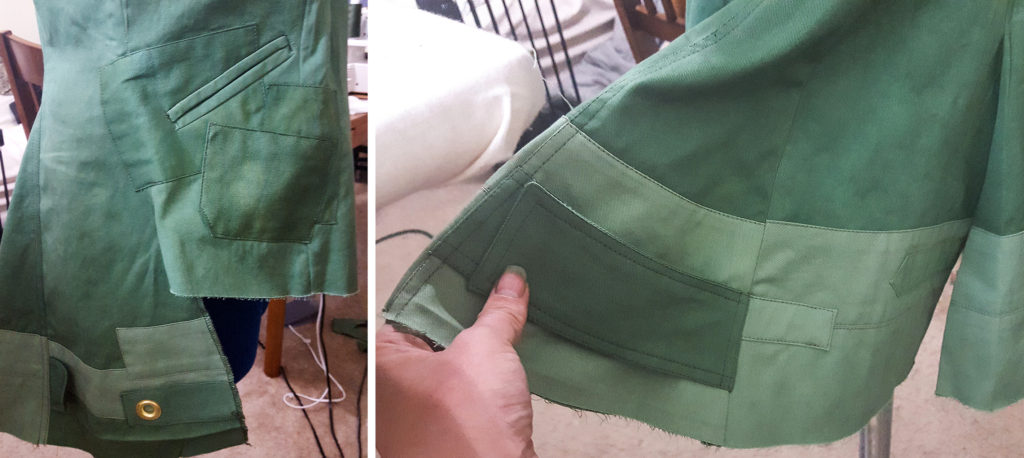
I used a mix of Muir Green, Sage, Wasabi, and Olive. I love the way the different toned fabrics work together. I’d give a specific mixture I used for the different colors, but there was a lot of mixing and layering of colors until I was happy with it. And then when it was done, I gave it a quick all over dye bath with a very watered down olive to unify the colors a bit. This also helped bring out some the areas that I distressed.
I cut out and dyed all the pieces specifically for their color which also did a great job of making the jacket look a bit weathered, plus I did a bit of distressing at the end.
- The jacket has a bunch of mismatched buttons like the one in the movie, and I did my best to try and match the patterns and tones. Most of the buttons are vintage metal buttons (I bought a 1 lb bag on etsy) with the exception of a few I picked up while in Dallas When we went to see Hatsune Miku! Squee!
When I got the lot in, I dug through all of them looking for buttons I liked, then refined for the same size, then cleaned those, then organized them so my client could pick the ones she wanted if she liked. She opted for me to pick out which ones to use.
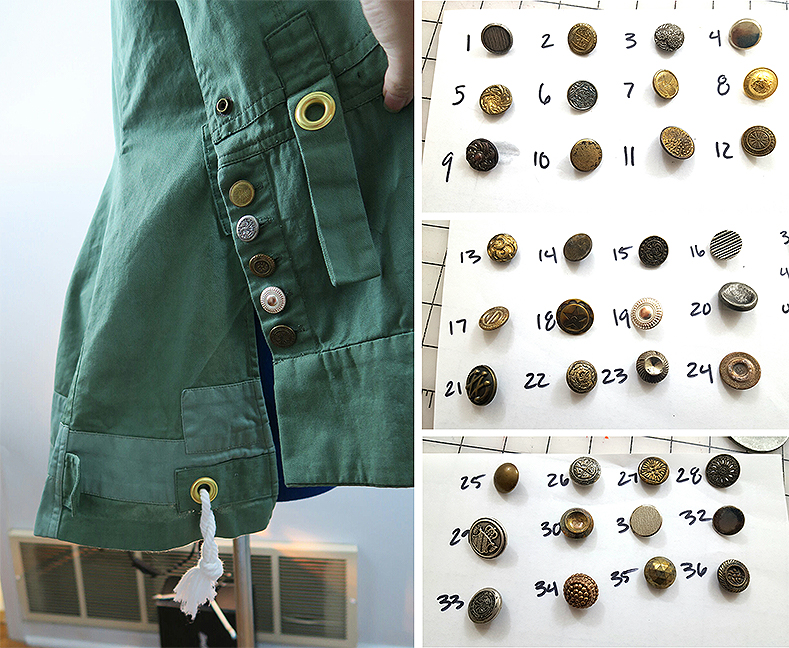
- I used 1/2 in brass grommets on the back of the jacket. Originally I purchased some 1 inch antique copper grommets from china, but as I studied the photos more, I realized these were actually brass, and the 1 inch seemed too large in the end.

The sleeves have these metal rivet looking pieces. I ended up using one half of a heavy duty snap. Let me tell you, a heavy duty antique copper snap with just the right looking “male part” was ridiculously hard. I ended up finding some on eBay. Bless eBay.
• Lots and LOTS of topstitching.
• This jacket is deceptively asymmetrical. Both sleeves are similar but assembled differently with different detailing. The same went for the back And the front areas by the pockets.
I really think it turned out beautifully, and kind of wish it was my size so I could have kept it.
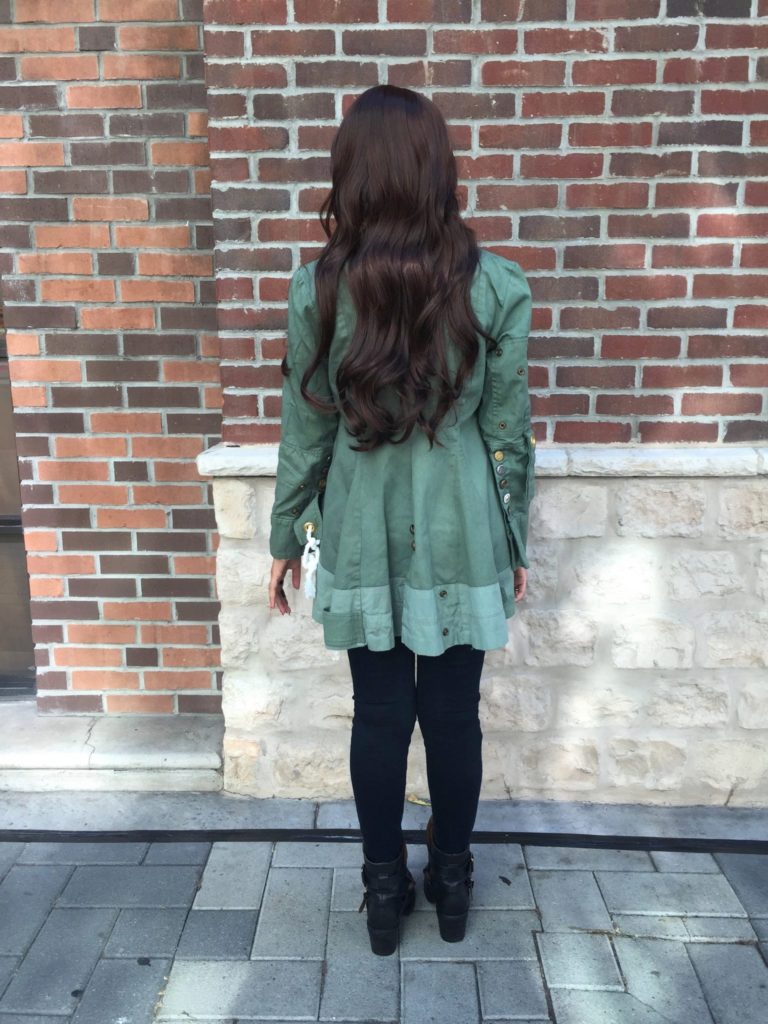
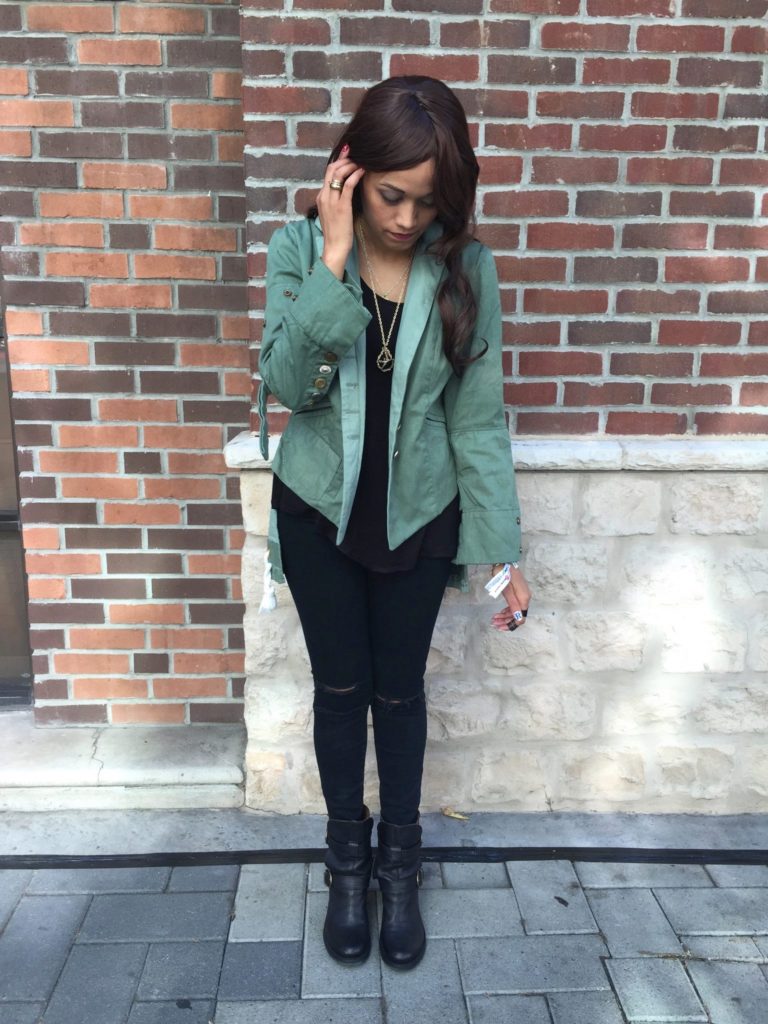
UPDATE!
Here’s some pictures of the jacket in it’s natural habitat! I always love when I get photos of commissions in action!