UPDATE! Scroll to the bottom to see the finished jacket on it’s owner!
This jacket, besides being awesome, is very special to me. I was commissioned for this jacket earlier this year to be worn as SDCC. And, of course, was commissioned before Civil War had come out, so there was a lot of research to do be done on my end with some very fuzzy photographs.
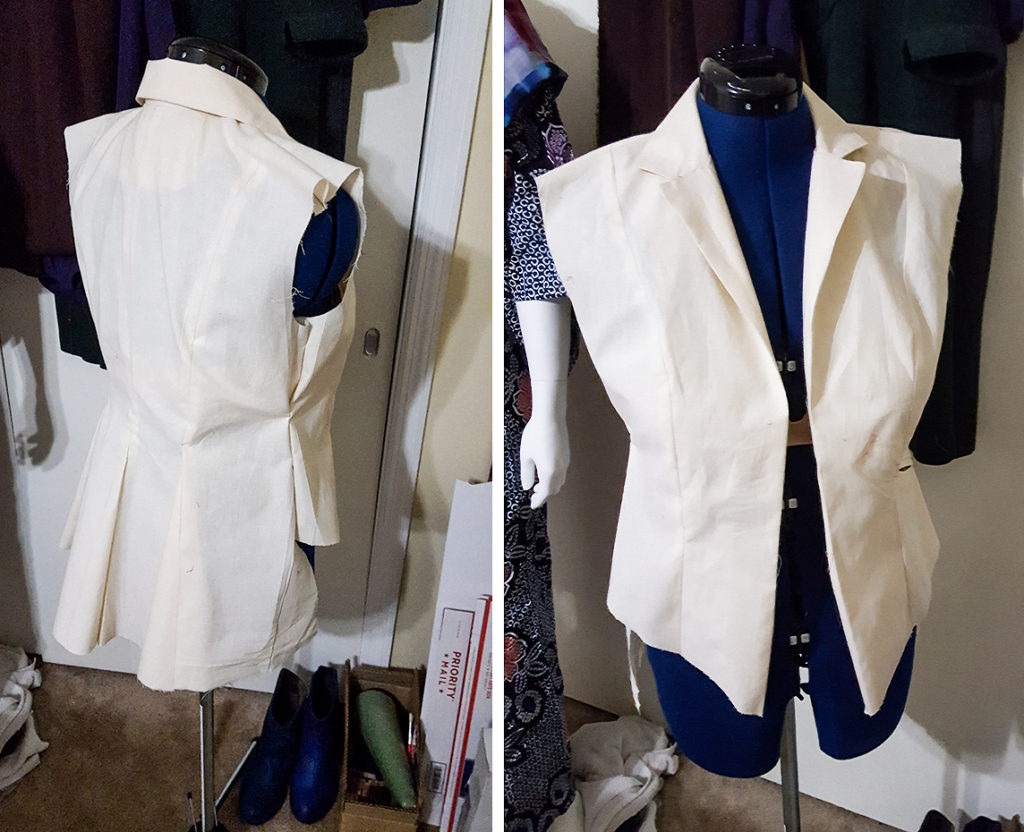
But what makes this jacket so special is that this was the first pattern I drafted digitally using Adobe Illustrator. I managed to spend a good amount of time earlier this year teaching myself the fundamentals of flat-patterning, vs my usual “winging it,” and it was really nice to be able to put that knowledge into action. I’m sure at one point I’ll go into my adventures of flat patterning. Also, I was amazed how much easier this garment went together. I think it’s because I spent a lot more thinking about it’s construction as I was designing it and concentrating on the details.
Of course I mocked up a quick muslin just to make sure it fit like I wanted.
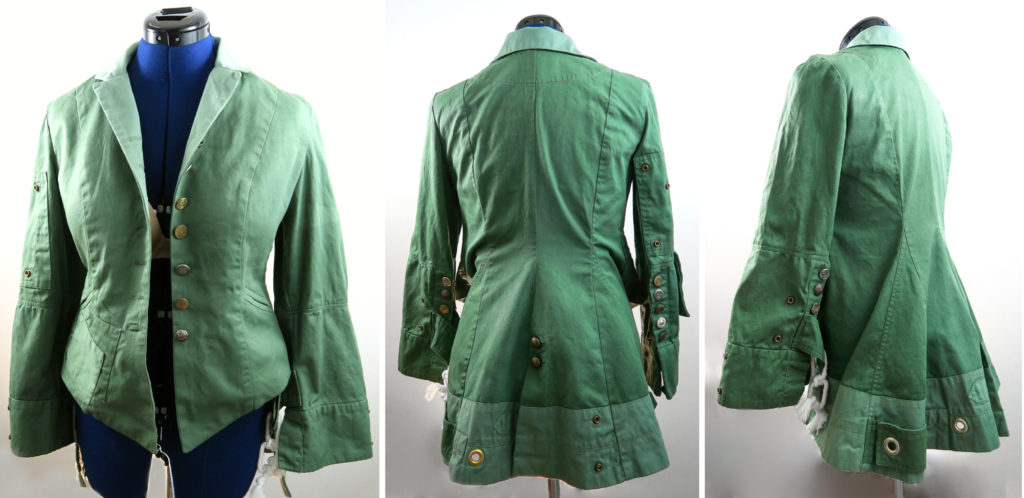
Alright, the important deets (and some larger jacket images):
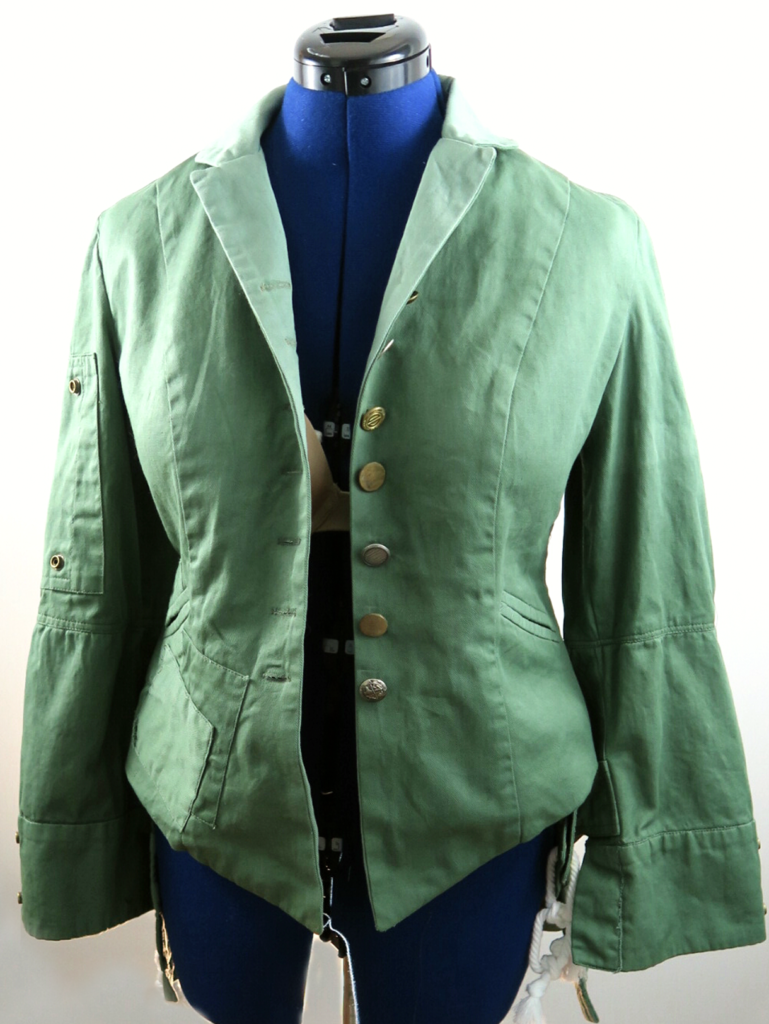
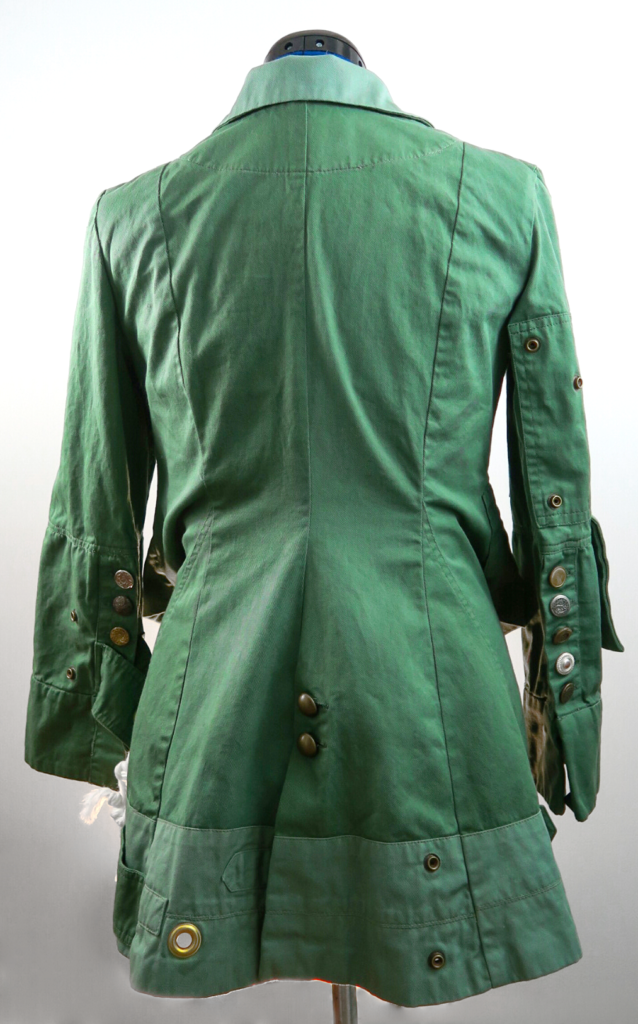
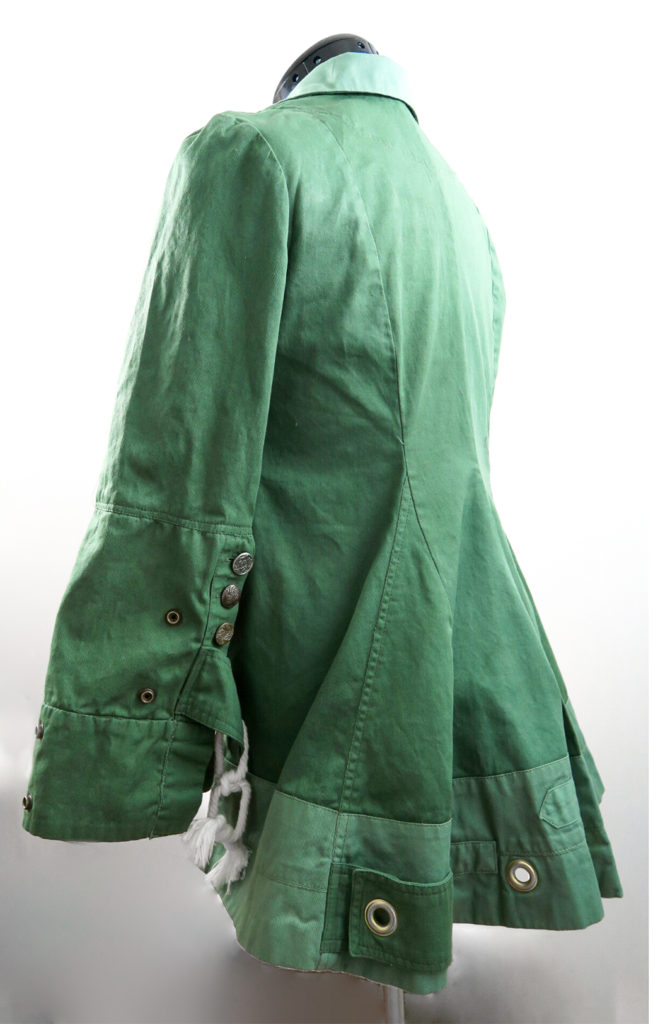
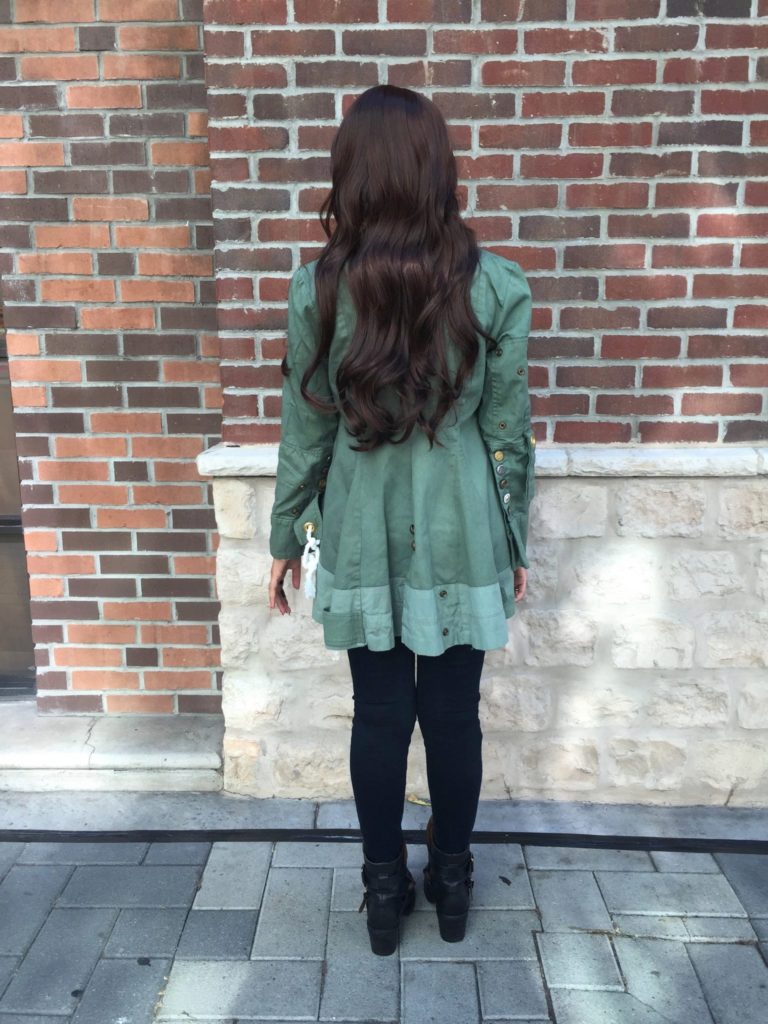
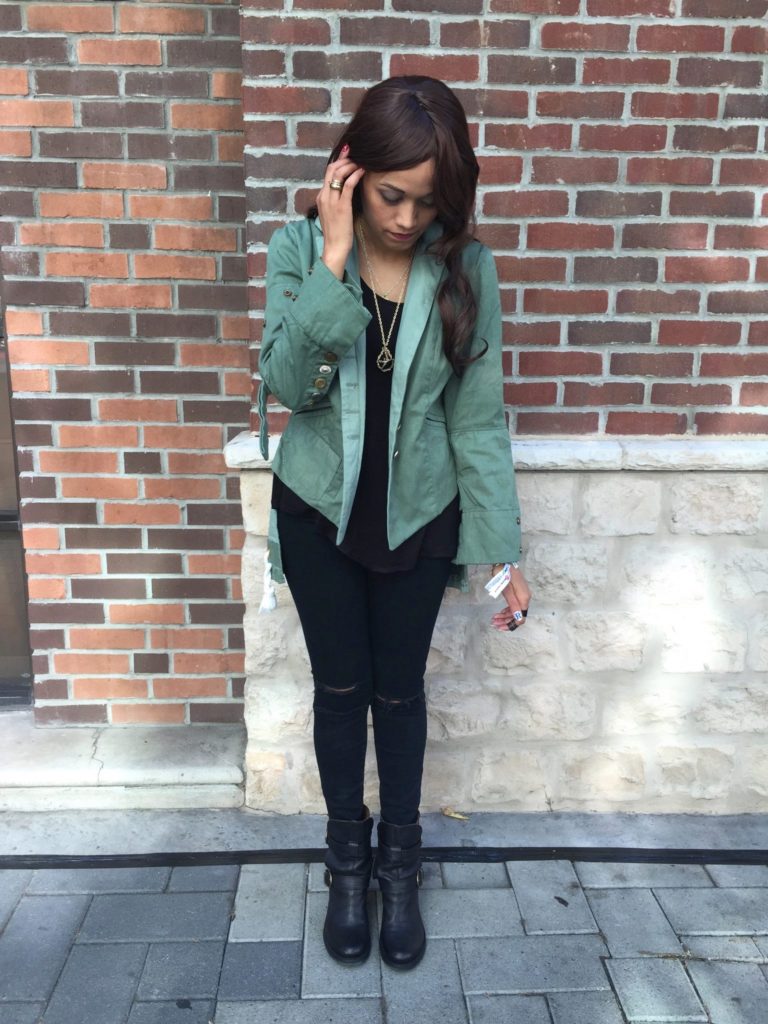
For some reason those pictures turned out way green. The colors below are way more accurate. C’est la Vie.
Jacket is unlined and made with cotton twill which was custom dyed with Procion dyes from Dharma Trading Co. I hemmed it with a blind hem stitch and dyed rayon hem binding (aka, the SHIZZ! This is my favorite way to hem).
I used a mix of Muir Green, Sage, Wasabi, and Olive. I love the way the different toned fabrics work together. I’d give a specific mixture I used for the different colors, but there was a lot of mixing and layering of colors until I was happy with it. And then when it was done, I gave it a quick all over dye bath with a very watered down olive to unify the colors a bit. This also helped bring out some the areas that I distressed.
I cut out and dyed all the pieces specifically for their color which also did a great job of making the jacket look a bit weathered, plus I did a bit of distressing at the end.
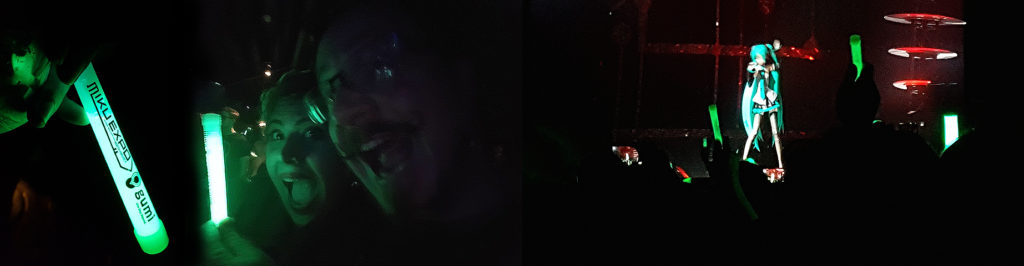
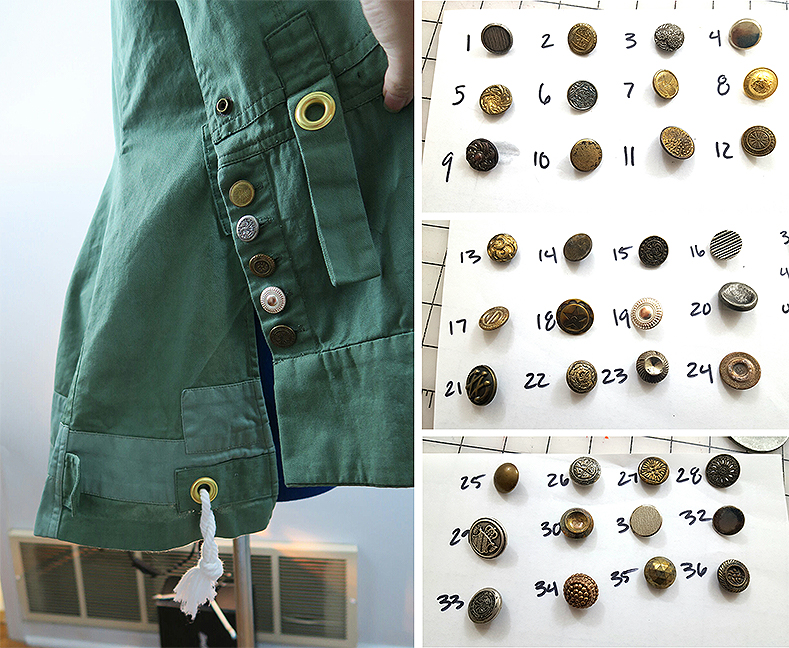
The jacket has a bunch of mismatched buttons like the one in the movie, and I did my best to try and match the patterns and tones. Most of the buttons are vintage metal buttons (I bought a 1 lb bag on etsy) with the exception of a few I picked up while in Dallas When we went to see Hatsune Miku! Squee!
When I got the lot in, I dug through all of them looking for buttons I liked, then refined for the same size, then cleaned those, then organized them so my client could pick the ones she wanted if she liked. She opted for me to pick out which ones to use.
I used 1/2 in brass grommets on the back of the jacket. Originally I purchased some 1 inch antique copper grommets from china, but as I studied the photos more, I realized these were actually brass, and the 1 inch seemed too large in the end.
The sleeves have these metal rivet looking pieces. I ended up using one half of a heavy duty snap. Let me tell you, a heavy duty antique copper snap with just the right looking “male part” was ridiculously hard. I ended up finding some on eBay. Bless eBay.
• Lots and LOTS of topstitching.
• This jacket is deceptively asymmetrical. Both sleeves are similar but assembled differently with different detailing. The same went for the back And the front areas by the pockets.
I really think it turned out beautifully, and kind of wish it was my size so I could have kept it.
UPDATE!
Here’s some pictures of the jacket in it’s natural habitat! I always love when I get photos of commissions in action!
I’ve decided to start a new category of posts basically featuring things I made in the past that I meant to blog about but didn’t because I thought I needed better photos or was lazy. Basically, I’m trying to work through the backlog of projects.
So Entry #1 – Spidey-Coat Commission
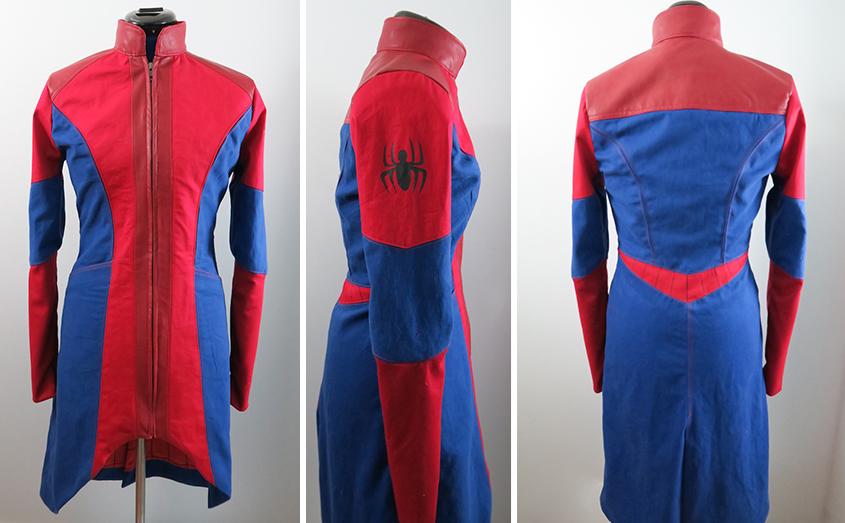
So this coat is the bees knees (or the spiders eggs?). I was contacted at the end of last year but the most amazing person who had a design in mind for a Spider-Man inspired coat. She sent me some drawings, I sent her back some more with some fabric options. I LOVE combining different types of textures in garments, and I loved that she was into it. Once we agreed on the design, I got working, and here’s some of the end results in picture form.
Some garment deets:
Fabrics used:
Red and Blue cotton twill fabric for the main body
Ponte knit for the sleeve bottoms
Perfecto faux leather (this stuff is amazing)
Crepe de Chine custom printed at Spoonflower for the lining
Cool jacket details:
For comfort and mobility, which seems like a given for any Spider-Man ANYTHING, I made slotted seams on the pertinent seams with some of the red ponte. I love the look, and how functional it can be.
Oh! And red topstitching!
Thumbholes on the sleeves!
The hood is removable! It’s secured with hidden snaps in the collar so it can be taken off.
When I custom printed the lining, I actually scanned in the pattern pieces and designed every spiderweb pattern specifically for that piece. Lots of work, but worth it.
I mean, look at that?
And look how great it looks on her! Commissions are some of my most favorite things 😀
And while I’m not apologizing about it, I feel the need to explain myself.
1) I am SUPER bad about taking good pictures of the things I make. Mostly because it’s normally dark out when I finish projects, or my roots are really bad, or I haven’t figured out the whole “take the pictures by myself” thing and am too embarrassed to ask my husband to take them. This means I also tend to not get good costume pictures in the process.
I will however post about my Bulma because I have tons of pictures of her (even if they are casual shots and nothing fancy). Because she’s my favorite.
2) I’m not really doing any cosplay for myself this year, but taking on quite a few commissions. They are mostly commissions where I’m only doing a piece or two for it, so it’s really nothing to write home about.
3) For at least the last year I’ve been suffering from pretty bad depression, and in the process finding out I am most likely manic depressive (which makes complete sense now, looking back on things). All this is something I never realized before because I thought it was normal. That’s the scary part about depression, you get so used to it, you don’t realize it’s even there. And it normally takes an outside person to help you. But I didn’t have energy, I felt trapped, my already low self-esteem was really in the dumpster, and struggling with a lot of body issues. I basically wanted to disappear.
And when you feel that way, blogging just seems like too much.
Luckily, I started seeing doctors back in February, and finally feel up blogging. And by “up to blogging” I mean I’ve totally missed it.
I know I am dreadfully behind on updating everyone on projects. What can I say, it’s been one heck of a summer with a bunch of back-to-back projects. I am only now, nearly a month later, recovered from Dragon Con and I’m working on some posts outlining the costumes I made. Plus, I know you’ve been waiting on the edge of your seats for 3 months for shots of that wedding dress I made.
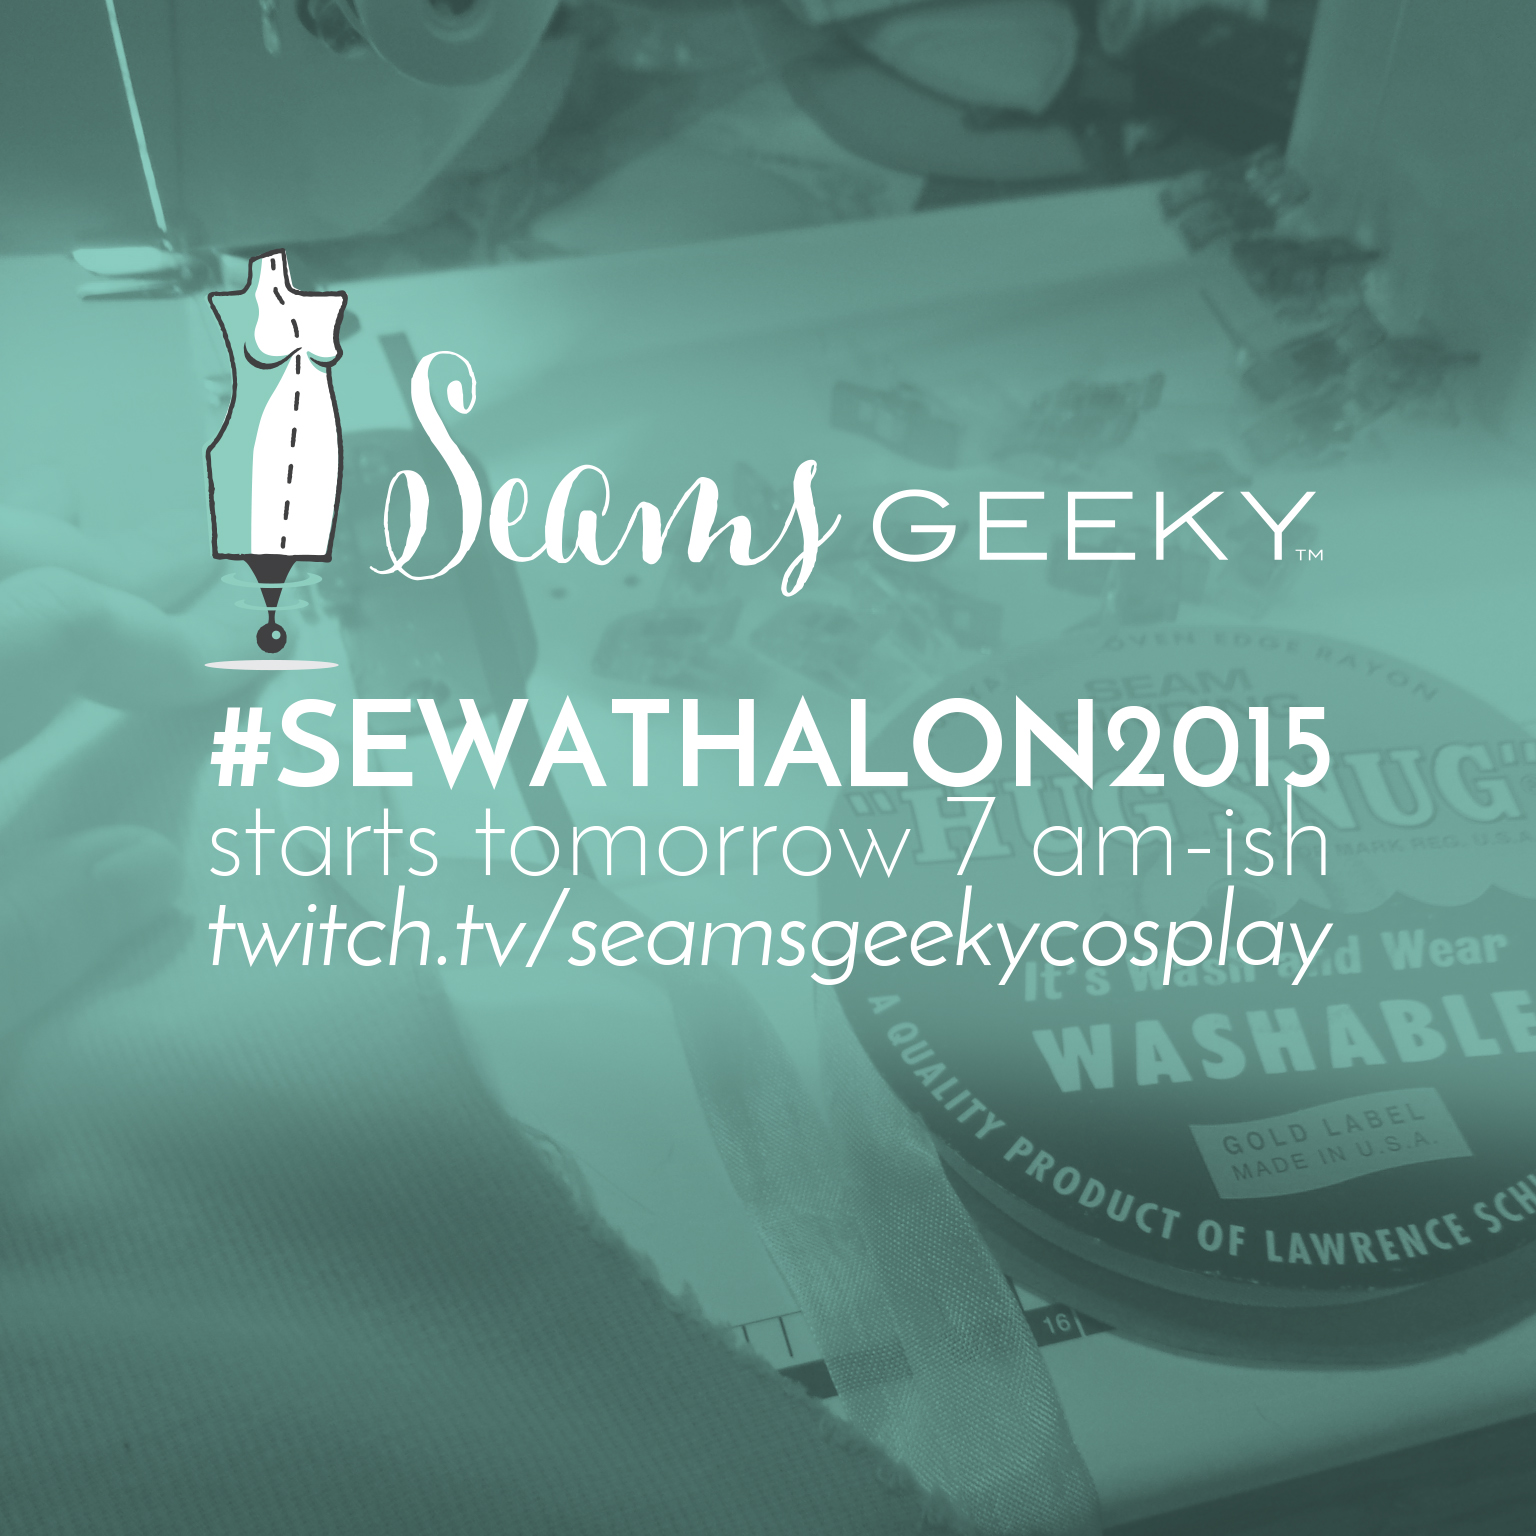
But for more exciting news! I’m going to try and get into this crazy world of streaming (most likely for a few hours every week), and to jumpstart the crazy streaming train I’ll be streaming my “sewathalon” which basically means I’m going to try and cram in as many of the projects I planned to make over the summer into one day (some are geeky, some are not). It’ll be a trial by fire, and I’m sure the cats will entertain you while they demand attention while I’m trying to iron.
So tune in tomorrow on twitch! I’m planning on starting around 7 am (CST) and going until I drop (which is usually around 2 am.) And I have few patterns to give away as well!
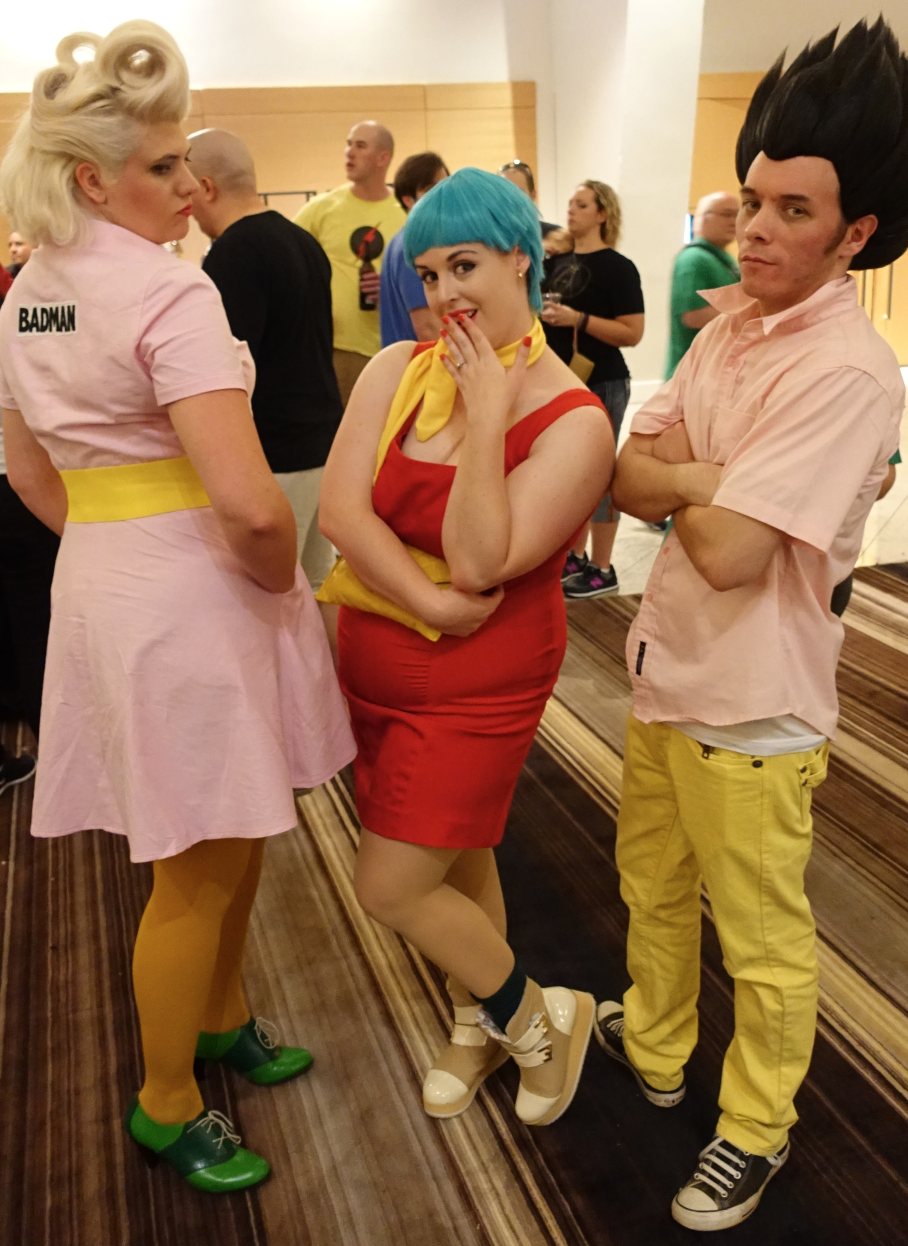
I’ll leave you with a little peak of my Badman dress.
By the way, isn’t that Bulma adorable?
Sometimes you just need an embroidered patch. A lot of the time the internet will provide, and other times, you just gotta take matters into your own hands.
I enjoy embroidery, but not enough to do it with any frequency. And I’d love an embroidery machine, but with 5 sewing machines already, and table space for only 3 at a time, adding an embroidery machine to the mix, plus that learning curve and the price tag, makes the probability of an embroidery machine low. So we gotta take it back old school.
I do not consider myself someone who does a lot of needlework. I don’t embroider on a daily, weekly, or even yearly basis. In fact, the last time I embroidered anything was close to 7 years ago when I just HAD have a Venture Industries patch, before they started making Venture Industry patches.
Vaguely related side note, have y’all been watching Otaku Teacher? I feel as though I also have YD in respect to crafting. I only do what I yearn to do, and let me tell you, there are very few crafts I enjoy so much I want to do them all the time.
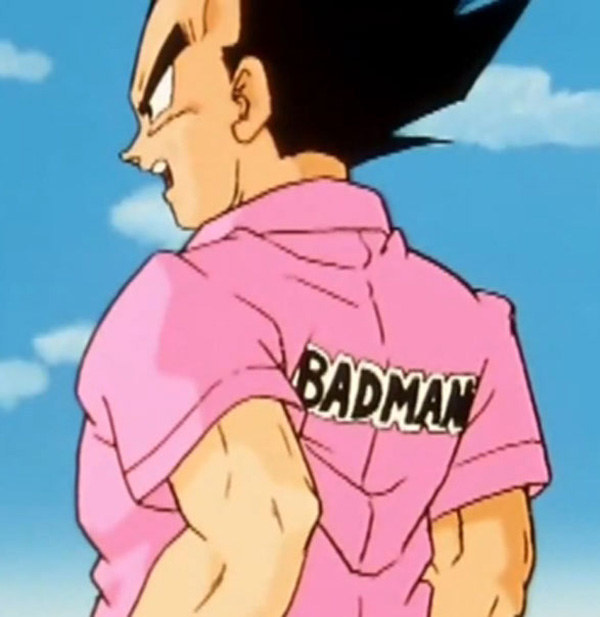
Random story: So I’m really into Dragon Ball Z right now. Anyone that follows my social media channels knows this painfully obvious, so this tutorial will feature the BADMAN patch that will find it’s way on something pink sometime in the future.
Because my anime boyfriend wears it. And Vegeta is leader of my anime boyfriend reverse harem.
Making a Patch with Hand Embroidery and a Sewing Machine
Materials Needed:
Fabric for embroidery/patch
Embroidery floss and needles
Interfacing (optional)
Embroidery hoop
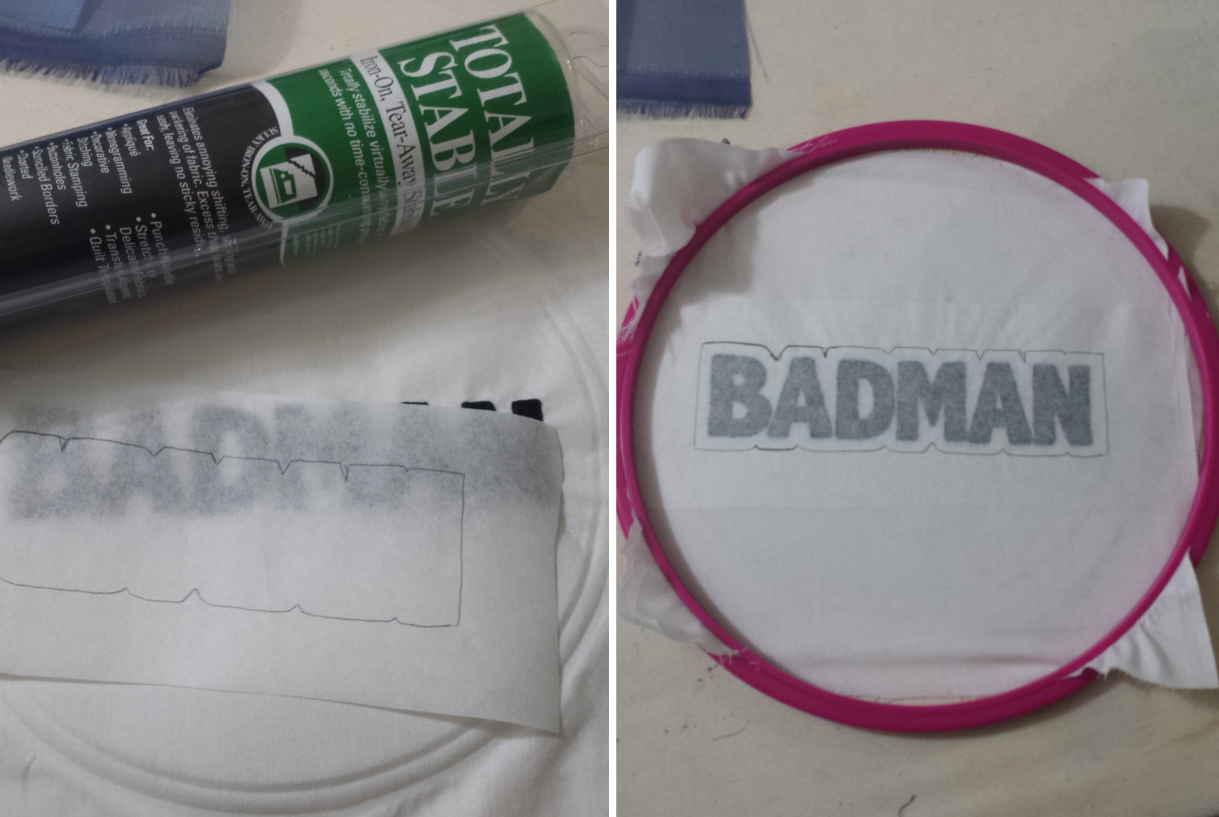
Tear or wash away stabilizer
Sewing Machine and thread
Heat ‘N Bond paper
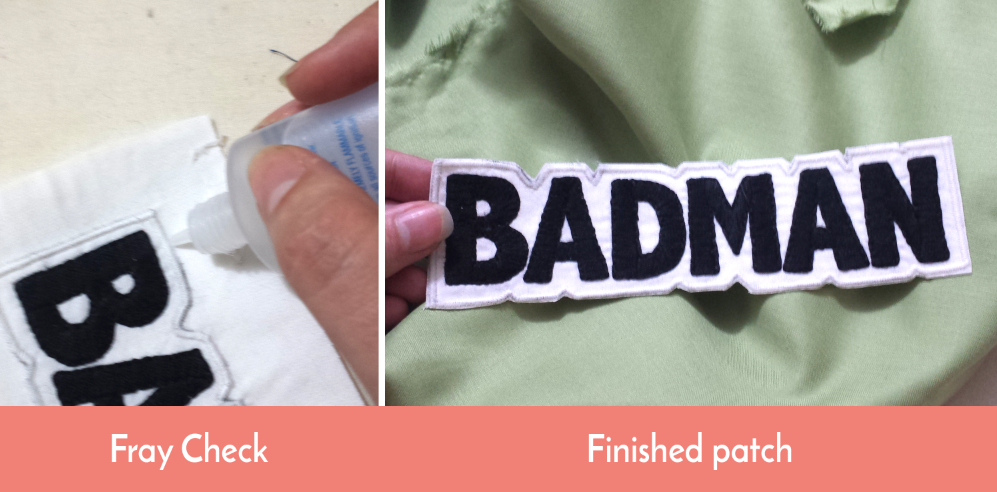
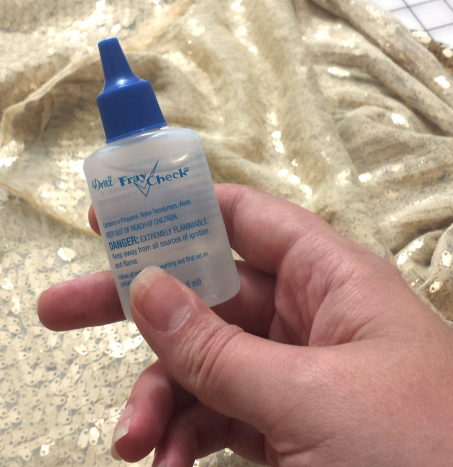
Fray Check (optional but recommended)
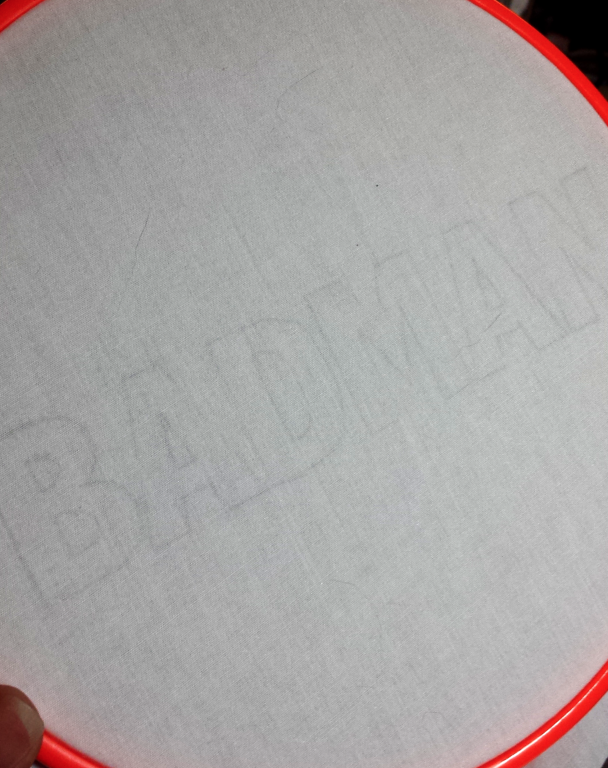
1- Prep your fabric
I used just a cotton broadcloth for this, but you can always use something sturdier. I transferred my pattern to some lightweight interfacing and ironed the interfacing to the back of the fabric piece I plan on embroidering. Don’t forget to reverse the image so it doesn’t end up backward!
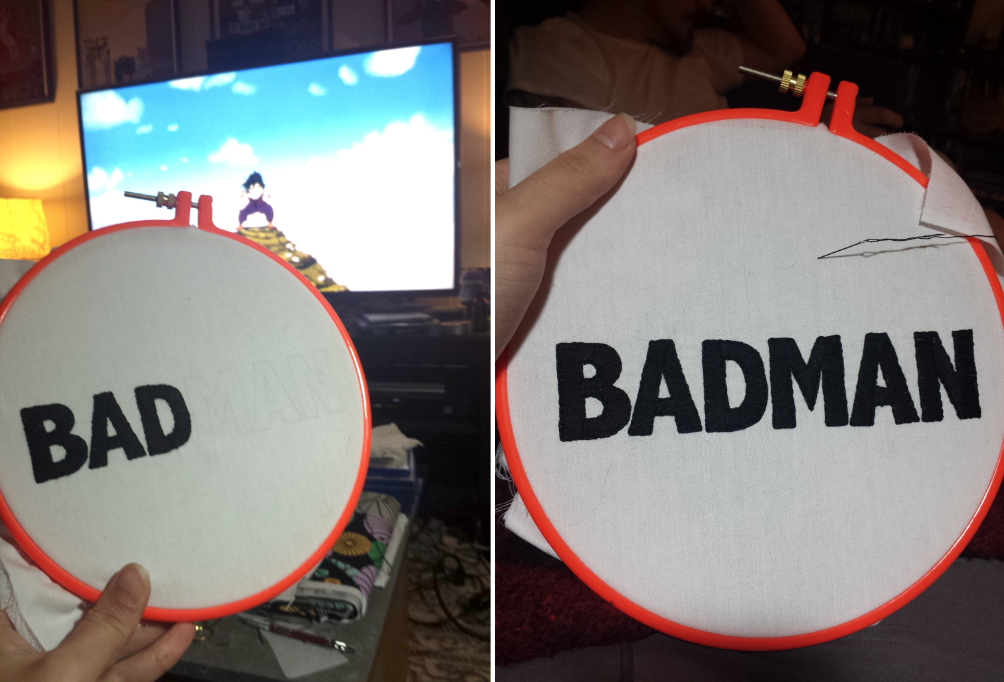
2- Embroider it!
Throw that thing in a hoop, grab your embroidery floss and go to town. I did mine while watching episodes of, you guessed it, Dragon Ball Z. For those über curious it was the end of the Frieza saga and the Garlic Jr mini-saga (featuring the Spice Boys).
3- Stabilize
Ok, I know it feels really firm already, but when it comes to machine embroidery, the firmer the better. I used tear away stabilizer. For this piece I had a pretty complex outline, and wasn’t really confident about seeing the line through the bottom so I ironed on the stabilizer on the top of my embroidery. If it’s a simple shape that I don’t need to follow an outline (like a square) you can iron the stabilizer on the back and use a chalk outline on the front or just wing it.
I’ve done plenty of fake patches more recently utilizing iron-on transfers, and the process I use to make it look more like a patch is the same. If you want to do a fake patch using iron-on t-shirt transfers, start with this step. But iron the stabilizer on the back of the fabric first before applying your t-shirt transfer since heat can make your transfer lift if you aren’t careful.
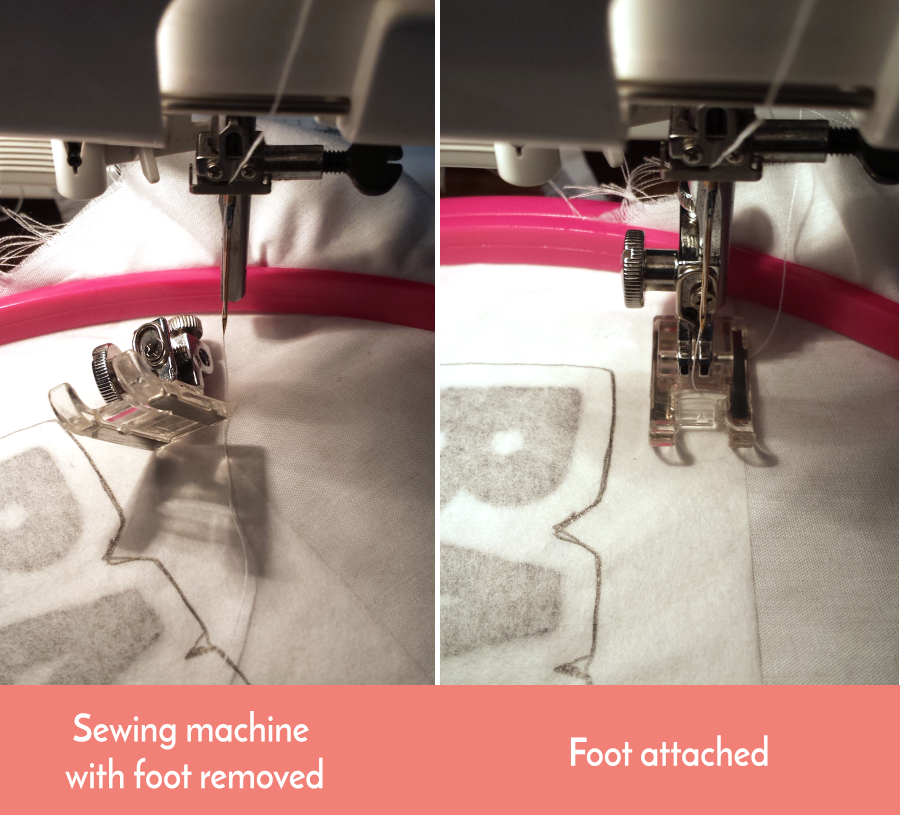
4- Hoop it
Pop that bad boy in a hoop, but with the hoop ridge up instead of down (the opposite of how you’d hoop it for normal embroidery). Make sure your hoop is large enough to hold you piece, but small enough to fit through the arm shaft of your sewing machine. Then put it under your machine foot. You might need to take the foot off of your shaft, put in your hoop, then put the foot back on.
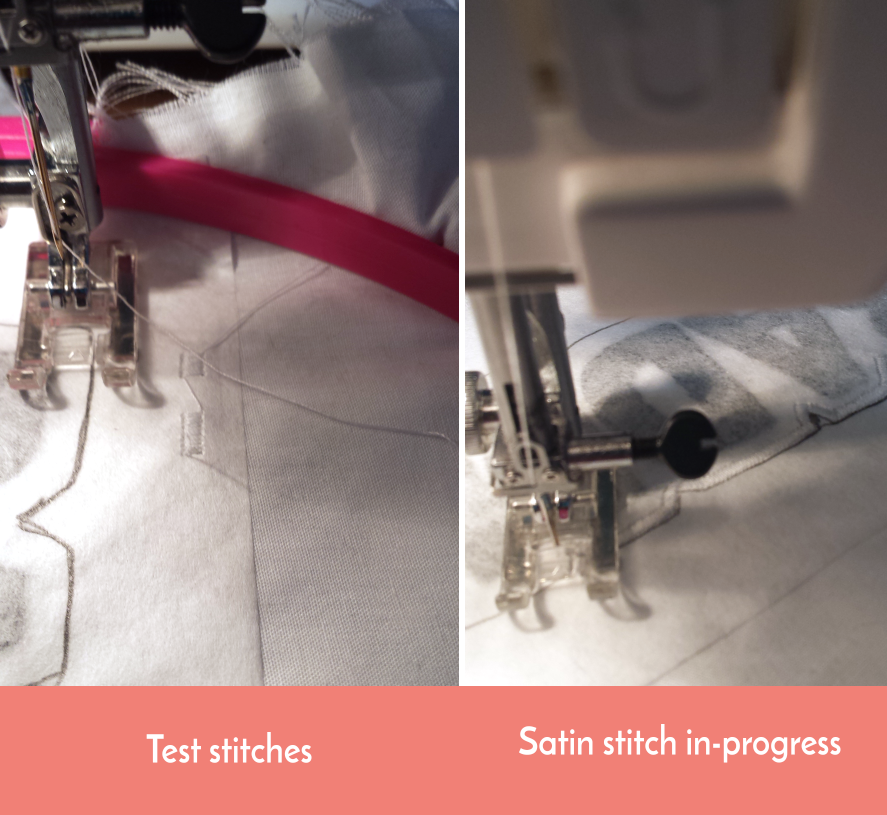
5- Bind the edge
We’ll use a zig zag stitch to do this. On an area that will be cut away test the stitch. The stitch width is up to you (I used a 2.7, but you can make it as wide or narrow as you like) and a stitch length of .5, or as close as you get the zig zag together to give it the satin look. I used normal thread, but you can use embroidery thread if you like. If you use an embroidery thread make sure to use an embroidery needle.
Once you like your zig-zag satin stitch, sew around your patch.
6- Making it iron on
Take it out of the machine, and carefully remove the tear away stabilizer. It should come off really simply due to the zig zag perforations. Then cut it down a bit (but not all the all the way). Now to add iron-on stuff!
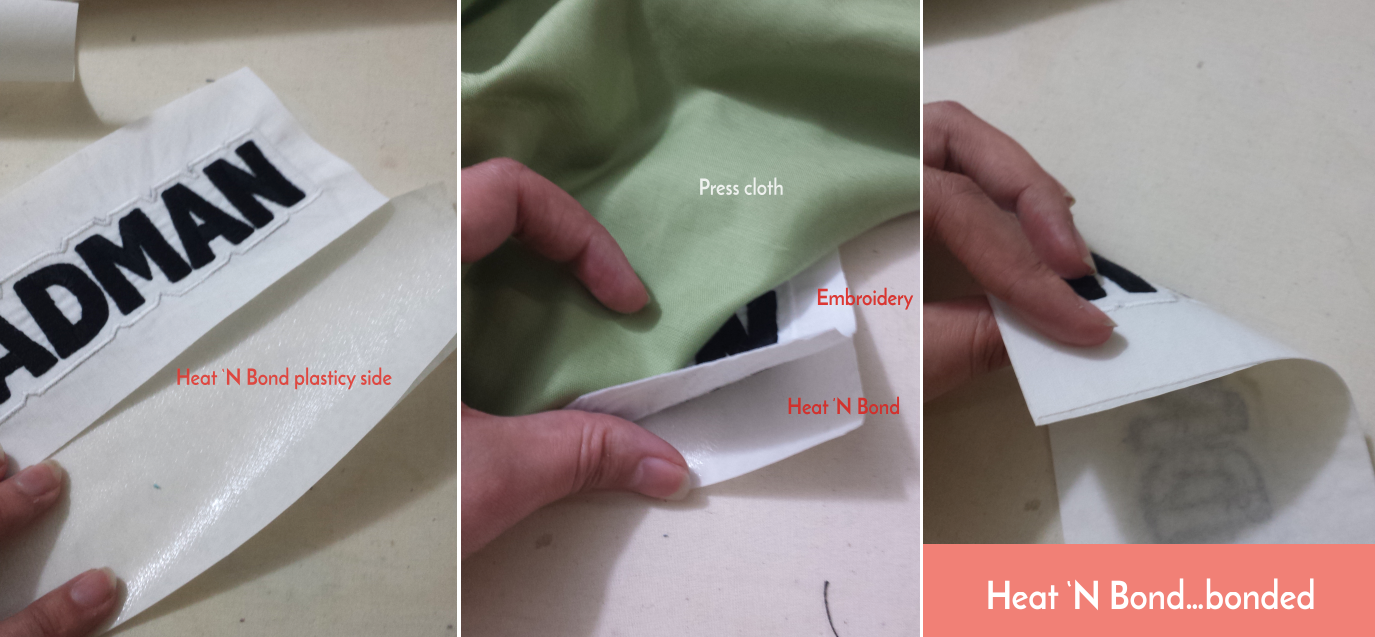
I use Heat ‘N Bond which is a double sided iron-on adhesive. It’s used a lot in appliqué. I cut it to match the size of the fabric and line up my fabric with the Heat ‘N Bond. One side of the Heat ‘N Bond is plastic-y, and the other has paper on it. You want to put the plasticy side facing towards the back of your embroidery. That plasticy side adhere’s to the back of your embroidery like half of double sided tape. Leave the paper on the back for now. Using a press cloth iron the fabric to the piece of Heat ‘N Bond. Let it cool.
7-Finishing your patch
To be safe, I put fray check around the perimeter of the zig zag to make sure it doesn’t unravel. Let it dry. Once the Fray Check has dried, cut out the shape as close as you can get to the zig-zag border without cutting through it.
Lookit that! You just made a patch! Now you can attach it by pulling off the paper back and ironing it where you want it. I add a security stitch around it after I iron it on just to make sure it stays put.
Straight up, everyone: Sequin dresses are a bitch to make. My biggest piece of advice: Don’t do it! Oh, you’re going to do it anyway? Basically this is going to be like a sex talk: If you’re going to do it, at least have the knowledge to do it safely and so you know what to expect.
Working with sequins in general are a total pain, but GLAMOUR!! Now, I knew it wouldn’t be easy. I can be blindly confident about taking on projects, it happens all the time. I tend to over-research to the point of WebMD psychosis levels.
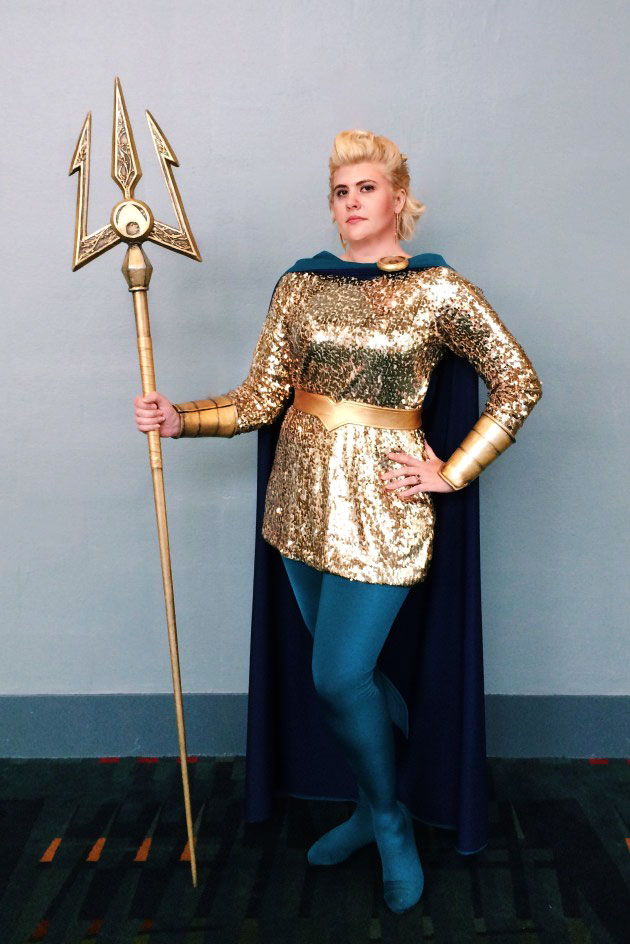
^ That’s the dress, you guys!! *Photo courtesy of Comic Alliance
The costume was full of unknowns to me, so it’s my own fear that’s kept me from starting the focal piece of the whole costume: the gold sequin dress. But I was also excited, because I never made a sequin dress before. I was smart and took pictures along the way, so you lovely readers can benefit from my pain and suffering.
Without further ado: Working with sequins.
At the end of the article, I’ll post some of the pages I looked at when researching that are much more positive about working with sequins, with headlines along the lines of Add a little sparkle to your wardrobe.
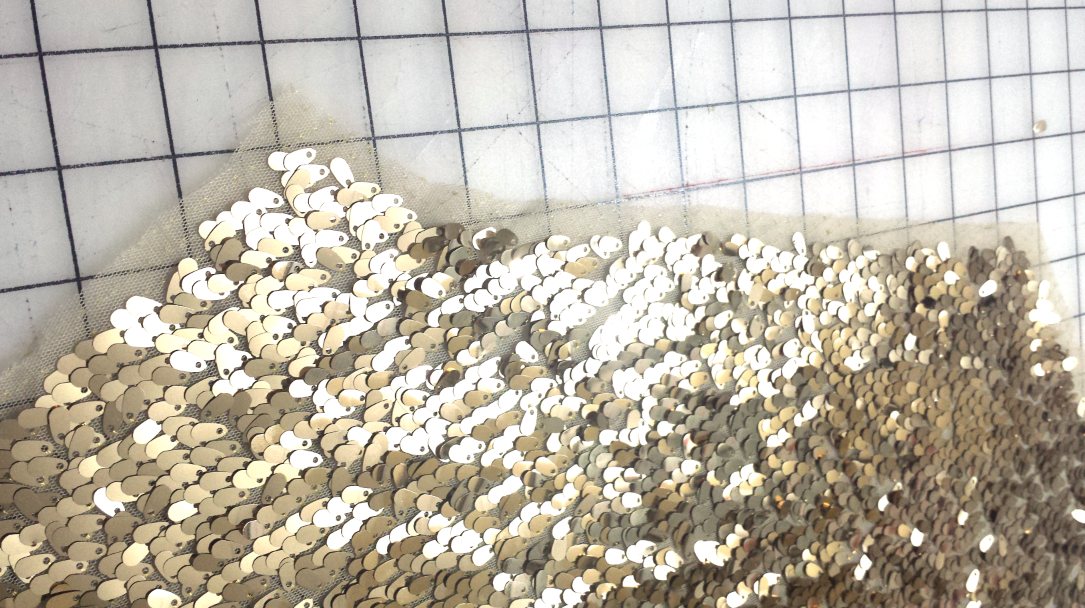
1- Sequin fabric is EXPENSIVE
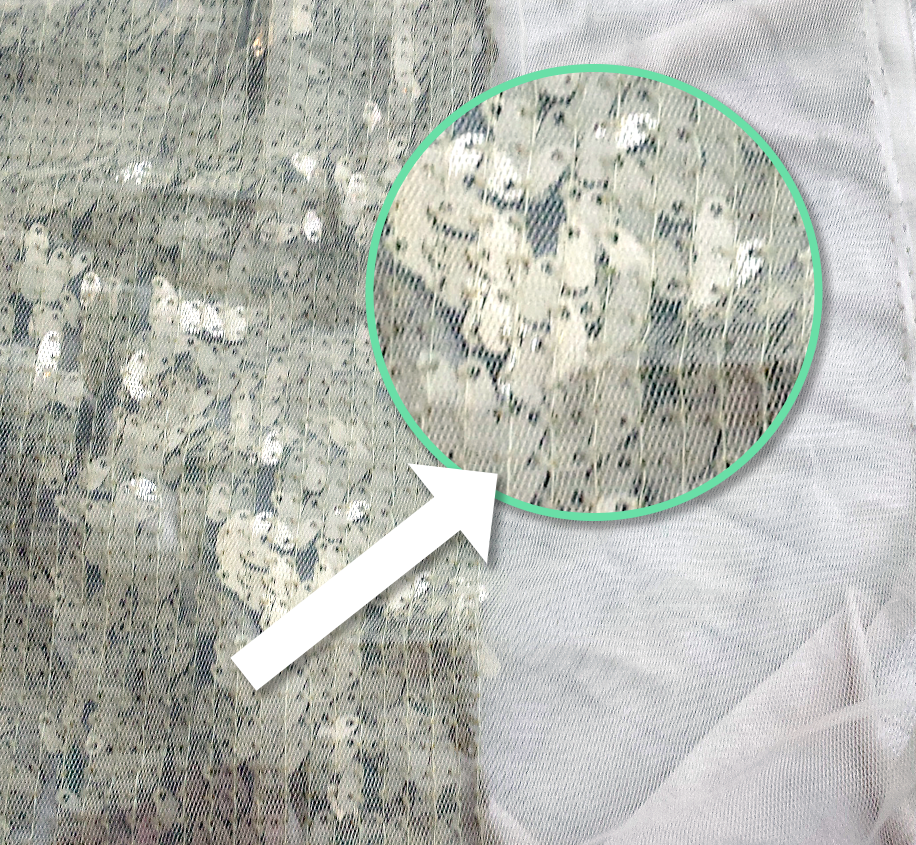
So make you have enough in the event of mistakes, but not so much you break the bank. It also makes it daunting to cut into. Not to mention the added fear of sequins falling off. That’s right, you are paying big money for the most fickle fabric known to man (might be an exaggeration). The way sequins are attached to fabric is they are stitched to the background in rows.
That one thread holds a whole mess of sequins!
Makes sense, right? Except a loose thread can make you lose a whole line of sequins. WHAT? This will come into play later.
2- Make sure your pattern is simple
Check and check! I mentioned in a previous post I’m using McCalls 7122. It’s really a simple dress, 4 seams total. No zipper.
Why does a simple pattern matter? Because you have to do a lot of prep of the fabric before you sew, so adding in darts or zippers or fancy collars, or even princess seams is a lot of work! I think the nice way the articles put it is “Let the fabric be the focal point.” Most sequin fabric is on a mesh or stretch backing anyway, so you can get away with less shaping.
3- Prepping Sequin fabric takes FOREVER!
I read an article that said, “A sequin dress will take 3 times longer to make than normal, so plan accordingly.” I went “Ok, this dress would normally take me about an hour. 1 x 3 = 3 hours, but I’ll add in a few more hours to be safe, I should be able to get it done in an evening.”
WRONG! So wrong. So very wrong. Just to prep the fabric took me about a week of evenings. If I judge by the anime I was watching when I removed the sequins, it took me close to 13 hours to prep the fabric. 13 HOURS. And that was just to get the fabric ready to sew, then once the dress is assembled, you have to hand sew sequins back on. From here on out I will be keeping track of approximate time spent on this dress so you can estimate your own.
Side note: I watched Red Garden. That anime is beautiful, and I might have to re-watch it because it’s so pretty and I hardly saw any of it because I was staring at sequins the whole time. It’s like Pretty Little Liars (well, the only episodes of seen of it, which is like 2) but with monsters.
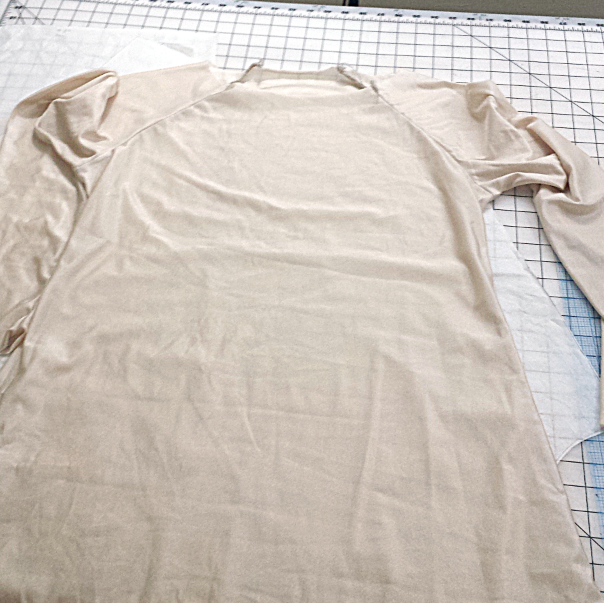
4a- Make a mock up
I used stretch mesh for my mock-up since it matched the fabric the sequins were sewn on, and there’s no pictures because that thing was almost fetish worthy in its sheerness. But I learned a lot about my pattern, and took it in a lot. Time spent: 45 Minutes
4b – Treat your lining like a second mock-up and sew it first.
Oh, and ALWAYS PUT IN A LINING. I called my lining my old lady night-gown because it was made of nude tricot. I used tricot because it has a similar stretch profile as the sequin fabric, and it was silky so it would feel nice against my skin but also not snag on the sequins. I made even more alterations to this lining for fit because I wasn’t getting distracted by my bellybutton like with the mesh one. Time spent: 45 Minutes
Old lady nightgown FOR THE WIN
But why is the mock-up important? I realized after all my fittings that the weight of the sequins, and the fabric being a little stretchy made everything hang longer than anticipated, plus I forgot to transfer some of my pattern changes (whoops!). So, I had to go back and remove more sequins everywhere I needed to take it in or shorten it. Just add more time to the sequin clock Time spent: 2 hours
5- Sequins have a Nap
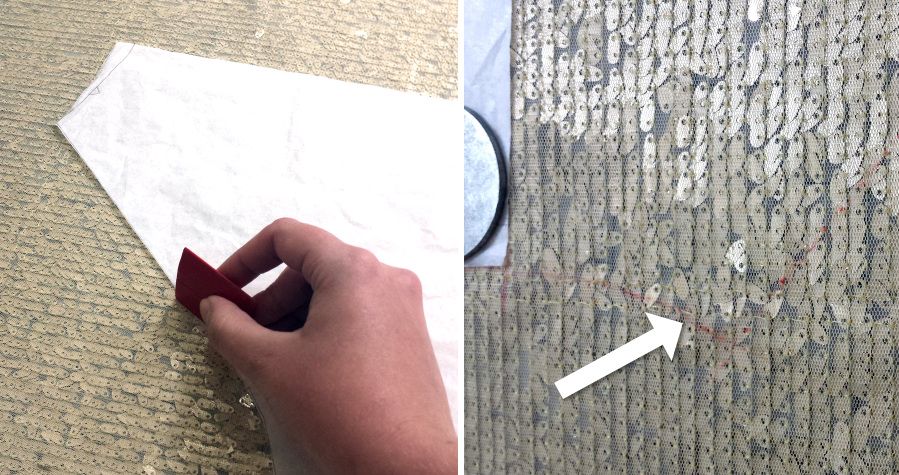
That means, sequins hang a specific way and shine a specific way. Find out which direction your sequins hang and lay everything out going one direction. I know it can feel like you’re wasting fabric, but you know what really wastes fabric? Having to re-cut a piece because the sequins are “hanging” vertically. Also, some sequins are one color on one side, and a different color on the other, so a piece cut in an opposite direction will really stand out.
Things to know when cutting out the fabric: Pinning is definitely not something you want to mess with, and cutting on a fold is not recommended. Layout and trace your pattern pieces onto the fabric from the back. I used red tailor’s chalk, then remove the pattern piece and cut along the line.
Also, don’t use your good scissors. I used my gift wrap scissors because those sequins will knick and dull your good scissors so fast! Time Spent: 1 hr
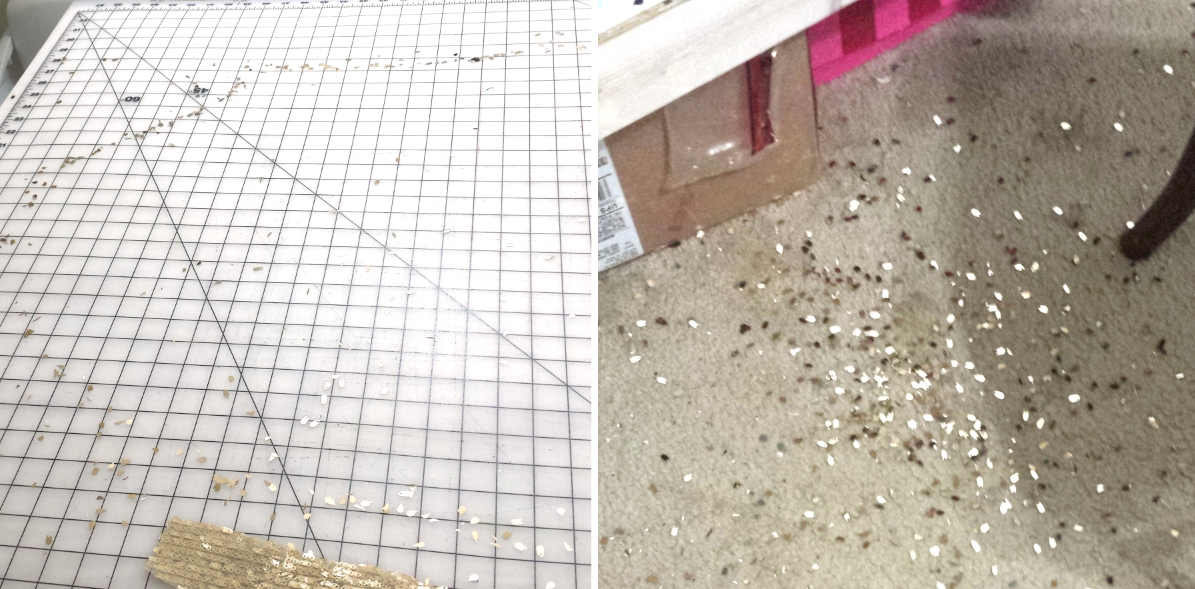
6 – Get ready to live in a disco ball
Left: Table after cutting out a piece Right: sequins from trimming one seam allowance
You may see the storm of sequins rolling in just from cutting your fabric, but you are not ready for the tidal wave of sparkles that are about to drown you. I joked with my husband I was like a sparkly Family Circus cartoon, trailing sequins in a path around the house. I also littered the city of Memphis with them, the work conference room, my car, etc. It’s basically giant glitter.
Before you sew, you need to take all the sequins out of the seam allowances. This allows for several things:
• Reduce the risk of sewing machine needle breakage
• Reduces seam bulk
• Not having sequins sticking straight out and jabbing everything if you sew through them.
If you have, like me, kept your sequin fabric folded in the box it shipped in, the sequins will most likely not lay flat at all. I suggest letting gravity help you and hang the fabric vertically for a few hours (I left mine overnight) before trimming the sequins off.
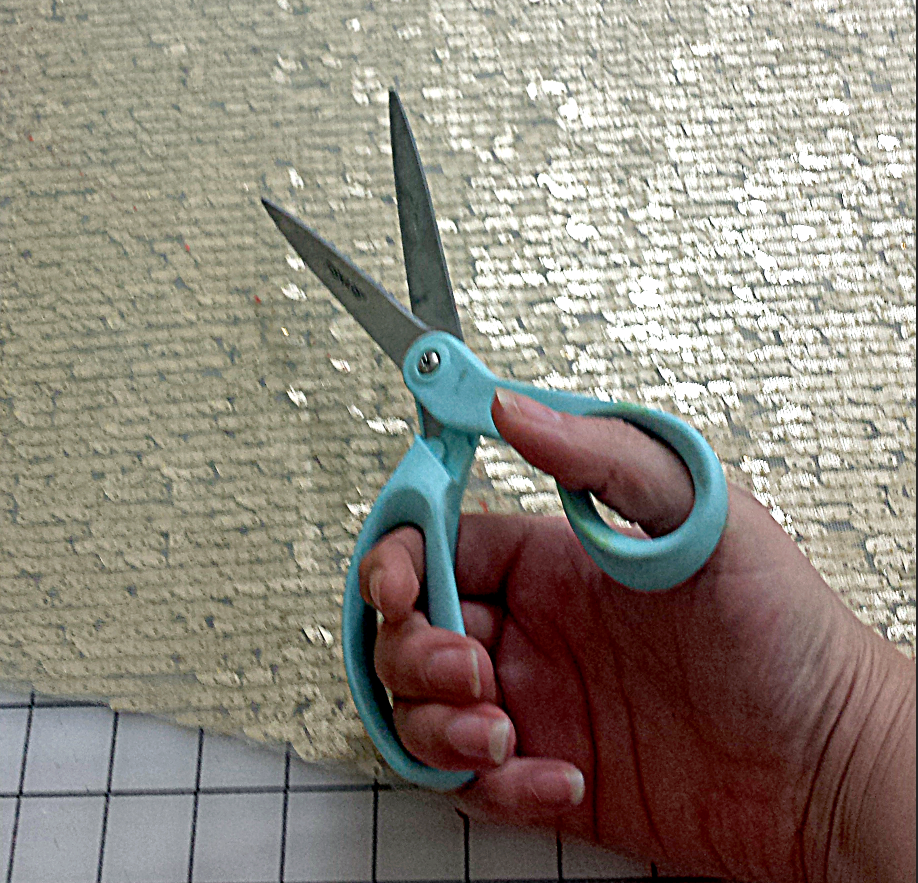
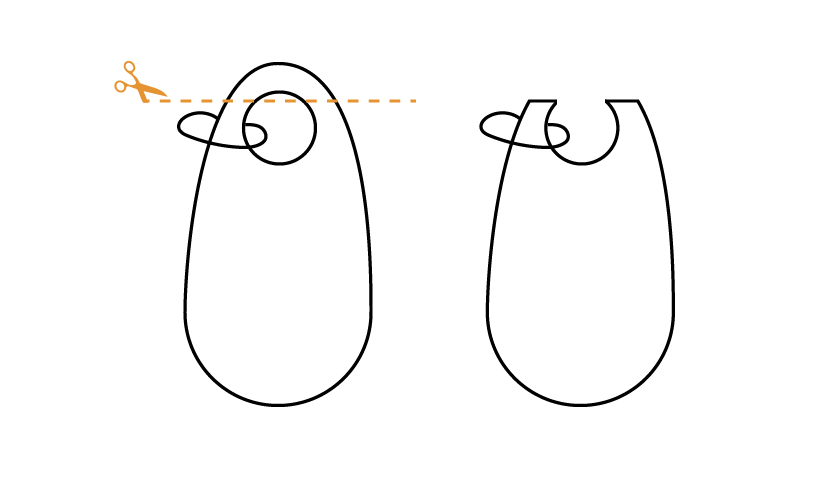
And you’ll want to trim off the sequins. If you use your seam ripper to take them off, most likely you will weaken the already crazy fragile stitching that holds the whole line of sequins together, so grab some small hand scissors that you don’t care about, and start clipping off the sequins.
I found clipping here gave the best and quickest results:
I would also err on the side of removing too many sequins than not enough because sequins move around while you sew and have a life of their own, and a broken needle is how we loose an eye.
Did I mentioned this took forever? This is going to take forever. And I asked around for tips on making it go faster, and found out there isn’t any. Your hands will hurt. Mine were swollen and I broke a blood vessel near my knuckle where the scissors rested.
Also, if I were to do it again, I would only clean up the seams and neck hole, and not the hem. Due to sequin fabric weight, the hem is going to hang much lower than you anticipate, so sew it together first, then remove the sequins at the hem and bottom of sleeves if applicable once you know the proper length. Time Spent: 13 hours
7- Sewing up the dress is going to seem like a reward from the heavens! But it’s not!
However, the dress should go together quickly, because it’s a simple sewing pattern. I stitched it together and lined it in less than an hour. Also, wear your trusty safety glasses. The chances of you breaking a needle or sequin pieces fling through the air is high. I used a zipper foot so I could get as close as possible to the sequins without having a full foot trying to feed through over the bulk.
I used a stretch stitch on my old battle horse of a Janome because a straight stitch kept puckering and I wanted to maintain as much stretch as possible. The downside? There is no unpicking at that point. The thread is hard to see and the stitches are really small.
I also fray checked each seam, because I’ll be damned if even 1 row of sequins comes loose! I also installed the lining kind of like a bagged jacket. I attached it at the neck and the ends of the sleeves, but hanging free at the bottom.
DO NOT IRON. It can melt the sequins, degrade their color, or melt your backing fabric. I found the seams didn’t really need it, and you can hand tack them later. If you feel it needs to lie flatter, steam and use a clapper.
Because of stretch in the dress and lining, and because the sequins are so heavy, I stay-stitched my trusty friend; clear elastic, around the neck (no stretching!). This gives it the stability to not get all wonky with weight and stretch. Instead, it will give it the stability to hold up that dress you’ve been working on for a week.
If you’re like me, now you’ll try it on and go “I feel like Zsa Zsa! I’m so glamorous! Maybe those past 13 hours have been worth it!” And for a few moments it does feel like it’s all worth it.
Time Spent sewing: 1 hour Time spent gawking at sparkles: at least 1/2 hour.
8- Hemming
Just when you thought you were done with sequin removal, it begins again. Once you get everything the length you want it and pinned (if you haven’t already), trim off all the hem sequins and hand hem the bottom. Because it’s all mesh, it’ll look flawless from the outside! Time Spent: 4 hours
9- Hand sewing sequins: the project that never ends
I hope you saved leftover fabric, because you’ll need it. Now is when you can take advantage of the sequins being attached by one thread and remove a bunch of whole sequins. You may have noticed when you tried your dress on that you can see all the backing fabric at your seams. Now you are going to painstakingly attach sequins over all the bare spots. I also used this opportunity to tack my seams the direction I wanted them, which keeps the seams as flat as possible. Time Spent: 8 hours (damn those long sleeves)
But guess what, now you’re done! Only about 30 1/2 hours and 3 sewing needles later.
And that is how you make a sequin dress. I suggest buying one from some sweat shop where 5 year olds are clipping sequins off instead of making one. Just kidding! (mostly)
Oh, but you do feel so glam in it. I probably would not make a sequin dress like this again, but I do feel more prepared to take on sequin projects in the very, very, very distant future.
If you have any sequin questions or tips, you know what to do: leave a comment!
I thought I’d give you a quick sneak peak of some of my progress:
I’m not even going into all the sequins that now have littered my house. You know what’s worse that glitter? GIANT glitter. I am littering the world with gold sparkles. I’ve never sewn with safety glasses before. It’s surprisingly distracting.
I’ve recently fallen IN LOVE with Dragon Ball Z and have been cramming it in while I work. Makes me feel very weird getting into it (and I have become obsessively into it) in my 30s, but whatever. Thanks Funimation Streaming!
Ugh, I love Vegeta so much. That cocky smile? His sassy attitude? Be still my heart.
I tend to update instagram with progress shots as a work on things (and post pictures of my cats) so if you’re into seeing that stuff, you can find me there.
And if you’re at HeroesCon this weekend, find me and say hi!
Awhile back a friend of mine tagged me on Facebook to post 5 characters that I identified with. And I felt awful because I couldn’t think of more than one. So I thought on it, asked my husband, asked my friends to no real avail. There’s characters I LOVE, but identify with? That’s much harder for me. I was just going to pick Chi 5 times, but that defeats the purpose I suppose.
I don’t know if it’s being married to a writer hobbyist, or overanalyzing every media I consume due to working in advertising, but instead of being “Oh yeah, that’s me.” I tend to love characters for their own development instead of how they relate to me. Especially since most characters have specific exaggerations that make them more of who they are. Or I’m over thinking it because that’s what I do. But that said, I think I have some sort of list that maybe encompasses who I am or relate to. I’m also taking vast liberty with 5.
And since I realize I haven’t given you large opportunities to get to know me, it should be fun.
Chi – Chi’s sweet home
Enthusiastic, happy, easily entertained, wears her emotions on her sleeve (er… paw?), and is easily tamed by the idea of food. She loves to explore and learn about the world around her. I love Chi so much I keep a folder of Chi gifs on my desktop for every occasion.
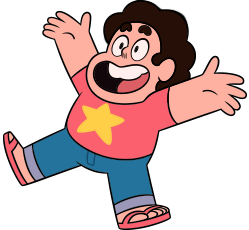
Steven Universe/Rose Quartz – Steven Universe If you watch the show, technically Steve and Rose are kinda the same person but not really. On one hand, I love Steven and relate to him for the same reasons as Chi. He has this enthusiasm, love for life, love of puns, great sense of humor, and also caring. I’m assuming the caring comes from his mom.
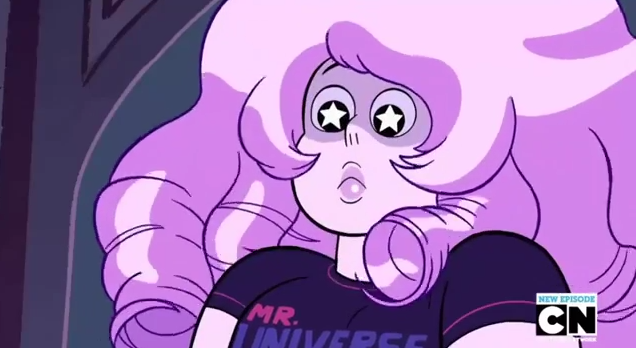
But Rose? The moment I saw her, even with knowing so little about her, knew we shared some bond. I mean, she has healing tears! If that doesn’t speak to her character I don’t know what does. Plus, she chose Greg, who is by far my most favorite character.
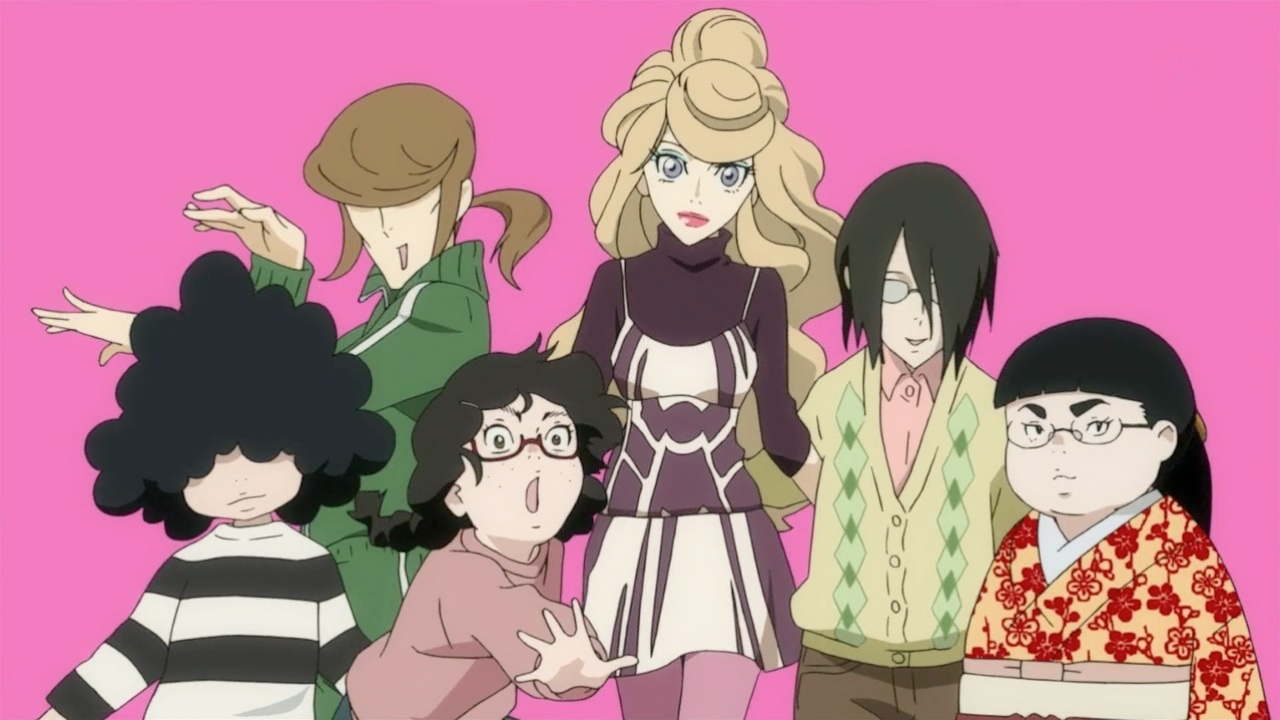
The Amars – Princess Jellyfish (Kuragehime)
I can’t say I relate to only one of these ladies (and honorary gentleman) but aspects of all them are so relatable. They are all Otaku to extremes, but I can see myself in each and every one.
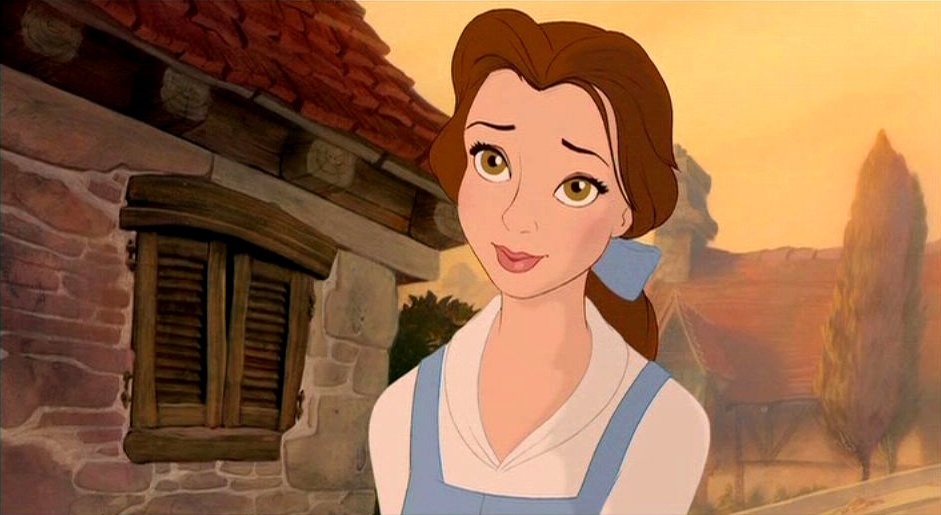
Belle – Beauty and the Beast Maybe it’s the artist in me that loves her so much, but Belle had a profound impact on my life as a child. I wanted more, too. And I was like, 8 when it came out? I remember gasping and my heart skipping a beat when this happened:
And it still does.
But she also was the reason I tried to look past outward apprearances and get to know people. And for that I am forever grateful.
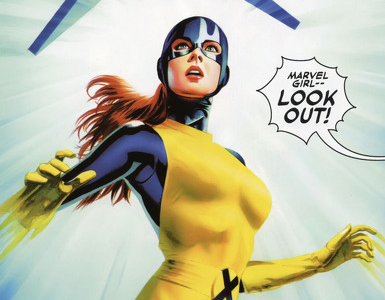
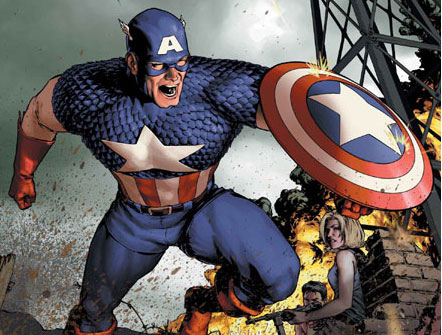
Jean Grey/Steve Rogers (Captain America) Ok, those two don’t exactly make the most sense right next to each other, but I love them for the same reason. They are both a voice of reason, they both try to be a moral compass and do what’s right, and they both aren’t perfect.
I’ve loved and Identified with Jean since I was in grade school. She was good, she was a total bad ass when she needed to be. And then she, like, forever died (I don’t count her from the past now in the present for who knows how long because I don’t like who that Jean is. She’s not the Jean I love).
But Cap I love for the exact same reasons. He has a calling to do what’s right, to watch out for others, to instill goodness into the world, to think beyond himself. He’s amazing.
I can only aspire to be as strong and caring as these two.
What characters do you relate to? Have they shaped you as a person?
Picking the right fabric can make or break a costume. And I don’t mean screen correct, but I mean quality, weave, texture, pattern, shine. You don’t have to spend a fortune on getting the most accurate fabric possible, but understanding what kinda of fabrics are best to use can take your costume game to a whole new level.
I’m not going to give you a crash course on textiles or how they are sewn. Getting into the specifics of burn tests and fiber content percentages isn’t something you need to know going into your costume planning. Instead I’ll go over a few important points for you to keep in mind, and a few examples of what fabric’s I’d choose for different costumes. Originally this was just going to be one post, but I get really excited about textiles and can ramble (such a nerd about this stuff). So this post is about fiber content, the next one will be about different weaves.
When I first started sewing fiber content was something I never, ever thought about. I never looked at the end of bolts because it didn’t really matter. And when I’m sewing stuff for normal wear, I don’t think about it a whole lot. I’m not a real snooty sewer who is silk charmeuse obsessed, I sew with what I like. But with costumes I’m really anal about what fiber contents I use.
Natural fibers
Natural fibers are my favorite! Mostly because it breathes. If you’ve ever been stuck in a walkway at Dragon*Con you’ll understand the importance of being in a costume that doesn’t retain every drop of sweat.
Cotton: From the humble cotton plant, this is the best fiber ever, in my opinion, It sews well, it presses well, and It also dyes really well. You can also find all kinds of different weaves and weights. But keep in mind, not all cotton is created equal. Some are thick and lovely, while others can wrinkle badly or too lightweight. Price range $-$$$
Wool: Sheered from our cute and cuddly animal friends! From Sheep to alpacas, this bad boy also breathes and dyes well. Downsides include dry-cleaning… and it’s wool which is known for being a bit on the warm side. $$-$$$$
Linen: Are you looking for the best fabric to make your Avatar: The Last Airbender cosplay out of? Use linen. Linen is a plant based fiber from flax. It has a lovely rustic texture, is easily washable, dyeable, and sews well. Downsides include wrinkling, but that kind of adds to the charm, I think. $$-$$$
Silk:Taken from the cute little silk worm’s cocoons.I’m gonna be straight up honest with you on this one, I hardly ever use real silk for cosplay costumes. I think it’s really price prohibitive and can be a pain to work with. It’ll show water drops if your iron leaks, you may or may not have to dry clean it, it can be really slippery depending on the weave, but it’s also really lovely. You can dye and paint silk in amazing ways and get absolutely beautiful color. It feels amazing, and there’s so many different weaves and textures to choose from. It’s also an investment $$$-$$$$
Other natural fibers I don’t use much but are available include Bamboo, soy, hemp. They are basically better cotton and hemp is like a stronger variation of linen. $$-$$$$
Leather: I think we are familiar with leather. It can be luxurious, slightly stretchy (and I mean slightly), easily manipulated, you can dye it, stain it, paint it. But buying leather is a different process since you are buying hides of animal skin, and it’s measured by the square inch. It’s also pricey, and you may or may not have a desire to use animal hides for personal reasons. $$$-$$$$ More information about leather hide measuring and purchasing can be found here.
The middle child, Rayon: I’m having a stupid love affair with Rayon right now. But it’s not technically a natural fiber since it’s man made, but it’s not a synthetic material because it’s made from plant cellulose. It can be stiffer or flowy. It feels wonderful, it can breathe, and it doesn’t have to be stupid expensive. Other terms you may see include viscose, modal and lyocell. $-$$$
Synthetics
Synthetics are great because they are less expensive than natural fibers. And there is basically 2 kinds: Polyester and Nylon The downside is, they aren’t as versatile when it comes to the ability to take dye and they don’t breathe like a natural fiber does. Well, except for one big caveat: super fancy sports manufactured fabrics. Think Under Armour shirts. Those guys are polyester and sometimes nylon mixed but science has made them wickable and breathable. When I need spandex, I look here first. If I can find the color I need with a moisture management spandex I will. And it will make all the difference in the world.
Not all synthetics are stretchy like spandex, but they can be much cheaper than their natural alternatives. But there is a downside, if you aren’t careful you can melt it if ironing it too high, and sometimes it’s hard to get a good press.
And my favorite synthetic: Faux leather/pleather. It’s still pricey, but is no where near as pricey as real leather. It doesn’t have the same texture or share the same richness as real leather, but you can buy it by the bolt, and they make some really nice ones these days.
A note on dying synthetics: They make dye for polyester. There is one called iDye by Jacquard (it will say “for Polyester”) and Rit just came out with a new formulation called Dyemore which I wanted to try, but nowhere local carries it right now. I recently tried iDye and, straight up, those colors are rich and intense (not what I was looking for at the time) and mixing colors can be a bit of a challenge, especially with their “mess free bags” which dissolve when water touches them. Not ideal for measuring it out 1 teaspoon at a time.
Nylon CAN take dye really well (and normally does) or it can be stupid stubborn and won’t take any. It’s a bit of a crap shoot.
Fiber blends
This is what happens when a natural fiber and a synthetic fiber fall in love. Who cares if their love isn’t natural? So they run away together and have a fabric baby that is part natural fiber/part synthetic. Like if a human and a robot had a baby and it was born Robocop. They are kinda freaks, but can also be REALLY AWESOME!
Like stretch denim. Something most people have fallen in love with. It’s denim (cotton) with a little spandex to keep it stretchy. So it fits all your curves, is flexible to move in, and can allow you to take your jeans off on the 3rd wear without having to unbutton them.
Or blend poplin: 65% Polyester/ 35% cotton. Semi breathable, crisp, irons well, resists fading, and resists wrinkles! Its no wonder it’s used for uniforms.
When not making magical happy things that defy normal laws of fabric physics, they create cheap alternatives of more expensive types of fabric. For example: You know you need a wool texture for a coat, but wool is $20 a yard, a wool/poly blend can cost half that! But you are reducing the breathability a bit, so it might actually make you sweat more than normal wool would.
So you’re ready to shop but aren’t sure where to find the fiber content? If you’re in a fabric store, check the end of the bolt. It’s mandated by law to have the fiber content listed. Online fabric stores will have it listed in the product description.
What’s your experience with fiber content? Is it something you’ve spent a lot of time thinking about? Are there fiber types you like to use? I’d love to hear about your experiences!
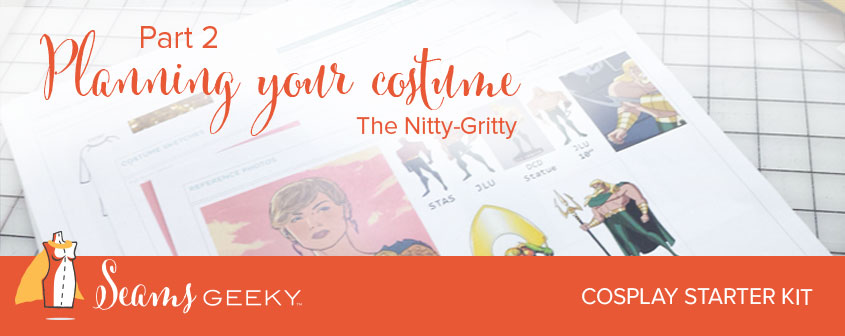
Last time I talked a bit about narrowing your costume selection down, and this time I’m going to go into the nitty gritty of planning out the costume. You can do this for all of your costumes first, and then narrow down or you can do it after. If you’re new to making costumes, you might want to do this step first because it will help you figure out all the bits and pieces for each costume and you can evaluate your time, skills, and costs early. This isn’t my first rodeo, so I have a pretty good grasp of what skills I have etc so I’m comfortable estimating that on the front end.
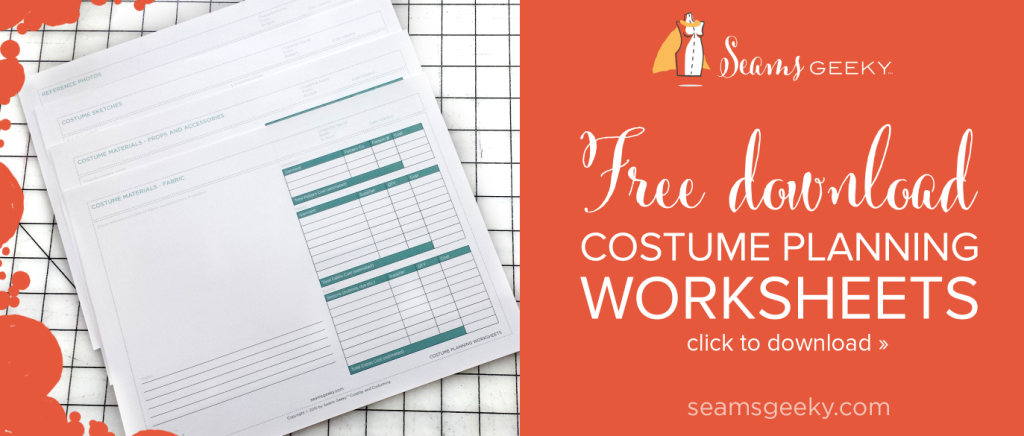
I’m a visual person, so I’ve created some worksheets, you can get these for free (Yes! Free!) These are pretty great because you can 3-hole punch ’em, put them in a binder and keep them for future reference if needed.
Now for the meat and potatoes of today’s post: here’s how I plan out my costumes and use the planning sheets. My examples are digital so they are easier to read, but I do a lot of sketching by hand too.
Aquaman
I’m bookin’ it to squeeze in my Aquaman costume by HeroesCon (a mere 3 weeks away) between some swimsuit commissions and a wedding dress, so planning is crucial!
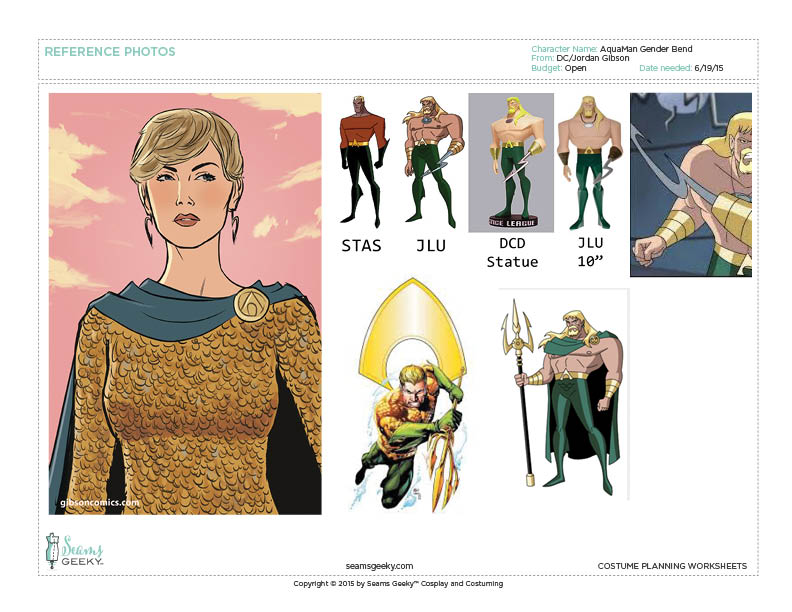
Page 1: Reference Shots
First things first, Grab all the reference pictures you can find. The internet is full of great shots (normally) but you also might need to go straight to the source material and/or sketch stuff out. I usually do both. I was lucky enough to have the artist sketch out the costume details for me (thanks, twitter!). I also grabbed different Aquaman shots for color, shapes, and specifics.
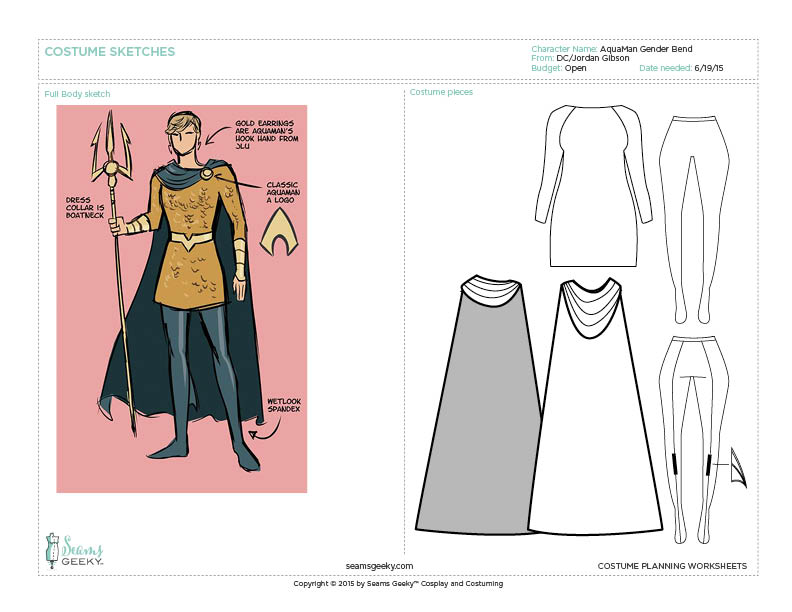
Page 2: Costume sketches
The next bits aren’t too far off of industry fashion line sewing:
I start drawing out all the bits and pieces. ALL OF THEM. Don’t skimp on this stage. The drawings don’t need to be works of art, but need to be clear enough so you know what you’re doing. Draw the front, the back, accessories, shoes. Get it all out there. Not only will this help you figure out everything you need, a lot of time it helps you get your mind around how things need to be constructed, or process you might need to learn.
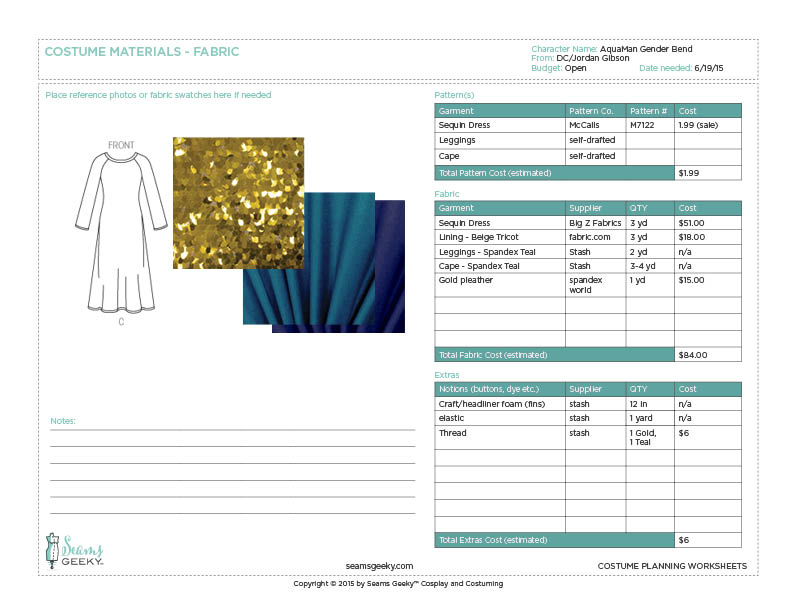
Page 3: Costume Materials — Fabric
This is a sewing blog of sorts, and I personally hate refashioning, but if you are buying and/or altering ready to wear, you can go looking for pieces that fit what you’re looking for right now. But you might want to stay tuned to this part because it could help you find the pieces you need a little easier.
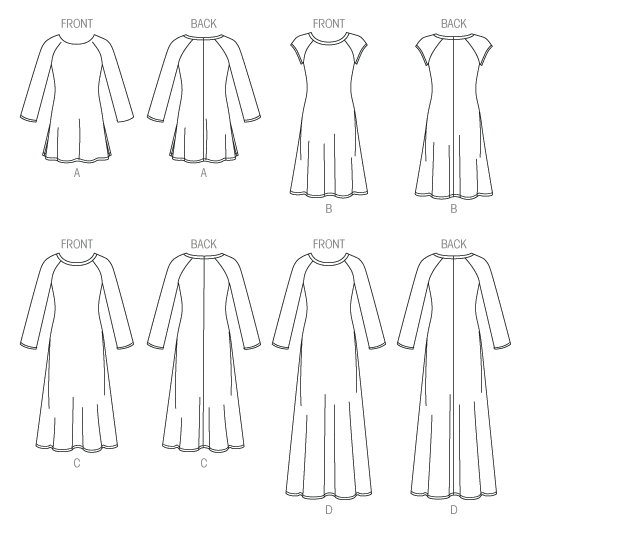
If you are not comfortable drafting your own pattern, now is the time to look for appropriate ones. You have your sketch, and all patterns have technical sketches! This is probably the coolest thing I nerd out about with patterns. It’s so easy to get distracted (or lured in) by how cool the picture looks on the envelope, but we are looking at the black and white line drawing. This shows us the bones of the pattern. I like to do this whether I use a pattern or draft my own because it also helps me estimate the yardage I’ll need of specific fabrics.
I’ll be using McCalls 7122 (view c) for the dress:
McCalls M7122
I chose this pattern because it doesn’t have a lot of sewn in shaping like darts, and I like the raglan sleeve because it’s less easing I’ll have to do inserting the sleeve, which with sequin fabric that’s pretty pricey and not the easiest thing to work with, seems like a plus. I’ll be making some changes though, I need to raise and lengthen the neckline to make it boat shaped neckline, and take in and shorten the bottom of the skirt as well.
The leggings I’ll be self drafting because it goes over shoes, but this McCalls pattern also has a legging patten I can use if I want. Yippie! I’ll be drafting the cape because it can’t be that hard, right? (This is how I get myself in trouble.)
I then went online and grabbed some swatches, but you can glue or pin on actual fabric swatches here as well. You can order these online or check with your local fabric store, they might give them to you for free!
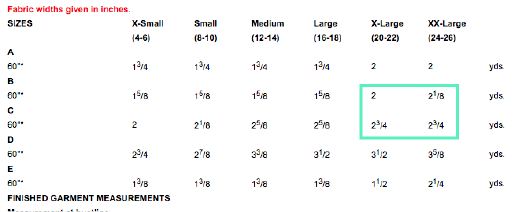
Now that the blueprint has been set, I can work out the costs and keep track of the fabric I need to buy. I know from the pattern envelope I need at least 2 yards of fabric, so I’m rounding up to 3 Just in case. I’m just a round up/play it on the safe side kinda gal.
I’ve never worked with sequins to this capacity before so I want to make sure I have enough in the event of mistakes, and apparently you need extra sequins so I know I’ll be covered. The sequin fabric is somewhat stretchy, based on a power mesh backing so I’ll need a lining as well. I also learned from the internet that you should always line sequin dress because they can be scratchy. I also am utilizing some spandex from my stash for the legging and the cape that’s left over from bridesmaids dresses. I also know I’m using gold stretch pleather for the belt, so I put that down here as well.
Once my fabric is picked out, I can put down where to buy it (really important incase you need to order more) and the cost. Finally, I try to think of all the notions I’ll need; zippers thread, elastic, etc and put that down. I can now add up all the costs and get an estimate for how much money I’ll be spending on fabric. Yay and boo, all at the same time.
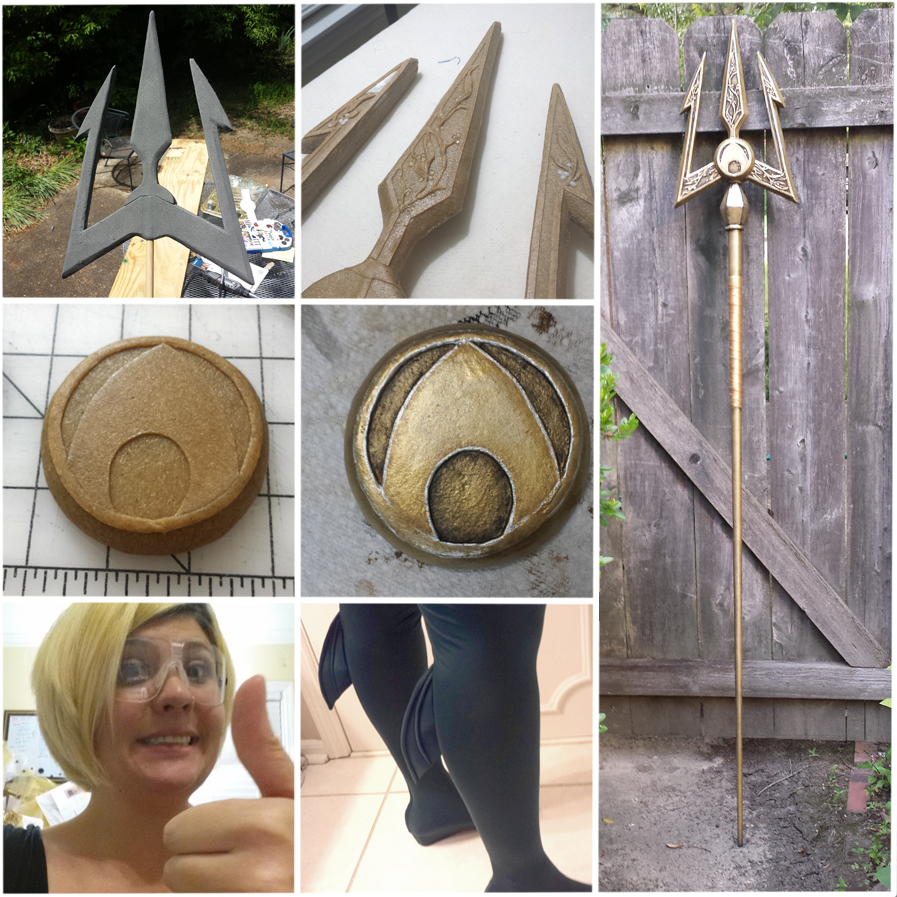
Page 4: Costume Materials — Props and Accessories
The last page! Or maybe pages, depending on your costume. I use the same process as page 3. I drew out my Trident design in illustrator so I’d have quick reference (I have it actual size elsewhere), a quick side view of the earring, and a list of the other accessories since they are pretty well laid out on the sketch. You might need to do a bit of thinking here to try and wrestle out how exactly you plan on making all your prop pieces so you accurately choose your materials.
I crammed all mine on page because there isn’t a lot of detailed pieces, but you might want several pages with deeply outlined materials and budget costs for each accessory piece.
I listed and sketched out the accessories I’ll need to the side and just added all the costs together. You can see I tried to list every darn thing I could think of that I’d need to make everything. You can put wig costs, shoe costs, plus base materials here.
Then add up your costs from page 3 and page 4. Maybe scream, maybe cry, maybe get really excited because it will cost less than you think. Whatever your reaction, you’re ready to start making!
Next time I’ll be talking a bit about different kinds of fabrics for those unsure about what fabrics to choose.
*While writing this post I found a phone app called Cosplanner which you can track all your costuming planning the same way digitally. It’s pretty cool! But I like having the sheets to reference because they are bigger and I can take notes and draw on them. But I’m an old fuddy duddy that’s stuck in my analog ways.


 For some reason those pictures turned out way green. The colors below are way more accurate. C’est la Vie.
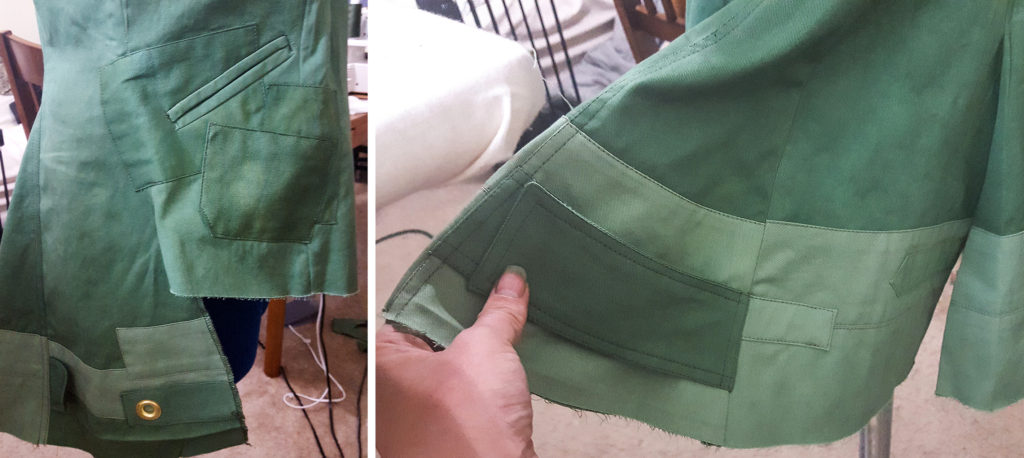


 But Cap I love for the exact same reasons. He has a calling to do what’s right, to watch out for others, to instill goodness into the world, to think beyond himself. He’s amazing.


