Sometimes you just need an embroidered patch. A lot of the time the internet will provide, and other times, you just gotta take matters into your own hands.
I enjoy embroidery, but not enough to do it with any frequency. And I’d love an embroidery machine, but with 5 sewing machines already, and table space for only 3 at a time, adding an embroidery machine to the mix, plus that learning curve and the price tag, makes the probability of an embroidery machine low. So we gotta take it back old school.
I do not consider myself someone who does a lot of needlework. I don’t embroider on a daily, weekly, or even yearly basis. In fact, the last time I embroidered anything was close to 7 years ago when I just HAD have a Venture Industries patch, before they started making Venture Industry patches.
Vaguely related side note, have y’all been watching Otaku Teacher? I feel as though I also have YD in respect to crafting. I only do what I yearn to do, and let me tell you, there are very few crafts I enjoy so much I want to do them all the time.
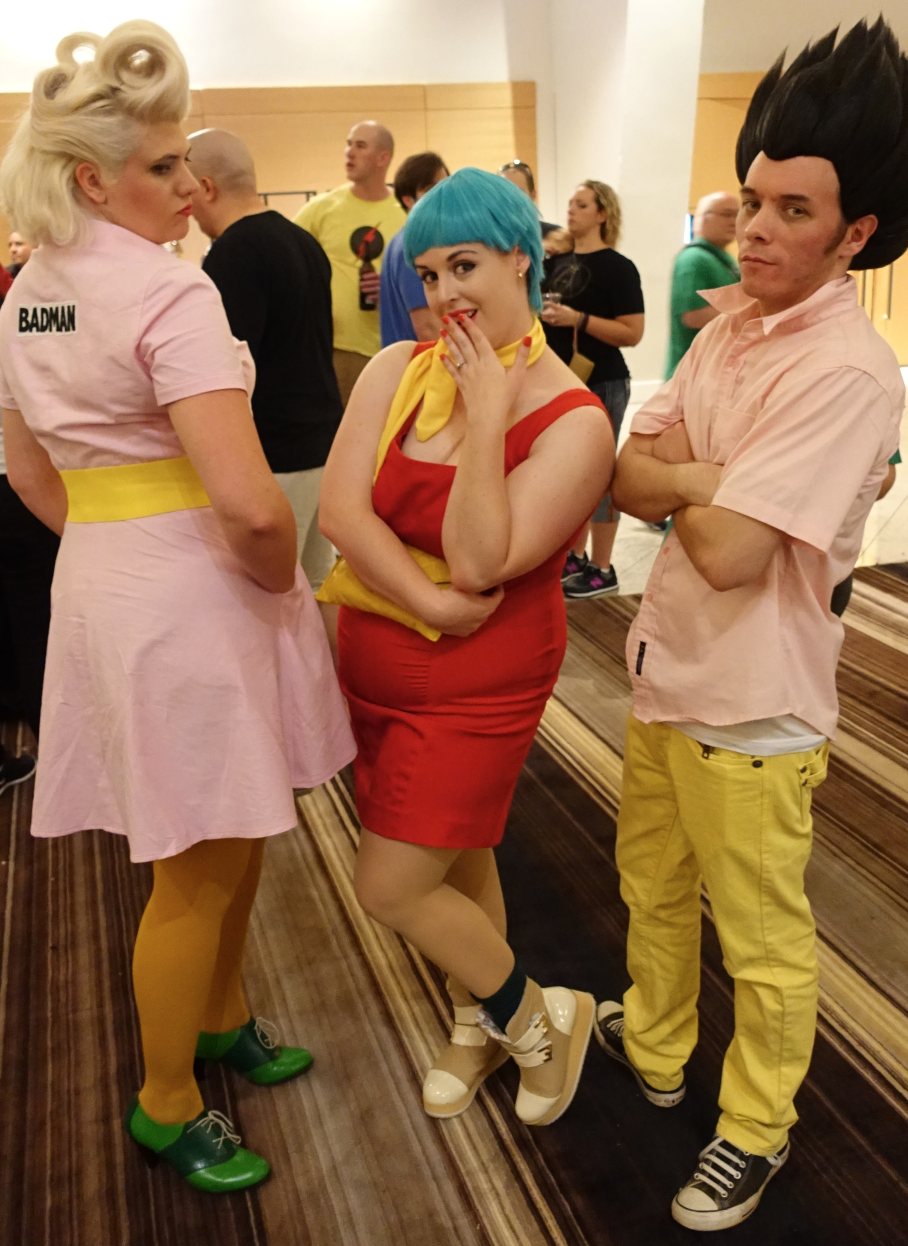
Random story: So I’m really into Dragon Ball Z right now. Anyone that follows my social media channels knows this painfully obvious, so this tutorial will feature the BADMAN patch that will find it’s way on something pink sometime in the future.
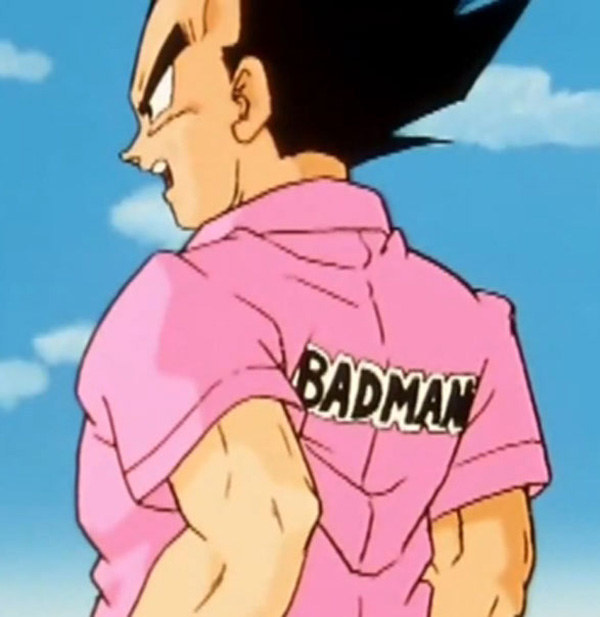
Because my anime boyfriend wears it. And Vegeta is leader of my anime boyfriend reverse harem.
Making a Patch with Hand Embroidery and a Sewing Machine
 Materials Needed:
- Fabric for embroidery/patch
- Embroidery floss and needles
- Interfacing (optional)
- Embroidery hoop
- Tear or wash away stabilizer
- Sewing Machine and thread
- Heat ‘N Bond paper
- Fray Check (optional but recommended)
1- Prep your fabric
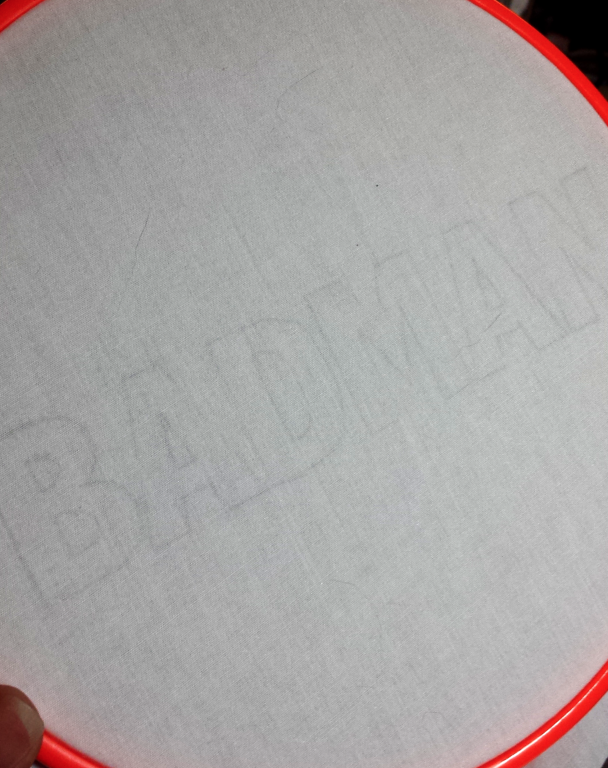
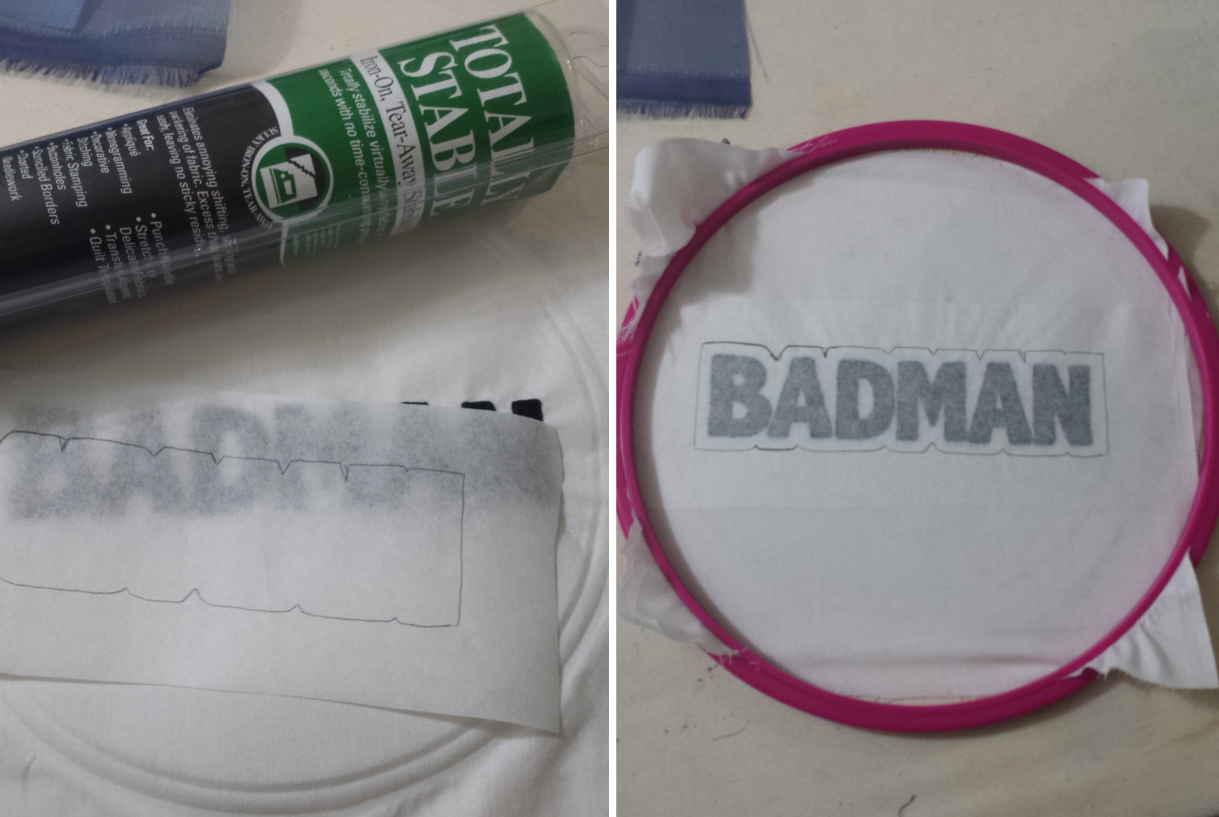
I used just a cotton broadcloth for this, but you can always use something sturdier. I transferred my pattern to some lightweight interfacing and ironed the interfacing to the back of the fabric piece I plan on embroidering. Don’t forget to reverse the image so it doesn’t end up backward!
2- Embroider it!
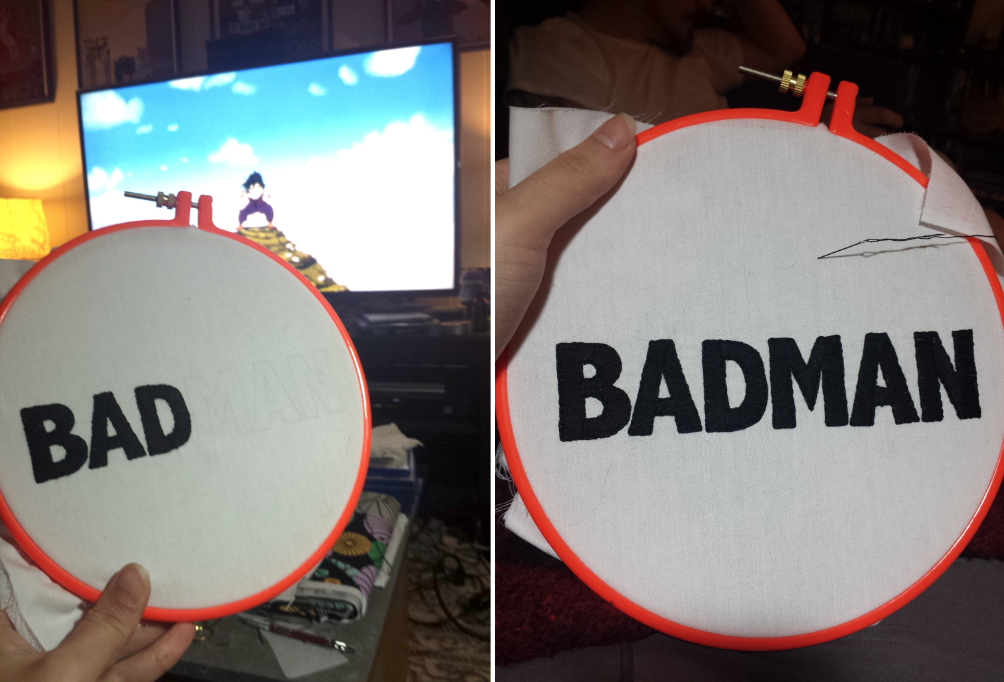
Throw that thing in a hoop, grab your embroidery floss and go to town. I did mine while watching episodes of, you guessed it, Dragon Ball Z. For those über curious it was the end of the Frieza saga and the Garlic Jr mini-saga (featuring the Spice Boys).
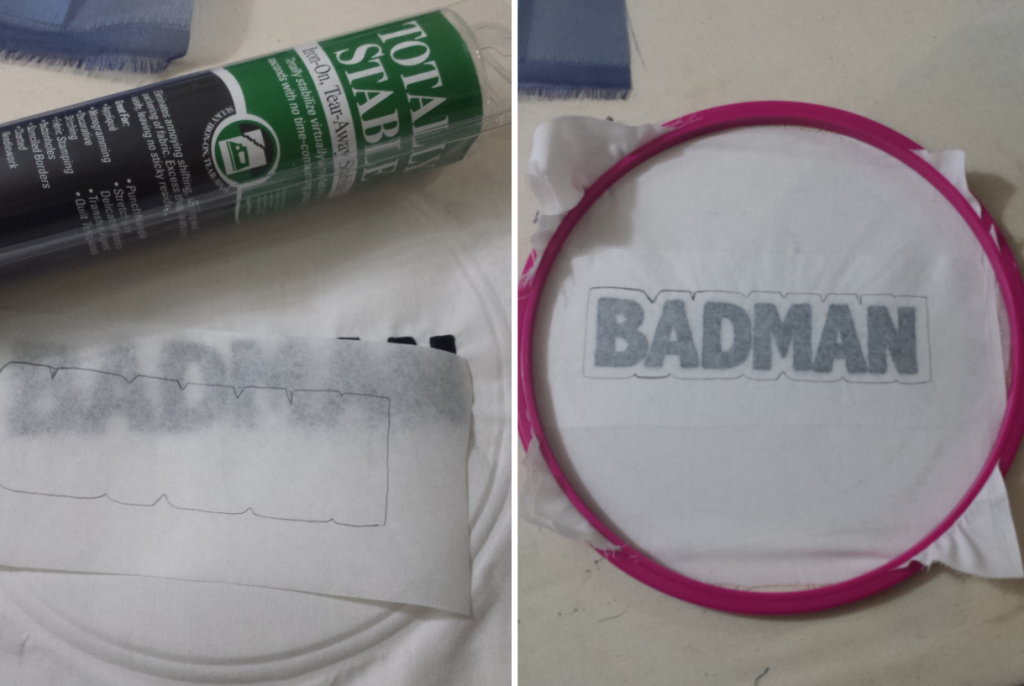
3- Stabilize
Ok, I know it feels really firm already, but when it comes to machine embroidery, the firmer the better. I used tear away stabilizer. For this piece I had a pretty complex outline, and wasn’t really confident about seeing the line through the bottom so I ironed on the stabilizer on the top of my embroidery. If it’s a simple shape that I don’t need to follow an outline (like a square) you can iron the stabilizer on the back and use a chalk outline on the front or just wing it.
I’ve done plenty of fake patches more recently utilizing iron-on transfers, and the process I use to make it look more like a patch is the same. If you want to do a fake patch using iron-on t-shirt transfers, start with this step. But iron the stabilizer on the back of the fabric first before applying your t-shirt transfer since heat can make your transfer lift if you aren’t careful.
4- Hoop it
Pop that bad boy in a hoop, but with the hoop ridge up instead of down (the opposite of how you’d hoop it for normal embroidery). Make sure your hoop is large enough to hold you piece, but small enough to fit through the arm shaft of your sewing machine. Then put it under your machine foot. You might need to take the foot off of your shaft, put in your hoop, then put the foot back on.
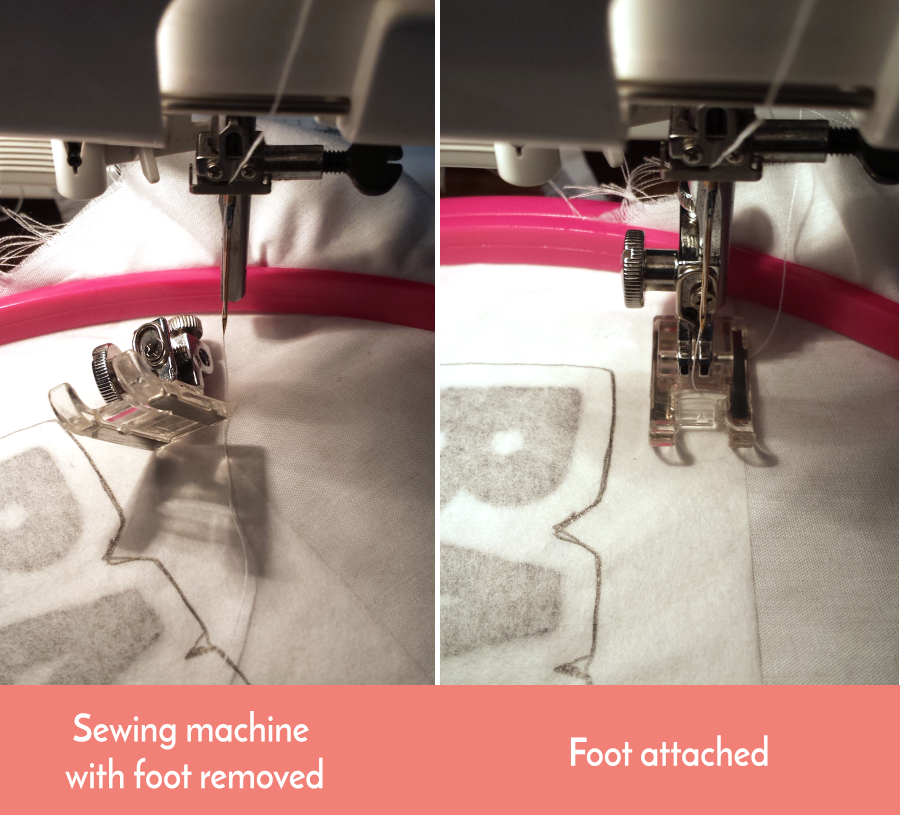
5- Bind the edge
We’ll use a zig zag stitch to do this. On an area that will be cut away test the stitch. The stitch width is up to you (I used a 2.7, but you can make it as wide or narrow as you like) and a stitch length of .5, or as close as you get the zig zag together to give it the satin look. I used normal thread, but you can use embroidery thread if you like. If you use an embroidery thread make sure to use an embroidery needle.
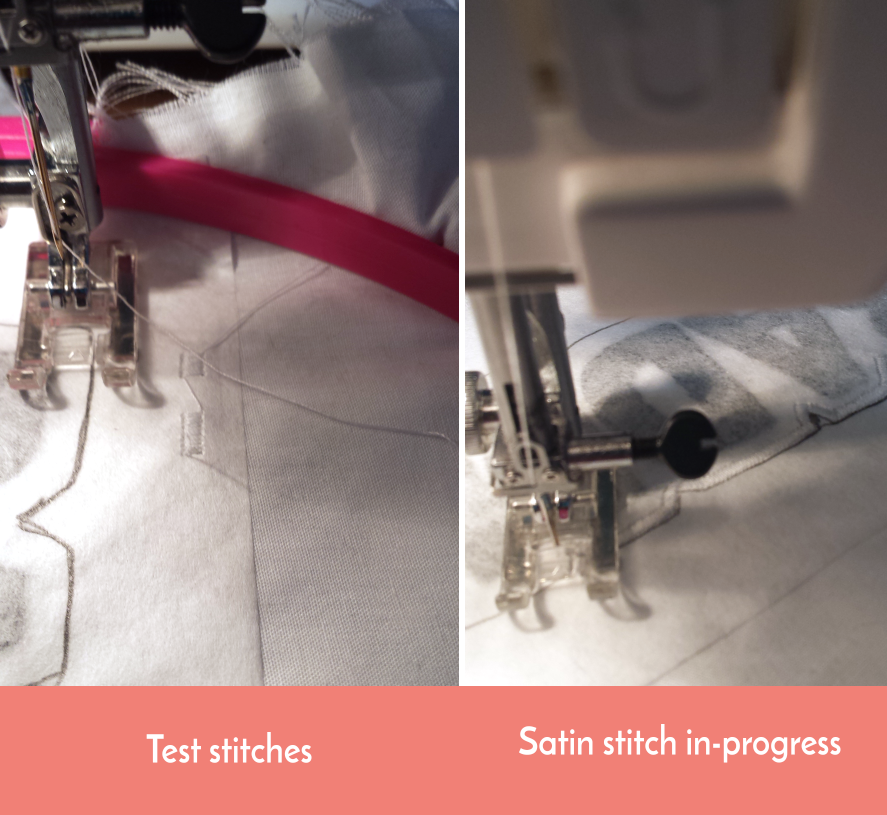
Once you like your zig-zag satin stitch, sew around your patch.
6- Making it iron on
Take it out of the machine, and carefully remove the tear away stabilizer. It should come off really simply due to the zig zag perforations. Then cut it down a bit (but not all the all the way). Now to add iron-on stuff!
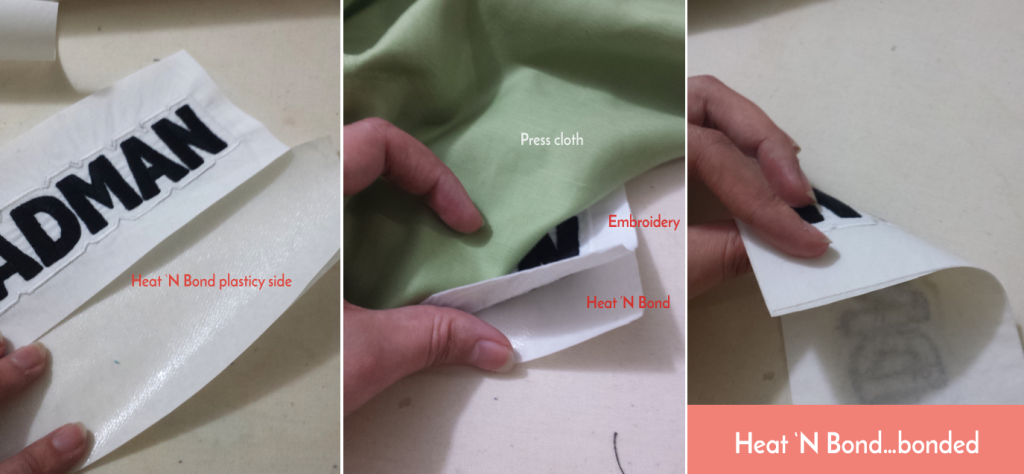
I use Heat ‘N Bond which is a double sided iron-on adhesive. It’s used a lot in appliqué. I cut it to match the size of the fabric and line up my fabric with the Heat ‘N Bond. One side of the Heat ‘N Bond is plastic-y, and the other has paper on it. You want to put the plasticy side facing towards the back of your embroidery. That plasticy side adhere’s to the back of your embroidery like half of double sided tape. Leave the paper on the back for now. Using a press cloth iron the fabric to the piece of Heat ‘N Bond. Let it cool.
7-Finishing your patch
To be safe, I put fray check around the perimeter of the zig zag to make sure it doesn’t unravel. Let it dry. Once the Fray Check has dried, cut out the shape as close as you can get to the zig-zag border without cutting through it.
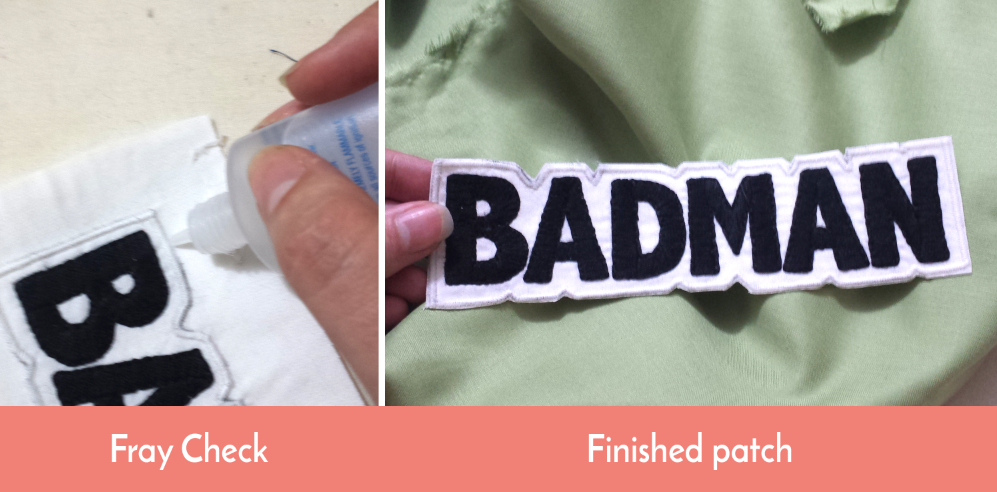
Lookit that! You just made a patch! Now you can attach it by pulling off the paper back and ironing it where you want it. I add a security stitch around it after I iron it on just to make sure it stays put.
Now let’s go make all the patches!