Sometimes you’re working on a sewing project (in this case, a Captain America jacket) and you can’t find the perfect fabric in the color you need. I went through this before with my original Captain America costume, and after doing my due diligence of searching, I resorted to dying my own fabric.
Now, dying fabric is one of those things where I always think “Piece of cake! I’ll just dye it” until I get into it and realize “Wow, this is a time suck.” And with my picky nature, always get wrapped up in that whole “But the color isn’t PERFECT! I must dye it again!” You may know the pitfalls already; uneven dying, dye freckles, bleeding color to name a few.
A note about fabrics you can dye:
Always know what’s in your fabric! Different textiles have different dyes (or dying processes). Natural based textiles dye the best (linen, cotton, silk, rayon, hemp, etc), but you can also dye most Nylons with great success. Today I’m going to show you how how to dye cotton fabric.
Not all cottons are created equal, and keep in mind, the base color will affect the final color. I opt for white for the purest tones, but not all white are the same. For the most vibrant dye colors, you need to start with an untreated cotton specially for dying. But not all fabrics are easy to find this way. I am using a cotton knit pique fabric because the texture most closely matches Captain America’s fabric from the Avengers. But I couldn’t find a dye-ready version, so I went with white and hoped for the best. Most fabrics you buy that are white are treated with whitening agents that could affect the final color, so it might not be as bright as you’d expect.
Dying fabric at home is a bit of bad science. You can’t always predict the outcomes. I tend to opt for a lighter color and re-dye darker since it’s much harder to get darker dye lighter. I’ve re-dyed fabric several times over until I get a shade I’m happy with.
Note: They make a special dye for Polyester fabrics, but I have yet to try it.
Now on to the tutorial:
I am tub dying. This can be done in a washing machine, but we have a front load HE washer, and I haven’t had the best results with it.
Gather all your materials together:
• Your fabric (pre-washed, please. This removes as many added chemicals, pre-treaters, and grease that might affect the dying process. Plus, it’ll help keep shrinkage down)
• Dye (For this blue, I am using a mix of Royal Blue and Cerulean Blue.)
• Soda Ash (this is a fixative for the dye)
• Urea (helps the dye to dissolve completely and reduce freckling on the final fabric. It also can help achieve a more saturated color.)
• Salt
• glass measuring cup
• dry-measuring cups and spoons
• Plastic spoons
• large pot for heating water
• a thermometer (optional)
• Rubber gloves (go with tall dish gloves to minimize hand stain)
• a trusty bucket*
• a plastic basin/tub
*Everyone should have a trusty bucket. I, sadly, could not find mine, so I used a clean trashcan.
First, weigh out your fabric on a household scale. Notate how heavy the fabric is so you know how much dye and water to use. My fabric was 14 oz, so I am going to round up and say it’s 1 pound of fabric.
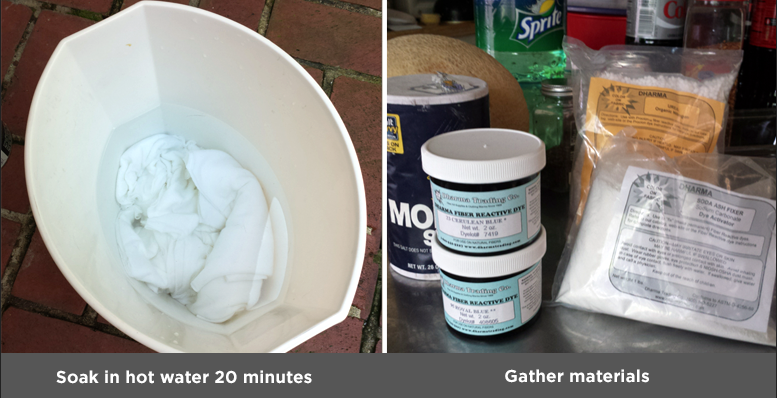
Next, a little fabric foreplay. Fill up your bucket with hot water and submerge your fabric in it. Fabric should soak in hot water for 20-30 minutes (just enough time to gather all the materials you need).This opens up the fibers to get it ready to accept for the dye. I placed this outside in the sun along with my empty dying tub.
Now, gather all your ingredients into one place. Today I’m using Fiber Reactive Procion Dyes from Dharma Trading. I have used Rit dyes with success in the past, but found it took a lot more work to get a vibrant color, and freckling is a bigger issue.
Rit dye sidetone: If using Rit dyes, I find they work better with consistent almost boiling heat.
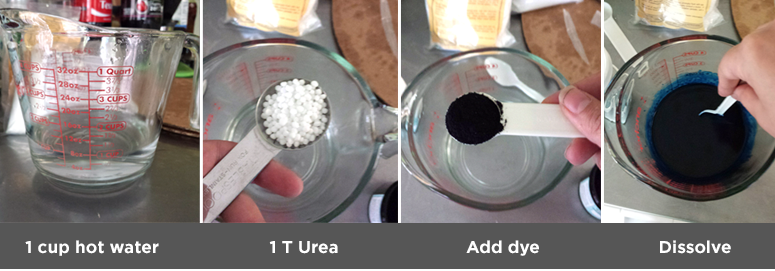
In your glass measuring cup, measure out 1 cup of hot water and mix in 1 Tablespoon of Urea (always makes me giggle). Once that’s dissolved, add in the appropriate amount of dye for your weight. There are charts with specific amounts of dye to use for different colors, but for this, it’s fine to use the approximation method which is 1 Tablespoon of dye for 1 lb pound of fabric. I used 2 tsp Royal and 1 tsp Cerulean to make up 1 tablespoon. For a darker color, you can use more dye. Stir this up until all the dye is dissolved in the measuring cup, then move it outside with your fabric and dye tub.
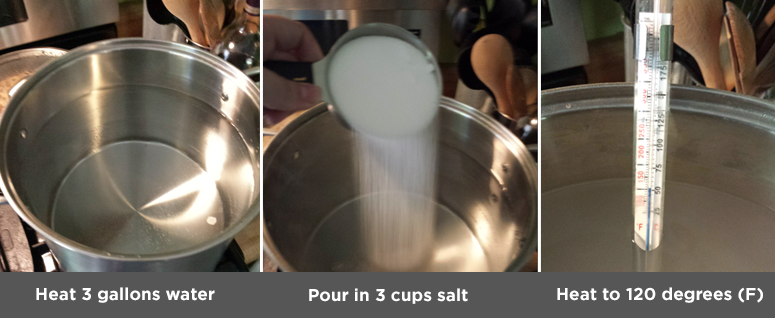
Fill up your large pot with 3 gallons of water and start warming it up. The best temperature for dying is 105 degrees F so we’ll want the water around 120 degrees to account for cool down when we move it from the heat. Next, add 3 cups (yup!) of salt to your water heating up on the stove. I use the cheapest table salt I can find at the store. You want to make sure it dissolves completely in the water.
Now, measure out 1/3 cup of Soda Ash. You can dissolve this in 1 cup of water now, but since I only have 1 glass measuring cup, I just take the soda ash out as is.
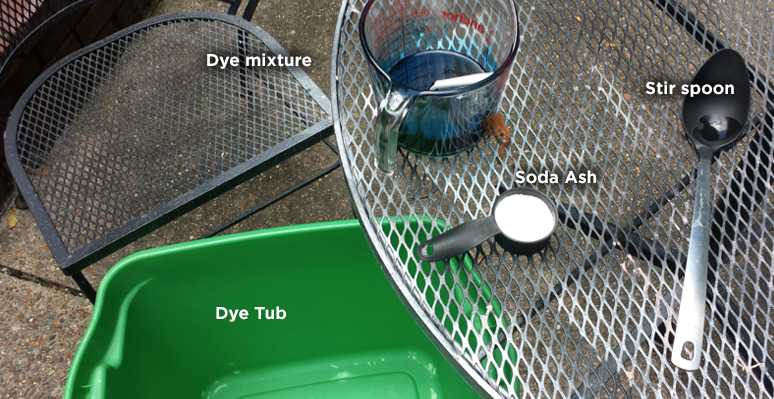
Take all your remaining supplies outside, put on those lovely gloves and dedicate the next hour to dying your fabric.
First, pour your salt water into your dying tub.
Then adding your concentrated dye. I swish the measuring cup around to get as much dye as possible into the water. Then stir until it a consistent color. You can check the temperature now and make sure it’s still above 100 degrees but below 120. It should feel about the same temperature of a hot tub.
Now that I have an empty measuring Cup, I add in my soda ash, and pour some of the water my fabric has been sitting in, and stir it around to dissolve. You’ll need this later.
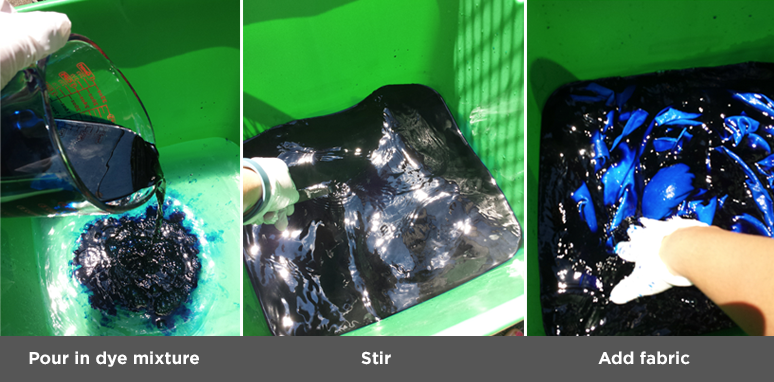
No turning back now, add in all your fabric! You can use solid yardage, but I’ve found I get a better, more consistent dye, when I cut out all the fabric ahead of time. Because I have pre-washed the fabric, I know it won’t shrink anymore. But either way, when you add the fabric, make sure all of it is separated and isn’t sticking together.
For the next 20 minutes you are a human washing machine. Stir that fabric and keep it moving. You want to agitate the fabric and try to keep dye from getting trapped and sitting in the crevasses of the fabric. Unless you want a mottled look to your fabric… then let it sit and stew. I like to use my hands, but you can use a large spoon, stick, whatever. If you want it darker, you can leave it for longer, but most of the time I find maximum color saturation happens in around 20-30 minutes. If you want a darker color, you’ll have to dye again, with either a darker color or a higher dye concentration.
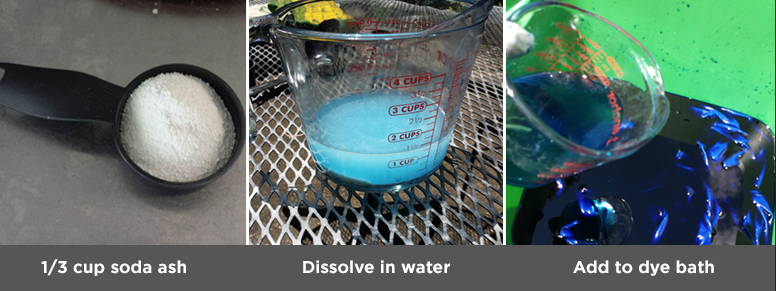
After 20 minutes, add the soda ash solution. Do not just dump this in! you want to add it slowly, bit by bit offer the next 15 minutes. Slosh all your fabric over to one side of the tub, and add a little to the dye bath being as careful as possible not to pour directly on the fabric (this will add dark splotches), then slosh around, add a little soda ash… over and over until all has been incorporated. Continuing stirring until the 15 minutes are up.
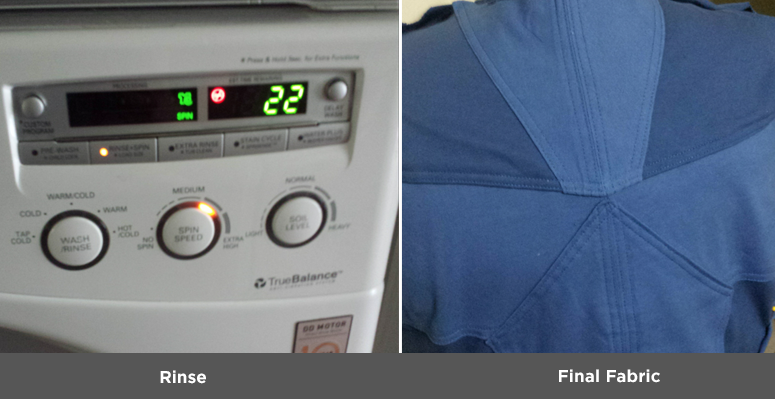
Whew! The hard part is over. Now, pull out all the fabric and place is your trusty bucket. Take it to a sink and rinse until the water is clear, or throw it in your washing machine and put it through a few rinse cycles. I then like to do a full wash cycle on delicate with soap to get out as much extra dye as possible. Once your fabric is dry, take a look at the color. You now have beautifully dyed fabric!
Now, getting rid of the dye water: Do not just pour this out on your lawn, it will kill anything growing. Ask me how I know. Find a safe place to dispose of your water. Remember there is salt and chemicals in it.
Go forth! And good luck!

